
 Pin
Pin
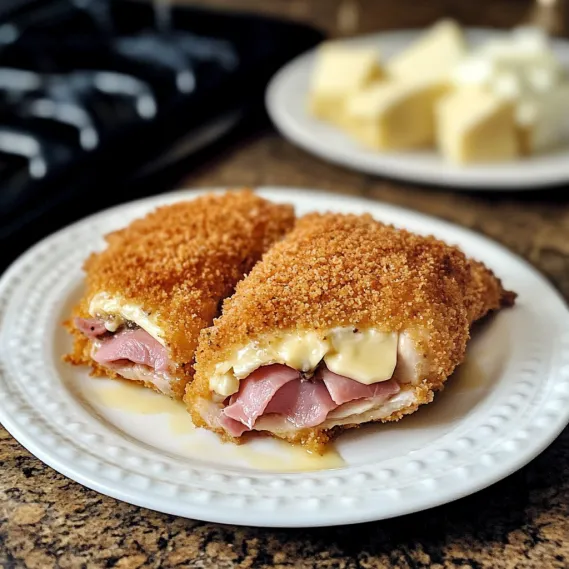
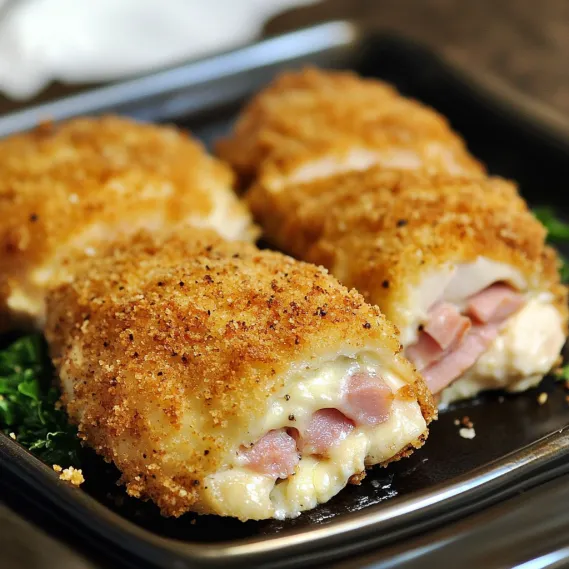
There's something undeniably elegant about perfectly executed Chicken Cordon Bleu. This clever version eliminates the frustration of traditional rolling methods by creating a simple pocket in the chicken breast that securely holds the ham and cheese filling. No more battling with flattened chicken that tears, or cheese that erupts volcano-style during baking. This approach delivers all the classic flavors you love - tender juicy chicken, savory ham, and melty Swiss cheese - all encased in a crispy, buttery crust that makes every bite absolutely delicious.
I had nearly given up on homemade chicken cordon bleu after too many disastrous attempts that left me with torn chicken and cheese puddles on my baking sheet. This method changed everything for me. When I served it at a dinner party last month, my friend who owns a catering business asked for the recipe, commenting on how professional it looked - that's when I knew this technique was truly foolproof.
Essential Ingredients and Selection Tips
- Chicken Breasts: Look for thick, large (at least 8-ounce) boneless skinless chicken breasts. The size is crucial for creating a pocket that can hold the filling without breaking through
- Ham: Opt for thin-sliced deli ham that's easy to roll. If your ham slices are small, overlap two slices to create a larger surface for rolling the cheese
- Swiss Cheese: Shredded Swiss works better than sliced for this method, as it rolls more easily inside the ham and melts more uniformly
- Ritz Crackers: These butter crackers add incredible flavor to the coating. While regular breadcrumbs work, the Ritz crackers create that special buttery crunch that elevates this dish
The quality of your ingredients makes a difference, but the technique is truly the star here. After years of struggling with traditional methods, this pocket approach has made this classic dish approachable for everyday cooking.

Detailed Cooking Instructions
- Step 1: Prepare the Crumb Coating
- Process 25 Ritz crackers and 4 slices of hearty sandwich bread in a food processor until coarsely ground, then drizzle in 6 tablespoons melted butter while pulsing. Spread the mixture on a baking sheet and toast in a 450°F oven for 3-5 minutes until lightly golden, stirring occasionally to ensure even browning. Transfer to a shallow dish and reduce oven temperature to 400°F.
- Step 2: Create the Ham and Cheese Rolls
- Lay out 8 thin ham slices and place about 1/4 cup shredded Swiss cheese on each slice. Roll the ham tightly around the cheese to create compact cylinders that will fit inside the chicken. If your ham slices are small, overlap two slices to create a larger rolling surface, ensuring the cheese stays completely enclosed in the ham.
- Step 3: Form the Chicken Pockets
- Pat chicken breasts dry with paper towels, then use a sharp knife to cut a deep 3-4 inch pocket in the thickest part of each breast. Be careful not to cut all the way through or too close to the edges. Gently insert two ham-cheese rolls into each pocket, then fold the top flap over and press to seal. Secure with a toothpick if needed, then season both sides with salt and pepper.
- Step 4: Bread the Chicken
- Set up a three-step breading station: flour in one dish, beaten eggs mixed with Dijon mustard in another, and the toasted crumb mixture in a third. Dredge each stuffed chicken breast in flour, then dip in the egg mixture, and finally coat thoroughly in the crumb mixture, pressing gently to adhere. Place the breaded chicken on a lightly greased baking sheet.
- Step 5: Bake to Perfection
- Bake the chicken in the 400°F oven until golden brown and cooked through to 160°F internal temperature, about 25-30 minutes. Let the chicken rest for 5 minutes before serving to allow the juices to redistribute and the cheese to set slightly. Remove any toothpicks before serving for a beautiful presentation.
The first time I tried this method, I was amazed at how simple it was compared to the traditional approach. No more flattening chicken until it tears, no more wrestling with toothpicks, and best of all, no more cheese explosions in the oven. The pocket technique keeps everything neatly contained while delivering all the flavors that make chicken cordon bleu a classic.
Serving Inspiration
This chicken cordon bleu pairs beautifully with sides that complement its rich flavors. For an elegant dinner, serve it alongside roasted asparagus spears and creamy mashed potatoes. The crisp-tender asparagus provides a nice textural contrast, while the potatoes are perfect for soaking up any delicious juices. For a lighter option, a bright spinach salad with sweet-spicy nuts and apples offers a refreshing counterpoint to the richness of the chicken.
Make-Ahead Options
One of the advantages of this recipe is its make-ahead potential. The chicken can be stuffed and refrigerated for several hours before coating, making it perfect for entertaining. You can even bread the chicken up to 24 hours in advance and keep it covered in the refrigerator until ready to bake. This flexibility allows you to prep when convenient and simply pop the chicken in the oven before dinner time.
Troubleshooting Tips
If you're concerned about the chicken cooking evenly, especially with thicker chicken breasts, you can loosely tent the pan with foil halfway through cooking if the crumb coating is browning too quickly. For even cooking, make sure all chicken breasts are similar in size. If they vary significantly, adjust cooking time for individual pieces, removing smaller ones earlier while allowing larger pieces to continue cooking.
This Chicken Cordon Bleu has become my go-to recipe for both family dinners and entertaining. The pocket method transforms what was once a frustrating cooking experience into something I actually enjoy making. The combination of crispy exterior, tender chicken, and the perfect ham and cheese filling creates a dish that looks impressive but requires far less effort than the traditional method. It's proof that sometimes the clever simplification of a classic can make it even better.
Recipe FAQs
- → Can I prepare Chicken Cordon Bleu ahead of time?
- Yes! This recipe is perfect for make-ahead meal planning. You can prepare the chicken up through the breading step, then cover and refrigerate for up to 24 hours before baking. This actually helps the breading adhere better and reduces the chance of cheese leaking during baking. Just add about 5 minutes to the baking time if cooking straight from the refrigerator. You can also freeze the breaded, uncooked chicken for up to 1 month - thaw overnight in the refrigerator before baking.
- → What can I serve with Chicken Cordon Bleu?
- Chicken Cordon Bleu pairs beautifully with many sides. For a traditional meal, serve with buttered egg noodles or rice pilaf and steamed vegetables like asparagus, green beans, or broccoli. A simple green salad with a light vinaigrette also works well. For a heartier option, try serving with roasted potatoes or mashed potatoes. A sauce like Dijon cream sauce or light gravy can be spooned over the chicken for extra flavor and elegance.
- → Can I use different cheeses or meats in this recipe?
- Absolutely! While traditional Chicken Cordon Bleu uses Swiss cheese and ham, you can customize with different combinations. Try provolone, mozzarella, or Gruyère instead of Swiss cheese. For the meat, prosciutto offers a more delicate flavor than ham, or try using smoked turkey for a lighter option. For an Italian twist, use mozzarella cheese with prosciutto and add a basil leaf inside each roll. Just maintain similar quantities to ensure proper cooking.
- → Why is my cheese leaking out during baking?
- Cheese leakage is common with stuffed chicken recipes. To minimize this: 1) Make sure to use large chicken breasts and create a deep pocket rather than cutting all the way through, 2) Chill the stuffed chicken for at least 20 minutes before breading to help it stay closed, 3) Secure the opening with toothpicks if needed, 4) Don't overstuff with cheese, and 5) Ensure your oven isn't too hot, as excessive heat can cause the cheese to melt too quickly and leak out before the chicken cooks through.
- → Can I make this recipe gluten-free?
- Yes, you can adapt this recipe for a gluten-free diet. Replace the Ritz crackers and bread with gluten-free crackers and gluten-free bread. Use gluten-free all-purpose flour for the dredging step. The texture might be slightly different, but the flavor will still be delicious. Make sure to check that your Dijon mustard is gluten-free as well, as some brands may contain trace amounts of gluten.
- → How do I know when the chicken is fully cooked?
- The most reliable way to check doneness is using an instant-read meat thermometer inserted into the thickest part of the chicken (not the filling). The chicken is done when it reaches 165°F, though you can remove it from the oven at 160°F as the temperature will continue to rise during the 5-minute rest period. Without a thermometer, cut into the thickest part - the meat should be opaque white throughout with no pink, and the juices should run clear.