
 Pin
Pin
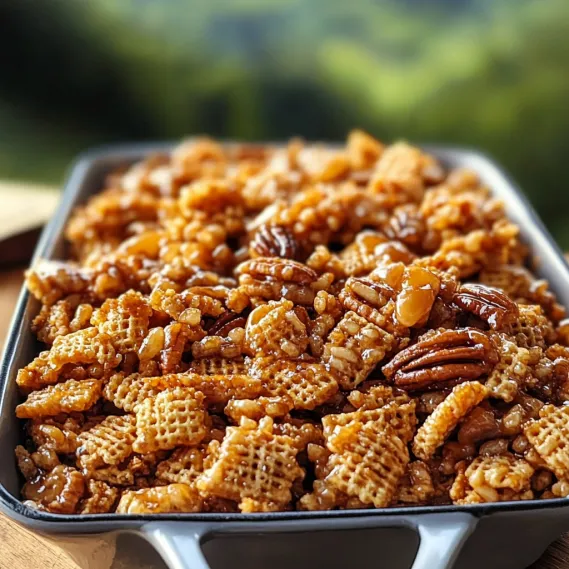
This irresistible Praline Crunch transforms simple cereal and pecans into a decadent, caramel-coated treat that captures the essence of classic Southern pralines in a crunchy, snackable form. The magic happens when crispy cereal squares and toasty pecans are enveloped in a buttery, brown sugar caramel that bakes to golden perfection, creating an addictively crunchy texture with rich, warm flavor notes. Whether enjoyed by the handful as a sweet snack, packaged as a thoughtful homemade gift, or set out for guests at gatherings, this easy-to-make treat strikes the perfect balance between casual and special – familiar enough for everyday enjoyment but impressive enough for celebrations.
I first made this Praline Crunch for a holiday gathering when I wanted something sweet that wouldn't require last-minute preparation. What surprised me most was how quickly it disappeared – guests who claimed they were "just having a taste" kept returning to the bowl until nothing remained! The most frequent question I heard all night was, "Can I please have this recipe?" Now it's become my signature contribution to potlucks and parties, and I always make a double batch because I know it won't last long. There's something about the perfect balance of sweet, buttery, and nutty flavors that makes it nearly impossible to stop at just one handful.
Essential Ingredients and Selection Tips
- Crispy Rice or Corn Cereal: Choose a sturdy cereal like Chex (rice or corn) that holds its shape and provides the perfect base for the caramel coating.
- Pecans: The star ingredient that gives this mix its praline identity. Use fresh pecan halves or large pieces for the best flavor and satisfying crunch.
- Unsalted Butter: Creates the rich base for the caramel coating. Using unsalted allows you to control the overall saltiness.
- Brown Sugar: Provides deep caramel flavor. Dark brown sugar offers more molasses notes, while light brown creates a milder sweetness.
- Light Corn Syrup: Essential for creating a smooth caramel coating that adheres perfectly to the cereal and pecans.
I've discovered that toasting the pecans before adding them to the mixture dramatically enhances their flavor. Just 5-7 minutes in a 350°F oven brings out their natural oils and creates a deeper, more complex nuttiness that elevates the entire snack mix.
Detailed Cooking Instructions
- Step 1: Prepare Your Foundation
- Preheat your oven to a low 250°F and line a large baking sheet with parchment paper or a silicone mat for easy cleanup. In a large mixing bowl, combine 6 cups of crispy cereal with 2 cups of pecan halves, tossing gently to distribute evenly. The large bowl gives you plenty of room to coat everything thoroughly without making a mess.
- Step 2: Create The Perfect Caramel
- In a medium saucepan over medium heat, melt 1 cup of unsalted butter, then stir in 1 cup of brown sugar and 1/3 cup of light corn syrup. Bring the mixture to a gentle boil while stirring constantly to prevent burning. Let it simmer for 3-4 minutes until it thickens slightly and the sugar completely dissolves, creating a smooth, glossy caramel.
- Step 3: Transform With Chemistry
- Remove the caramel from heat and immediately stir in 1 teaspoon of vanilla extract and 1/2 teaspoon of baking soda. Watch as the mixture bubbles and expands – this chemical reaction creates a lighter texture that will coat each piece perfectly. The caramel will transform from a dense, heavy mixture to a lighter, more aerated sauce that's easier to work with.
- Step 4: Coat For Complete Coverage
- Pour the hot caramel over the cereal and pecans in the large bowl. Using a rubber spatula or wooden spoon, gently fold and stir until every piece is evenly coated with the golden mixture. Work quickly but carefully to ensure thorough coverage before the caramel begins to set. Make sure to get to the bottom of the bowl where dry ingredients often hide.
- Step 5: Bake For Perfect Crunch
- Spread the coated mixture in an even layer on your prepared baking sheet. Bake in the preheated oven for 1 hour, stopping to stir every 15 minutes to ensure even coating and crispness. This low, slow baking process is crucial – it allows the caramel to crisp up perfectly without burning while maintaining the light, crunchy texture of the cereal and pecans.
The first time I made this, I didn't stir it enough during baking and ended up with some pieces that were overly toasted while others remained slightly chewy. Now I set a timer for each 15-minute interval to remind myself to stir, which results in perfectly even crispness throughout the entire batch.
The Science Behind Perfect Caramel
What makes this Praline Crunch so special is the science of caramelization that happens during preparation. The transformation of sugar molecules creates those complex, nutty flavors we associate with caramel, while the addition of baking soda creates tiny air bubbles that lighten the texture. I've found that the temperature control is crucial here - if your heat is too high, the sugars can burn rather than caramelize, creating bitter notes. Too low, and you won't achieve that perfect amber color and flavor depth. When making this for my sister's baby shower, I accidentally rushed the caramel process and ended up with a slightly bitter coating. Since then, I've learned patience is key - keeping the mixture at a gentle simmer while stirring constantly yields that perfect butterscotch-like flavor that makes this snack so addictive.
Creative Gifting Presentations
One of the aspects I love most about Praline Crunch is how beautifully it presents as a homemade gift. During the holidays, I package it in clear cellophane bags tied with festive ribbon, often attaching a handwritten recipe card for recipients who inevitably ask for it. For teacher appreciation gifts, I fill mason jars with the crunchy mix, add a decorative fabric top, and attach a heartfelt note. My most creative presentation was for a Southern-themed dinner party, where I served individual portions in miniature paper berry baskets lined with checkered fabric. I've even created custom labels for "Katie's Famous Praline Crunch" when giving it as hostess gifts. The versatility of this treat makes it appropriate for almost any occasion, from casual gatherings to more formal gifting.
Delicious Variations To Try
While the classic version holds a special place in my heart, I've experimented with several variations that have become favorites in their own right. For chocolate lovers, try drizzling the cooled mixture with melted white or dark chocolate for an extra layer of indulgence. My husband's favorite variation includes a teaspoon of cinnamon in the caramel mixture and a pinch of cayenne for a sweet-heat combination that's absolutely addictive. During the holidays, I sometimes add dried cranberries after baking for festive color and a tangy contrast to the sweetness. For a tropical twist, substitute macadamia nuts for half the pecans and add toasted coconut flakes during the last 15 minutes of baking. These adaptations maintain the essence of the original while offering new flavor experiences that keep this treat exciting year-round.
Make-Ahead And Storage Wisdom
One of the greatest advantages of Praline Crunch is its remarkable shelf life, making it perfect for advance preparation. I've discovered it actually tastes better on the second or third day, as the flavors have time to develop and meld. For optimal freshness, store in an airtight container at room temperature for up to two weeks - though in my experience, it rarely lasts that long! For longer storage, it freezes beautifully for up to three months in freezer-safe containers. Just allow it to come to room temperature before serving to restore its perfect crunch. When preparing for large events, I often make multiple batches weeks in advance and freeze them, which significantly reduces my preparation stress as the event approaches. Just be sure the mixture is completely cool before storing to prevent condensation that could compromise its crispness.
This Praline Crunch has transcended being just another recipe in my collection – it's become part of my identity as a home cook and hostess. Friends and family have come to expect it at gatherings, often requesting it specifically. There's something deeply satisfying about creating something so beloved from such simple ingredients. The way the buttery, caramel-coated pieces glisten, the intoxicating aroma that fills the house while baking, and the perfect balance of sweet, nutty flavors create a truly special treat that brings joy with every crunchy bite.
Recipe FAQs
- → Can I use different types of cereal for this recipe?
- Yes! While rice or corn Chex work perfectly, you can experiment with other crispy cereals like Crispix, Corn Flakes, or even a mixture of cereals. Just make sure to keep the total amount to 6 cups. Avoid cereals with high sugar content as they may burn during the long baking time.
- → Why do I need to add baking soda to the caramel mixture?
- The baking soda reacts with the acidic ingredients in the caramel (primarily the brown sugar), creating tiny carbon dioxide bubbles. This makes the caramel lighter and easier to coat the cereal and nuts. It also creates a more delicate texture in the finished praline crunch rather than rock-hard caramel that might be difficult to eat.
- → Can I make this recipe without nuts for someone with allergies?
- Absolutely! You can substitute the pecans with seeds like pepitas or sunflower seeds for those who can consume seeds. Alternatively, increase the cereal amount to 8 cups and add 1-2 cups of pretzels for a nut-free version that still provides great texture and flavor contrast.
- → Why is my praline crunch sticky even after baking?
- If your praline crunch remains sticky after cooling completely, it may not have baked long enough or at a high enough temperature. Make sure your oven is calibrated correctly and that you're stirring the mixture every 15 minutes during baking. Also, humidity can affect the final texture - in very humid environments, you might need to bake it for an extra 10-15 minutes.
- → How should I package this if I'm giving it as a gift?
- Praline Crunch makes wonderful gifts! For best presentation and freshness, package it in airtight containers like mason jars with tight-fitting lids, decorative tins, or cellophane bags tied with ribbon. Add a pretty label with the name and storage instructions. Make sure the crunch is completely cooled before packaging to prevent condensation inside the container.
- → Can I double this recipe?
- Yes, this recipe doubles well, but you'll need to use two baking sheets to ensure the mixture isn't overcrowded. Overcrowding prevents proper crisping. Also, you might need to increase the baking time slightly, still stirring every 15 minutes. For best results, rotate the baking sheets between oven racks halfway through the baking time.