
 Pin
Pin
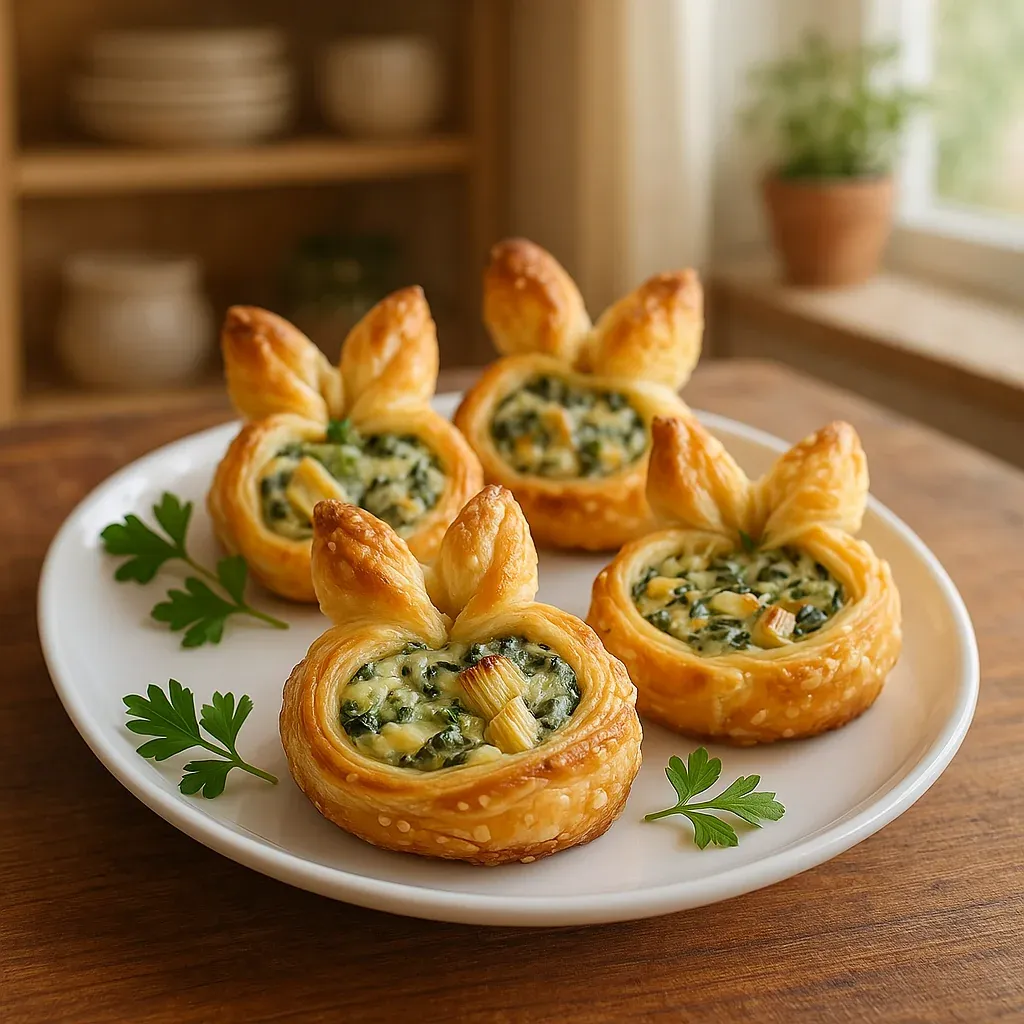
This hearty Easter Bunny Crescent Bites transform simple crescent roll dough into an adorable and delicious holiday appetizer that will delight guests of all ages. What makes these treats special is the clever design - crescent dough formed into mini cups filled with creamy spinach-artichoke dip and decorated with bunny ears cut from the same dough. The contrast between the buttery, flaky pastry and the rich, savory filling creates a perfect bite-sized appetizer.
Last Easter, I set these out just as guests were arriving for our family brunch. My usually shy niece became the center of attention as she proudly explained to everyone how she had helped shape the bunny ears. My brother-in-law, who typically heads straight for the meat and cheese platter, couldn't resist these little bites and asked for the recipe before the day was over.
Essential Ingredients and Selection Tips
Crescent Roll Dough: Brand matters here. I've tried store brands but Pillsbury consistently provides the best texture and flavor. Look for the original variety rather than butter flavored for this recipe as it's more neutral and works with any filling
Filling Options: While spinach artichoke dip creates a lovely spring green center that complements the Easter theme don't be afraid to experiment. Cold fillings like herb cream cheese or chicken salad maintain their shape better and make inserting the ears easier
Non-Stick Spray: Be generous when greasing your mini muffin tin. The secret to perfectly shaped cups is easy release after baking
I've found through experimentation that the temperature of your dough impacts how easily you can work with it. Dough that's slightly chilled about 10 minutes in the refrigerator after opening cuts more cleanly for those perfect bunny ears than dough at room temperature, which can get too soft and stretchy.
Detailed Cooking Instructions
- Prepare the Dough Canvas:
- Begin by preheating your oven to 350°F and generously coating a mini muffin tin with non-stick spray. Open your can of crescent roll dough carefully along the seam, and instead of separating into triangles, lay it flat on a lightly floured surface. Gently pinch together all perforated seams to create one smooth, unified rectangle. Use the palm of your hand to lightly press the seams together rather than pinching hard with your fingers, which can create thin spots.
- Create Perfect Circles:
- Using a 2.5-inch round cookie cutter or similar-sized glass, firmly press down to cut clean circles from the dough. You should get 4 complete circles from one can. When cutting, use a straight down-and-up motion rather than twisting, which can distort the shape. If your circles stretch while transferring to the muffin tin, gently reshape them with your fingers. Save all the scraps you'll need these for the bunny ears.
- Form Miniature Pastry Cups:
- Place each dough circle over a cavity in your mini muffin tin. Using your fingers, gently press the center down first, then work your way to the sides, ensuring the dough lines the cup completely. Avoid stretching the dough too thin, which can lead to holes or tearing. For even baking, prick the bottom of each cup several times with a fork. This prevents the centers from puffing up too much and maintains space for your filling.
- Craft Adorable Bunny Ears:
- Gather the remaining dough scraps and gently press them together don't knead or overwork the dough, as this will make it tough. Roll the collected scraps to about 1/8-inch thickness. Using a sharp knife or small cookie cutter, cut out bunny ear shapes, approximately 1.5 inches tall. For the most natural look, make each ear slightly curved and tapered at the top.
- Bake to Golden Perfection:
- Place the muffin tin with dough cups on the middle rack of your preheated oven. On a separate baking sheet lined with parchment paper, arrange your bunny ears, leaving space between each. The cups need about 8-10 minutes to bake, while the ears require only 3-5 minutes. Watch them carefully the thin ears can go from golden to burnt very quickly.
- Create Filling Wells:
- Once the cups are golden brown, remove them from the oven. While still hot, use the rounded end of a wooden spoon to gently press down the centers, creating a deeper well for your filling. This step is crucial if the centers have puffed up during baking, this reshapes them without damaging the cup structure.
- Fill and Assemble with Care:
- Allow the cups and ears to cool completely before filling. If using a cold filling like spinach-artichoke dip, spoon it generously into each cup, creating a slight mound on top. For hot fillings, you can either fill the cups before baking or fill after baking while still warm. To create the finished bunnies, gently insert one pair of ears into each filled cup, positioning them at the back edge.
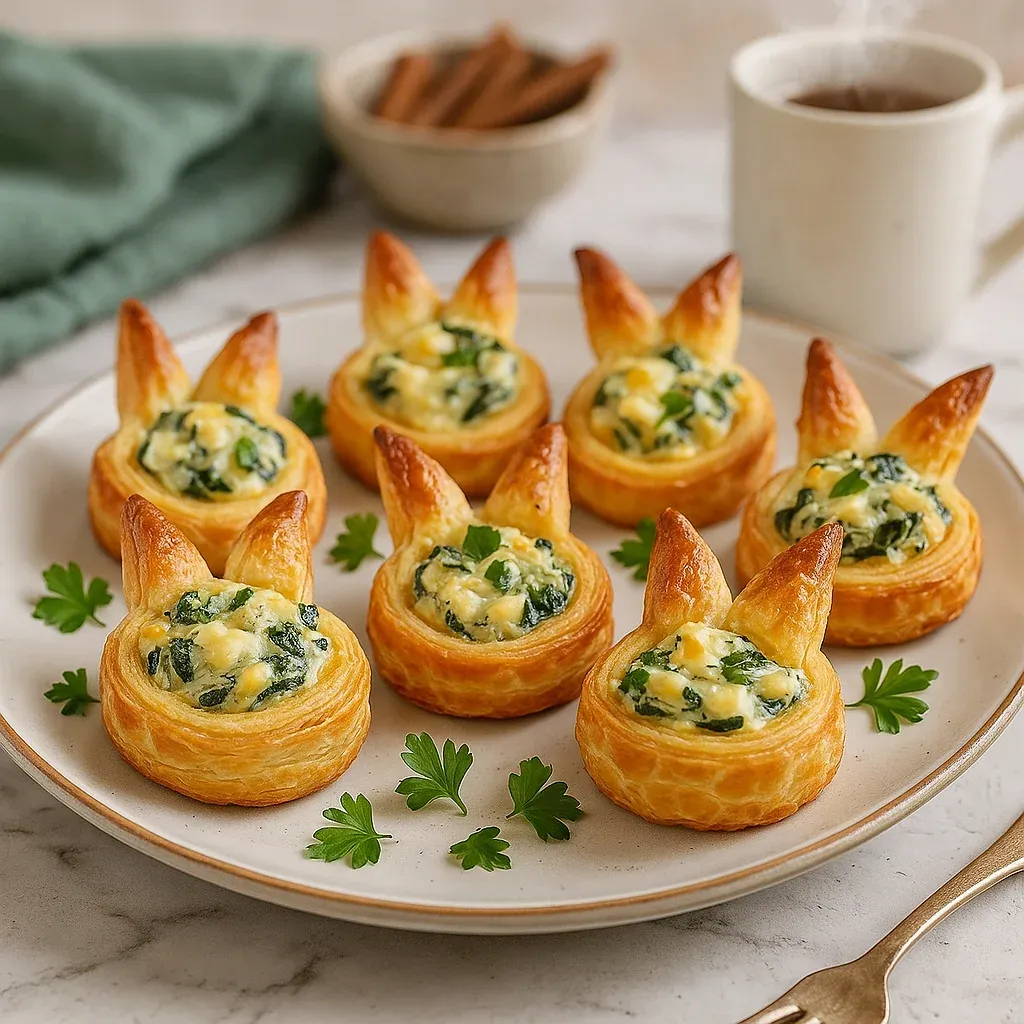
I learned the importance of proper ear placement after my first batch, when I put the ears too close to the center and they toppled over. Now I place them near the back edge of the cup, angled slightly outward, which creates a more stable and realistic bunny appearance.
Make-Ahead Strategies
For stress-free entertaining, prepare components in advance. The baked cups and ears can be made a day ahead and stored in an airtight container at room temperature. If you need to make them even further in advance, freeze the baked components for up to a month and thaw at room temperature before filling. Cold fillings can be prepared up to two days ahead and refrigerated. For the freshest presentation, fill the cups no more than an hour before serving and insert the ears just before bringing them to the table.
Filling Variations for Every Taste
While spinach-artichoke dip creates a perfect springtime look, these versatile cups welcome endless filling possibilities. For a brunch spread, try scrambled eggs with herbs and small bits of ham or smoked salmon. For a sweeter option, fill with stabilized whipped cream cheese sweetened with honey and topped with fresh berries. One of my most successful variations used a buffalo chicken dip that delighted spice lovers while maintaining the cute presentation.

Presentation Ideas
For maximum impact, serve these bites on a bed of fresh Easter grass or arrange on a platter surrounded by fresh herbs like parsley or microgreens. Small edible flowers placed around the display enhance the spring garden theme. For a children's Easter party, create a 'bunny garden' by arranging the bites in a pattern on a large platter, with carrot sticks 'planted' among them to continue the rabbit theme. The visual appeal of these treats is half their charm, so taking a few extra minutes with presentation pays dividends in guest delight.
Kid-Friendly Cooking Project
These Easter Bunny Crescent Bites make an ideal cooking project to share with children. Kids as young as three can help press the dough into muffin tins, while slightly older children can cut out the circles and craft the bunny ears. Teenagers can take on the entire process, including creating custom fillings. The immediate gratification of seeing their creations transform in the oven maintains children's interest throughout the process, and their pride in serving something they helped create is priceless.
The beauty of these Easter Bunny Crescent Bites lies in their ability to bring joy through both their appearance and taste. They transform a simple appetizer into an experience that celebrates the playfulness of the Easter season. Whether they're welcoming guests at the beginning of your holiday meal or starring on a spring party buffet, these little bunnies create those magical moments where food becomes more than sustenance – it becomes part of the celebration itself.
Recipe FAQs
- → How do I keep the bunny ears upright?
Place the ears at the back edge of the cup at a slight angle. For firmer support, you can create small slits in the filling to secure the ears.
- → Can I make these crescent bites ahead of time?
Yes, you can bake the cups and ears a day in advance and store them in an airtight container. Fill them right before serving for the best texture and presentation.
- → What filling options work best?
While spinach-artichoke dip is a classic option, you can also use cream cheese, scrambled eggs with herbs, or even sweet fillings like honeyed whipped cream and berries.
- → How do I prevent the dough from tearing?
Keep the dough slightly chilled for easier handling. Patch any tears with small dough pieces, as the filling will hide imperfections during assembly.
- → Can I use store-brand crescent roll dough?
While store-brand dough works, Pillsbury original crescent rolls offer the best texture and flavor for this recipe.
- → How do I decorate these for a festive presentation?
Serve on a bed of edible Easter grass or fresh herbs, and add edible flowers or carrot sticks for a spring garden theme.