
 Pin
Pin
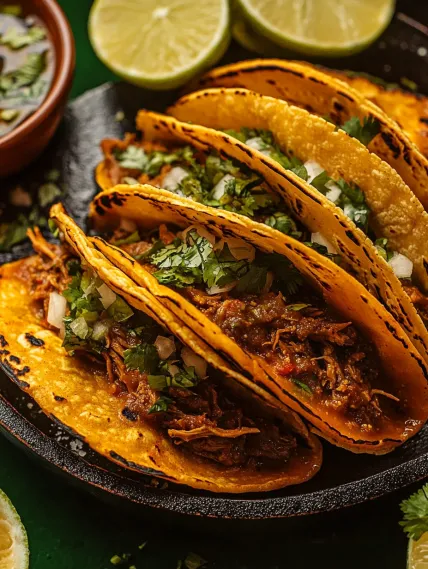
These mouthwatering Birria Tacos deliver an explosion of flavor with tender, slow-cooked beef, rich adobo sauce, and melty Oaxaca cheese, all crisped to perfection in a corn tortilla. The combination of deeply savory meat, spicy consomé for dipping, and that irresistible crispy exterior creates the ultimate taco experience that's worth every minute of preparation.
The first time I served these at a gathering, people literally gathered around the kitchen watching me assemble them, unable to resist grabbing one straight from the skillet. The dipping experience with the flavorful consomé elevates these tacos to a whole new level.
Essential Ingredients and Selection Tips
- Dried Chiles - Guajillo and ancho chiles provide authentic flavor; find them in Hispanic markets or online
- Chuck Roast - This cut becomes beautifully tender when slow-cooked; look for good marbling
- Oaxaca Cheese - Has the perfect melt; substitute with mozzarella if unavailable
- Corn Tortillas - Traditional choice that crisps beautifully; look for fresh, quality brands
- Herbs and Spices - Cinnamon, cumin, oregano, and bay leaves create the distinctive birria flavor profile
The magic happens when the tortillas are dipped in the rich, red consomé before being crisped in a hot pan, creating that signature orange-hued exterior while infusing them with flavor.
Detailed Cooking Instructions
- Step 1: Prepare the Dried Chiles
- Remove stems and seeds from guajillo and ancho chiles. Toast them briefly in a dry skillet until fragrant, about 30 seconds per side. This awakens their flavors and adds complexity to the sauce.
- Step 2: Create the Birria Sauce
- Soak the toasted chiles in hot water for 15-20 minutes until soft. Blend them with chipotle peppers, onion, garlic, crushed tomatoes, and spices until smooth. This creates the foundation of your birria flavor.
- Step 3: Sear the Beef
- Season beef chunks with salt and pepper, then sear in a hot Dutch oven until golden brown on all sides. This critical step develops a flavorful crust and seals in juices.
- Step 4: Slow Cook to Perfection
- Pour the chile sauce over the seared beef, add beef stock and water, then braise in a 350°F oven for about 2½ hours. The meat should be fork-tender and easily shredded.
- Step 5: Prepare the Consomé
- Strain the cooking liquid to create a smooth consomé for dipping. Reserve some of this flavorful liquid to keep the shredded meat moist.
- Step 6: Shred the Meat
- Using two forks, shred the tender beef into bite-sized pieces. Mix with enough consomé to keep it juicy and flavorful.
- Step 7: Assemble and Dip
- Warm corn tortillas to make them pliable. Fill one side with shredded beef and Oaxaca cheese, fold over, then quickly dip both sides in the consomé. This step is crucial for both flavor and the signature orange color.
- Step 8: Crisp to Perfection
- Cook the dipped tacos in a hot skillet until crispy on both sides and the cheese is melted inside, about 2-3 minutes per side. The outside should be crispy while the inside remains juicy.
- Step 9: Serve Immediately
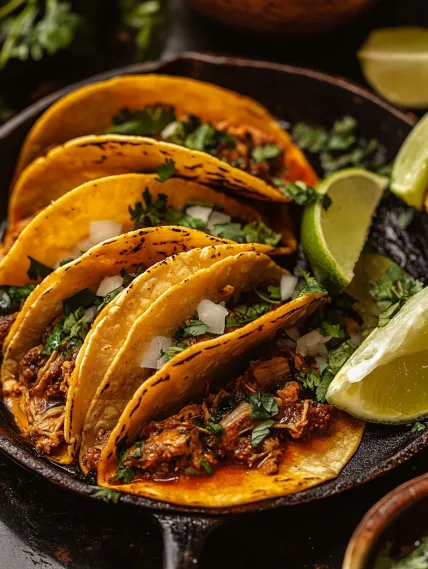
- Arrange tacos on a platter with small bowls of consomé for dipping. Garnish with fresh cilantro and diced white onion for added flavor and visual appeal.
- Step 10: Store Leftovers Properly
- If you have leftovers, store the rice and beef mixture separately in airtight containers in the refrigerator for up to 3 days. This prevents the rice from absorbing too much moisture.
I learned the importance of properly dipping the tacos after my first attempt resulted in soggy tortillas that fell apart. Now I always do quick dips and immediately transfer to a hot skillet for that perfect crispy exterior.
Spice Level Customization
The heat in these tacos comes primarily from the dried chiles and chipotle peppers. For milder tacos that children and spice-sensitive guests can enjoy, I reduce the guajillo peppers to just two, focusing on their flavor contribution rather than heat. Conversely, for heat enthusiasts, adding red pepper flakes or a splash of hot sauce creates a pleasantly spicy variation. Creating a "build-your-own" birria bowl allows everyone to adjust toppings to their personal taste.

Make-Ahead Strategy for Entertaining
Birria tacos become my secret weapon for stress-free entertaining. The beef can be braised up to three days ahead and actually improves in flavor overnight. On the day of serving, I simply reheat the meat and consomé, then set up a taco assembly station. Watching me dip and crisp these tacos becomes interactive entertainment for guests while filling the house with irresistible aromas. This approach allows me to enjoy the gathering rather than being stuck in the kitchen.
Seasonal Adaptations Year-Round
Throughout the year, I adjust this versatile dish to embrace seasonal produce. Spring versions feature tender young carrots and fresh peas. Summer brings additions of garden-fresh zucchini and cherry tomatoes added during the final minutes. Autumn calls for diced butternut squash simmered until tender. Winter versions welcome hearty root vegetables like parsnips. The creamy base remains constant while seasonal vegetables keep the recipe in rotation throughout the year without tasting repetitive despite frequent appearances on our dinner table.
Chef's Essential Tips
- For enhanced flavor, deglaze the pot with a splash of red wine after cooking the beef
- A pinch of nutmeg enhances the creamy mushroom flavor remarkably
- Toasting the rice in butter for 2-3 minutes before adding water adds nutty complexity
- For a flavor boost, add a teaspoon of Worcestershire sauce to the beef mixture
- Save time by using pre-cooked rice, reducing liquid accordingly
I've refined these tips through many iterations of this recipe, particularly after discovering that adding finely diced celery to the filling creates an authentic buffalo wing experience that reminds me of the classic appetizer but in a more nutritious form.
This Birria Tacos has become my go-to recipe when I want to impress without spending hours in the kitchen. There's something incredibly satisfying about transforming simple ingredients into a dish that tastes like you spent hours in the kitchen. The comforting combination of savory, spicy goodness and melty cheese, and fluffy rice that appeals to almost everyone in the family.
Final Tips
- For a dairy-free version, use coconut cream and dairy-free cream cheese
- Transform leftovers by pureeing a portion to create a thicker consistency
- For extra nutrition, stir in a handful of baby spinach just before serving
- A sprinkle of smoked paprika adds beautiful color and subtle smoky flavor
- Freeze in individual portions for easy grab-and-go lunches
This Birria Tacos proves that the most beloved family recipes don't need to be complicated to be delicious. With just a few simple techniques and the right ingredients, you can create restaurant-quality tacos at home that are fresher, less greasy, and more tailored to your taste preferences than takeaway versions. With just a little patience and attention to detail, simple components transform into a meal that will have everyone at the table asking for the recipe.
Recipe FAQs
- → Can I make Birria Tacos in a slow cooker instead of the oven?
- Yes! After searing the meat and preparing the sauce, transfer everything to a slow cooker and cook on low for 6-8 hours until the meat is tender and shreddable.
- → What's a good substitute for Oaxaca cheese?
- If you can't find Oaxaca cheese, mozzarella or Monterey Jack make excellent substitutes as they have similar melting properties and mild flavors.
- → How spicy are these birria tacos?
- With the combination of dried chiles and chipotles, they have a moderate heat level. For a milder version, reduce the amount of chipotle peppers or remove the seeds from the dried chiles.
- → Can I freeze the birria meat and consomé?
- Absolutely! The meat and consomé freeze very well for up to 3 months. Thaw overnight in the refrigerator and reheat gently on the stove before assembling tacos.
- → What sides go well with birria tacos?
- Traditional accompaniments include diced onions, fresh cilantro, lime wedges, and sliced radishes. Mexican rice, refried beans, or a simple cabbage slaw also make excellent side dishes.