
 Pin
Pin
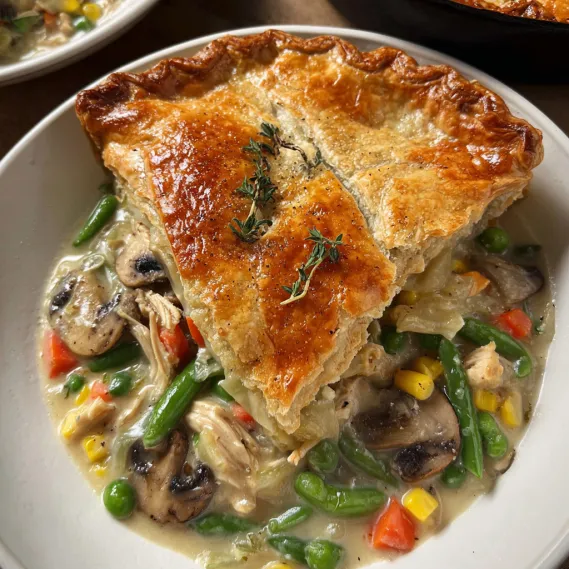
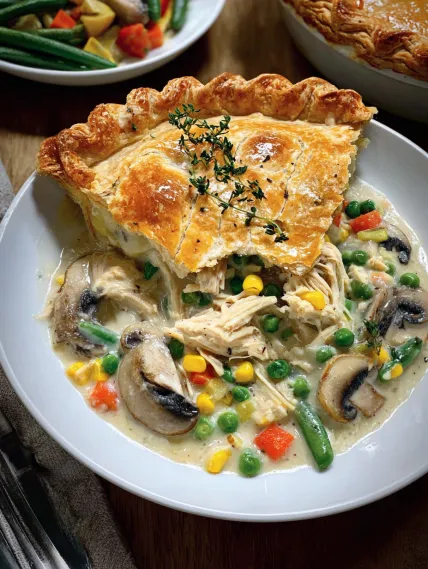
This hearty spring chicken pot pie transforms basic ingredients into a comforting masterpiece that's perfect for transitional weather when you want something warming yet fresh. The combination of rotisserie chicken and spring vegetables creates a balanced meal that feels both indulgent and wholesome.
I first made this recipe during a rainy spring weekend when I wanted something comforting yet seasonal. The beautiful lattice top impressed my dinner guests so much that it's now my go-to dish whenever I'm hosting a small gathering during the transitional seasons.
- Butter: Forms the rich base of the gravy and adds incredible flavor to the vegetables as they cook
- Yellow onion: Provides the aromatic foundation that makes the filling so flavorful
- Mushrooms: Add an earthy umami element that complements the chicken perfectly
- All-purpose flour: Thickens the gravy to the ideal consistency
- Chicken broth: Intensifies the savory flavor while creating a silky sauce
- Sugar snap peas: Bring freshness and a delightful crunch to contrast the creamy filling
- Frozen mixed vegetables: Offer convenience while adding color and nutrition
- Heavy cream: Creates luxurious richness that makes this pot pie truly special
- Rotisserie chicken: Saves time and provides tender meat with developed flavor
- Fresh thyme: Brightens the dish with its subtle herbal notes
- Prepared pie crusts: Make this impressive dish accessible for weeknight cooking
How To Make Spring Chicken Pot Pie
- Prepare the base:
- Begin by melting butter in a large skillet or Dutch oven over medium heat. Add the diced onions and cook until they become translucent and slightly soft about 3 to 4 minutes. The onions should not brown but rather become aromatic and tender.
- Develop mushroom flavor:
- Add the sliced mushrooms to the onions along with a generous pinch of salt and black pepper. Cook the mushrooms patiently for about 10 minutes until they release their moisture and begin to brown around the edges. This step builds tremendous flavor in the filling as the mushrooms caramelize slightly.
- Create the gravy:
- Sprinkle the flour evenly over the vegetable mixture making sure to distribute it well. Cook for about 1 minute to remove the raw flour taste. Gradually pour in the chicken broth while constantly stirring to prevent lumps from forming. Continue stirring until the mixture thickens into a smooth velvety gravy approximately 3 to 4 minutes.
- Incorporate vegetables:
- Add the sugar snap peas and frozen mixed vegetables to the thickened gravy stirring gently to coat everything evenly. Allow the vegetables to warm through for about 2 minutes they will continue cooking in the oven so they should remain slightly firm at this stage.
- Finish the filling:
- Season the mixture with additional salt and pepper tasting as you go. Stir in the heavy cream to create richness then fold in the shredded rotisserie chicken and fresh thyme leaves. The filling should look creamy and abundant transfer it to your casserole dish allowing about half an inch of space at the top.
- Create the lattice top:
- Prepare your egg wash by beating the egg with water. Unroll the pie dough and cut it into even strips about 3/4 inch wide. Arrange half the strips parallel to each other on a piece of parchment paper. Fold back every other strip halfway then place a perpendicular strip across them. Unfold the strips over the perpendicular one. Continue weaving until you have a lattice large enough to cover your casserole.
- Assemble and bake:
- Carefully transfer the lattice to the top of your filled casserole by flipping the parchment paper over it. Gently peel away the paper and adjust the lattice as needed allowing the edges to drape over the sides. Brush the lattice thoroughly with egg wash for a golden finish. Place the casserole on a rimmed baking sheet to catch any drips and bake at 400°F for 30 minutes until the filling bubbles vigorously and the crust turns a beautiful golden brown.

My absolute favorite part of this dish is watching the golden crust emerge from the oven with bubbling filling visible through the lattice openings. There's something magical about that moment when you know the flavors have melded perfectly and you're about to enjoy a truly comforting meal. My family knows that when the kitchen fills with the aroma of this pot pie dinner is going to be special.
Vegetable Variations
This pot pie welcomes seasonal adaptations throughout the year. In early spring try adding fresh asparagus tips blanched for just a minute before adding to the filling. Summer versions shine with fresh corn kernels cut directly from the cob and diced zucchini. Fall iterations can incorporate diced butternut squash or sweet potatoes which should be partially roasted beforehand. The recipe is incredibly forgiving for whatever vegetables look best at your market.
Make-Ahead and Storage
The filled unbaked pot pie can be assembled up to 24 hours in advance and kept refrigerated. When ready to bake simply remove from the refrigerator while the oven preheats and add an extra 5 to 10 minutes to the baking time. Leftover baked pot pie keeps beautifully in the refrigerator for up to 3 days. Reheat individual portions in a 350°F oven for about 15 minutes until warmed through. For the best texture avoid microwaving which can make the crust soggy.
Serving Suggestions
This pot pie truly shines as a standalone meal but can be complemented by simple sides. A crisp green salad dressed with a light vinaigrette provides refreshing contrast to the rich filling. For a special touch serve with a glass of unoaked Chardonnay or light Pinot Noir which pairs beautifully with the creamy sauce and herbs. If serving for a spring gathering consider offering small dishes of additional fresh herbs or microgreens for guests to garnish their portions.
Crust Alternatives
While the lattice top creates a showstopping presentation there are several alternatives that work wonderfully. For a time-saving option simply lay the whole pie crust over the filling trim the edges and cut several slits for steam to escape. Biscuit lovers can top the filling with homemade or storebought biscuit dough for a cobbler effect. For a lightened version skip the bottom crust entirely and only use the decorative top which significantly reduces the calories while maintaining the comfort food appeal.
Recipe FAQs
- → What vegetables can I use for the filling?
The recipe calls for sugar snap peas and a mixed frozen vegetable blend (with carrots and corn), but you can substitute with other spring vegetables like asparagus, spinach, or fresh peas.
- → Can I make this ahead of time?
Yes, you can prepare the filling and store it in the refrigerator for up to two days. Assemble and bake the dish fresh when ready to serve.
- → How do I prevent the crust from over-browning?
If the crust starts to brown too quickly, cover it loosely with aluminum foil during baking to prevent overcooking.
- → Can I use a different crust for this dish?
Absolutely! You can use puff pastry, biscuit dough, or even a homemade crust if you prefer over the pre-made pie dough.
- → What’s the best way to reheat leftovers?
Place leftovers in the oven at 350°F for about 20 minutes, or until heated through. This keeps the crust crisp and the filling warm.