
 Pin
Pin
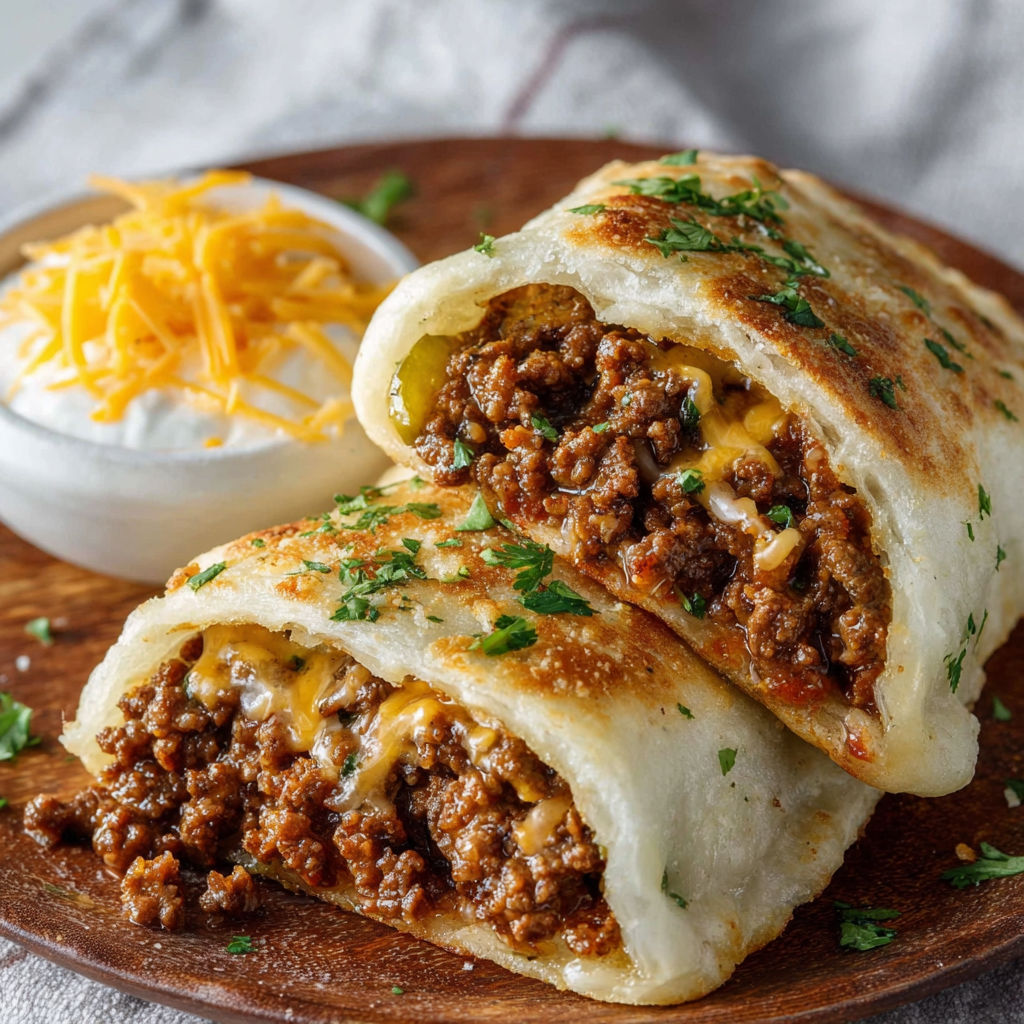
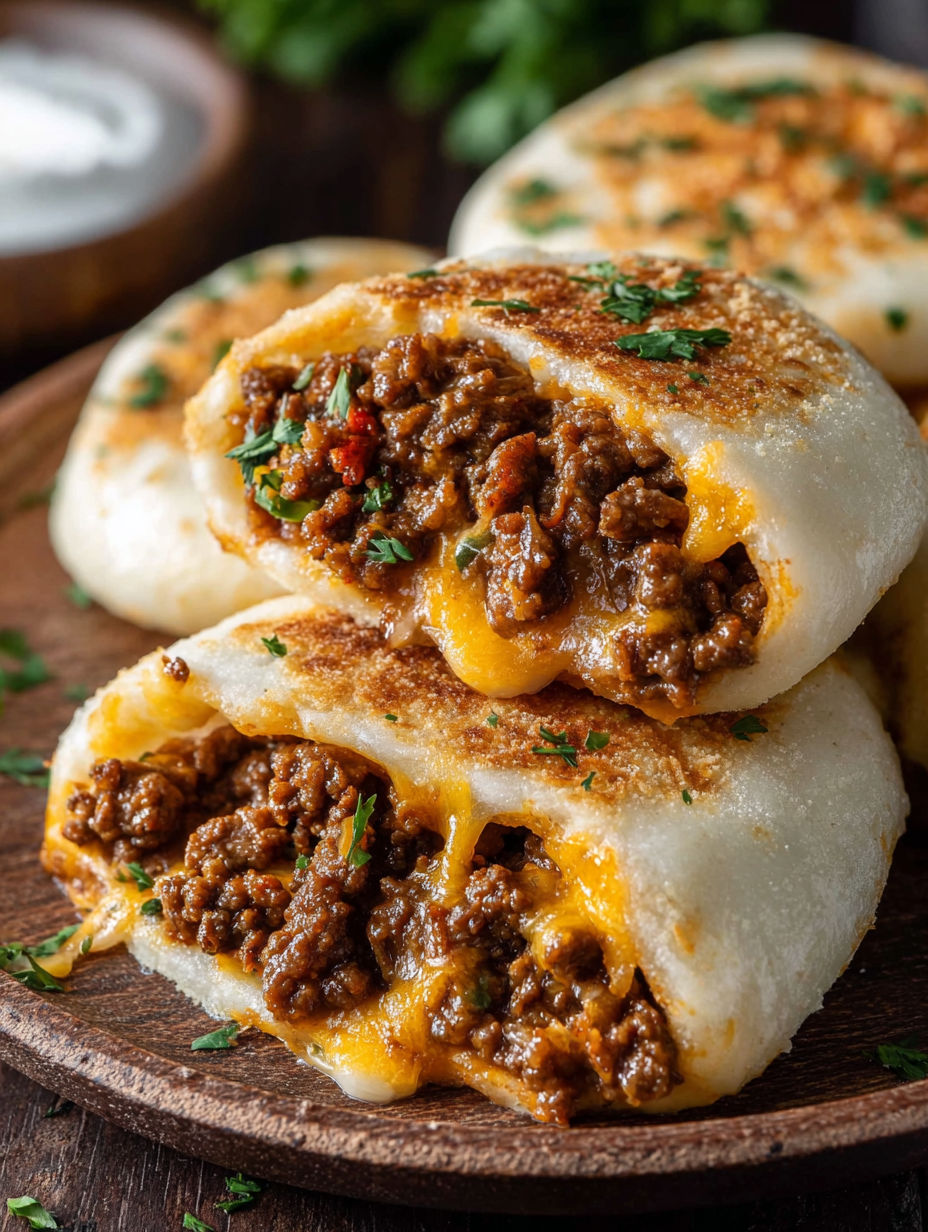
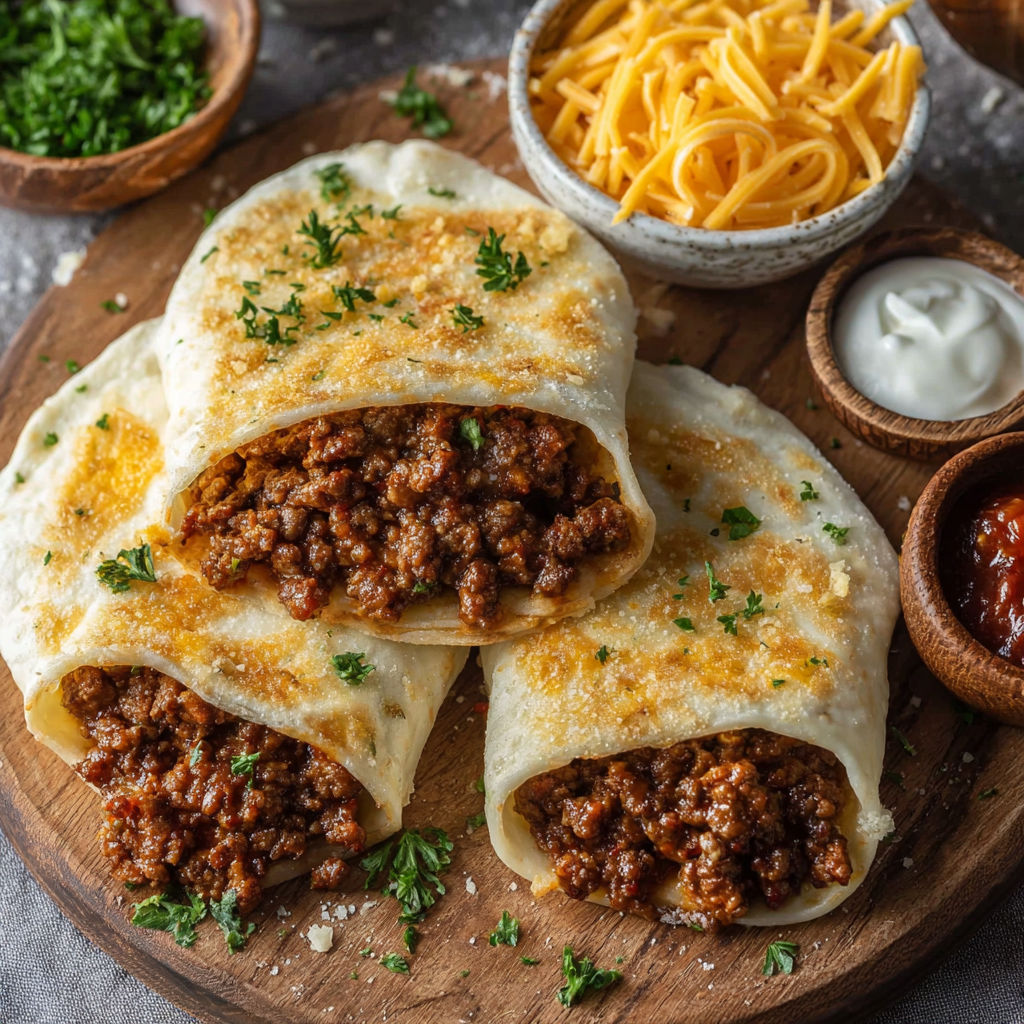
This hearty Beef Meximelt Cheesy Taco bomb combines the flavors of your favorite taco with the comfort of warm bread for a handheld meal that will satisfy even the hungriest appetites. The savory beef filling melts into the fluffy biscuit exterior creating an irresistible bite that's perfect for game day snacking or a casual dinner.
I first created these when looking for creative ways to use leftover taco meat. My teenage sons devoured the entire batch in minutes and now request them weekly as their favorite after school snack.
Ingredients
- Ground beef adds hearty protein and forms the base of our filling. Look for 80/20 blend for the best flavor balance
- Worcestershire sauce brings umami depth that enhances the beef flavor wonderfully
- Shredded cheese creates that signature melt factor. Sharp cheddar provides the best flavor but mozzarella gives the stretchiest pull
- Refrigerated biscuit dough offers convenience and a fluffy texture that pairs perfectly with the rich filling
- Garlic butter parmesan topping transforms the exterior into a fragrant golden crust you will not be able to resist
- Optional add ins like bacon or caramelized onions let you customize each batch to your preference
How To Make Beef Meximelt Cheesy Taco
- Brown the beef
- Cook ground beef in a large skillet over medium heat until fully browned and no pink remains. Break it apart with a wooden spoon as it cooks for even browning. This should take about 5 to 7 minutes. Drain any excess fat to prevent soggy bombs.
- Season the meat
- Add salt, black pepper, garlic powder, onion powder, and Worcestershire sauce to the browned meat. Stir thoroughly to distribute the seasonings evenly. The Worcestershire sauce adds depth that makes these taste restaurant quality. Allow the mixture to cool completely before adding cheese to prevent the cheese from melting prematurely.
- Prepare the filling
- Once cooled, fold in the shredded cheese until thoroughly combined. The cool meat will allow the cheese to stay intact in small pockets that will create delicious melty pockets when baked. This is also when you would add any optional ingredients like crispy bacon bits or caramelized onions.
- Form the bombs
- Take each portion of dough and flatten into a 10 cm round using your palms or a rolling pin. Place 1 to 2 tablespoons of the beef mixture in the center of each round. Carefully bring all edges of the dough together above the filling and pinch firmly to seal completely. Roll gently between your palms to form a smooth ball.
- Apply the topping
- Combine melted butter with minced garlic or garlic powder in a small bowl. Brush this mixture generously over each sealed dough ball. The butter will help achieve that gorgeous golden color while baking. Sprinkle Parmesan cheese over the tops for an extra layer of flavor and texture.
- Bake to perfection
- Place the prepared bombs on a parchment lined baking sheet with at least 2 cm between each one to allow for expansion. Bake in a preheated 190°C oven for 15 to 18 minutes until the exterior is beautifully golden brown and the dough is fully cooked through.
The Worcestershire sauce is my secret ingredient in these bombs. My grandmother always added it to her ground beef recipes, and I find it adds that special something that makes people ask for your recipe. The first time I served these at a family gathering, my uncle ate six of them before anyone else had a chance at seconds.
Make Ahead Options
These bombs are perfect for meal prep. You can prepare the entire recipe through the filling and shaping steps, then refrigerate the unbaked bombs for up to 24 hours. Simply apply the garlic butter and Parmesan right before baking. This makes them perfect for entertaining when you want to minimize day of preparation.
Serving Suggestions
While these bombs are delicious on their own, they truly shine when served alongside complementary dips. Ranch dressing offers cooling creaminess, while salsa provides bright acidity. For an elevated experience, serve with guacamole and sour cream to recreate the full taco experience. A simple green salad dressed with lime vinaigrette makes this a complete meal.
Ingredient Substitutions
The beauty of this recipe is its flexibility. Ground turkey or chicken can replace beef for a lighter option. Vegetarians can use plant based ground meat substitutes or a mixture of black beans and corn. If you prefer homemade dough, a basic pizza dough works wonderfully. Dairy free cheese alternatives melt nicely as well, though they might not stretch quite as dramatically as conventional cheese.
Storage and Reheating
Leftover bombs will keep in an airtight container in the refrigerator for up to 3 days. To reheat, place them in a 350°F oven for 8 to 10 minutes or microwave for 30 seconds. For best texture, the air fryer is my preferred method, giving them that freshly baked crispness in just 3 minutes at 350°F. These also freeze beautifully after baking. Simply cool completely, wrap individually in plastic wrap and freeze for up to 3 months.
Recipe FAQs
- → Can I make these Beef Meximelt bombs ahead of time?
Yes, you can prepare these up to 24 hours in advance. Assemble the bombs, place on a baking sheet, cover with plastic wrap and refrigerate. When ready to bake, brush with the garlic butter mixture and bake for an additional 2-3 minutes beyond the recipe time since they'll be cold from the refrigerator.
- → What's the best cheese to use for this dish?
While the recipe suggests cheddar or mozzarella, any good melting cheese works well. Mexican cheese blends, pepper jack for spice, or Monterey Jack all make excellent options. For extra flavor, consider mixing two varieties together.
- → Can I use homemade dough instead of refrigerated?
Absolutely! Homemade pizza dough or biscuit dough works wonderfully. Just ensure the dough is rolled to about 1/8-inch thickness before filling. Homemade dough often provides better flavor and texture than store-bought versions.
- → What are some good dipping sauces to serve with these?
These bombs pair perfectly with ranch, garlic aioli, or spicy mayonnaise as mentioned in the recipe. Additional excellent options include salsa, guacamole, sour cream, queso dip, or a simple marinara sauce.
- → How can I make this dish spicier?
To add heat, incorporate diced jalapeños or green chilies into the beef mixture. You could also add cayenne pepper, hot sauce, or red pepper flakes to the seasoning blend. For those who enjoy extra spice, serve with a side of hot sauce for dipping.
- → Can I freeze these Beef Meximelt bombs?
Yes, these freeze beautifully. Prepare through the assembly stage, then freeze them unbaked on a baking sheet until solid. Transfer to a freezer bag for storage up to 3 months. When ready to enjoy, bake from frozen, adding 5-7 minutes to the cooking time.