
 Pin
Pin
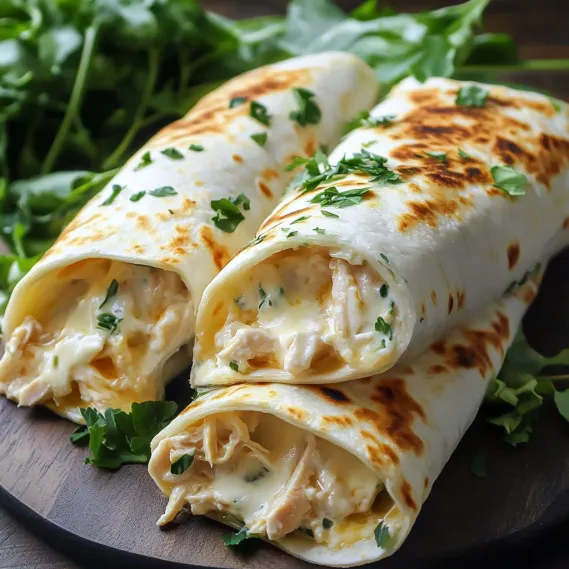
This cheesy garlic chicken wrap recipe transforms basic ingredients into a mouthwatering meal that satisfies both hunger and cravings. The combination of tender shredded chicken with creamy cheeses and aromatic garlic creates a filling that's impossible to resist when wrapped in a crispy, golden tortilla.
I first created these wraps during a busy weeknight when I needed something quick yet satisfying. They were such a hit with my family that they've become our go-to solution for hectic evenings when takeout seems tempting but homemade is preferred.
Ingredients
- Shredded chicken: Provides lean protein and works perfectly whether freshly cooked or leftover
- Mozzarella cheese: Creates that irresistible melty stretch factor when heated
- Cream cheese: Adds richness and helps bind the filling together
- Sour cream: Brings tanginess that balances the savory elements
- Fresh garlic cloves: Offer aromatic depth that dried garlic simply cannot match
- Fresh parsley: Brightens the entire dish with color and fresh herbal notes
- Paprika: Contributes a subtle smoky flavor and beautiful color
- Flour tortillas: Should be large and fresh for proper rolling and browning
- Mixed greens: Add nutrition and a pleasant textural contrast to the creamy filling
How To Make Cheesy Garlic Chicken Wraps
- Prepare the filling:
- Combine all filling ingredients in a large bowl until thoroughly mixed. Take time to ensure the cream cheese is fully incorporated with no lumps remaining. The warmth from the chicken helps melt the cheese slightly for easier blending. Make sure garlic is evenly distributed throughout.
- Assemble the wraps:
- Lay each tortilla flat and spoon one quarter of mixture onto the center. The key is placing filling slightly below center to facilitate proper rolling. Add a small handful of greens on top of the mixture but not too many or wraps become difficult to close.
- Roll and secure:
- Fold in both sides of the tortilla toward the center then roll from bottom to top keeping everything tight. Press gently to seal the edge. A properly rolled wrap stays closed during cooking without needing toothpicks.
- Crisp to perfection:
- Heat skillet until a drop of water sizzles immediately upon contact. Add just enough oil to coat the surface lightly. Place wraps seam side down first allowing heat to seal them closed. Cook until deeply golden pressing gently with spatula occasionally to ensure even contact with the pan.
Garlic is truly the star ingredient here. I discovered the perfect amount through numerous tests with my family. Four cloves provide enough flavor to make these wraps distinctive without overwhelming more sensitive palates. My daughter who normally picks around garlic actually requests these wraps specifically.
Storage and Reheating
These wraps keep remarkably well in the refrigerator for up to three days when properly stored in an airtight container. For best results separate layers with parchment paper to prevent sticking. While you can reheat them in the microwave wrapped in a damp paper towel for about 45 seconds I strongly recommend using an air fryer or toaster oven at 350°F for 5 minutes to restore their crispy exterior.
Variation Ideas
The basic recipe serves as an excellent foundation for countless variations. Try adding diced roasted red peppers or sun dried tomatoes for a Mediterranean twist. Swap the mozzarella for pepper jack to add heat or use a combination of cheeses like cheddar and Monterey Jack. For added nutrition incorporate finely chopped spinach directly into the filling mixture where it will virtually disappear during cooking but add valuable nutrients.
Serving Suggestions
These wraps shine brightest when served with complementary sides. A light cucumber and tomato salad dressed simply with lemon juice and olive oil provides refreshing contrast to the rich filling. For a heartier meal pair with sweet potato fries or a cup of tomato soup for dipping. I often serve these with a side of ranch or chipotle mayo for those who enjoy additional dipping options.
Make Ahead Tips
The filling can be prepared up to two days in advance and stored in the refrigerator making assembly lightning fast when needed. You can even assemble the entire wraps and store them uncooked with plastic wrap between each one. When ready to serve simply cook as directed adding perhaps one extra minute per side to ensure the filling heats through completely.
Recipe FAQs
- → How can I make these wraps low-carb?
Replace traditional flour tortillas with low-carb or keto-friendly tortillas available at most grocery stores.
- → What’s the best way to shred chicken?
Use cooked chicken breast or thighs and shred them using two forks, a stand mixer, or your hands for chunkier pieces.
- → Can I make these wraps ahead of time?
You can prepare the filling in advance and store it in the fridge for up to 3 days. Assemble and cook the wraps when ready to serve.
- → What can I use instead of mozzarella cheese?
Cheddar, Monterey Jack, or a cheese blend with similar melting properties works perfectly as substitutes.
- → How can I make the wraps extra crispy?
Ensure the skillet is preheated, use a little olive oil, and press the wraps gently with a spatula while cooking.
- → Can I add other ingredients to the filling?
Absolutely, you can mix in cooked bacon bits, sautéed onions, bell peppers, or jalapeños for more flavors.