
 Pin
Pin
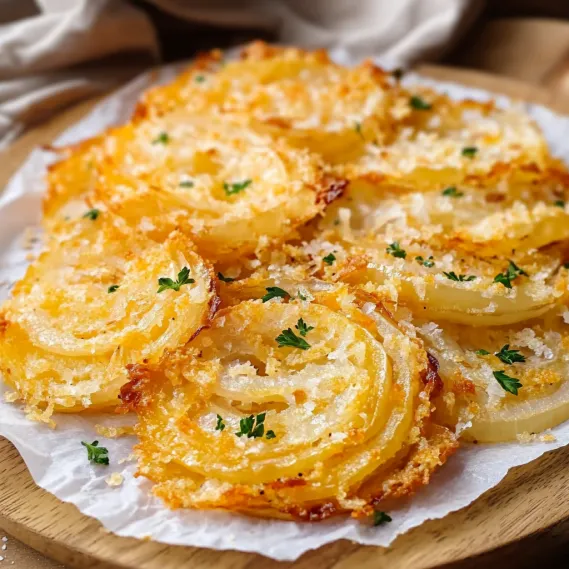
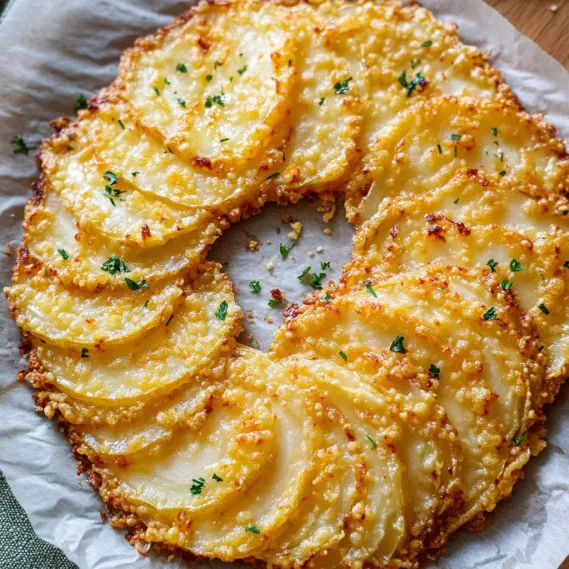
This crispy, cheesy onion appetizer transforms ordinary onions into golden brown delights that disappear within minutes at every gathering. I discovered this recipe during last Christmas when I needed something quick yet impressive, and it's been my secret weapon for entertaining ever since.
My neighbor actually begged for this recipe after trying it at my holiday party last year. I love watching people's surprise when they learn the star ingredient is simply onions.
- Large onions: Choose sweet varieties like Vidalia for a more balanced flavor profile
- All purpose flour: Creates the base coating that helps everything else adhere
- Salt and pepper: Essential seasoning that enhances the natural sweetness of onions
- Eggs: Act as the binding agent for the crispy exterior
- Milk: Thins the egg mixture to perfect consistency for dipping
- Sharp cheddar cheese: Provides bold flavor and that irresistible cheese pull
- Breadcrumbs: Essential for creating the ultimate crunchy texture
- Parmesan cheese: Adds nutty depth and helps create a golden crust
- Fresh parsley: Brightens the dish with color and fresh flavor
- Olive oil: Helps achieve perfect browning in the oven
- Preheat and Prep:
- Turn your oven to 400°F and prepare your baking sheet with parchment paper. The parchment prevents sticking and makes cleanup easier. Brush the parchment lightly with olive oil for extra insurance against sticking and to add flavor. A proper preheated oven ensures immediate browning when the onions go in.
- Prepare the Dipping Stations:
- Create an assembly line with three stations. First bowl combines flour with salt and pepper. Whisk thoroughly to distribute seasonings evenly. Second bowl contains eggs and milk whisked until completely smooth with no streaks. Third bowl mixes breadcrumbs with both cheeses. The order matters here for proper adhesion.
- Master the Coating Technique:
- Take each onion slice and dredge completely in the flour mixture, shaking off excess. Next, dip in egg mixture, allowing excess to drip off. Finally, press firmly into the cheese and breadcrumb mixture, ensuring complete coverage on both sides. Use one hand for dry ingredients and one for wet to prevent creating a gummy mess on your fingers.
- Arrange for Perfect Cooking:
- Place each coated onion slice on your prepared baking sheet, leaving about an inch between each piece to allow air circulation. Drizzle or spray with additional olive oil which helps achieve that golden brown color and adds extra crispiness. Be careful not to crowd the pan or the onions will steam rather than crisp.
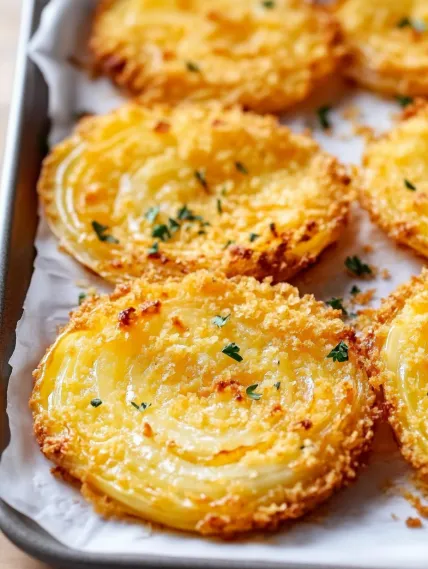
- Bake to Golden Perfection:
- Place in your preheated oven and bake for 20 to 25 minutes. Around the 15 minute mark, check for browning. If some pieces are cooking faster than others, rotate the pan. The perfect onion crisp has a deep golden color, crunchy exterior, and tender interior. The cheese should be melted and slightly browned.
The magic ingredient here is definitely the sharp cheddar. I once tried making these with a milder cheese and they just didn't have the same impact. The sharpness cuts through the sweetness of the caramelized onions creating that perfect savory balance that makes these so addictive.
Make Ahead Tips
These onion crisps can be fully prepared and refrigerated unbaked for up to 4 hours before your event. Simply increase baking time by about 5 minutes if cooking from cold. You can also bake them ahead and reheat in a 350°F oven for 5 minutes just before serving. The texture suffers slightly but they're still delicious. For longer storage, freeze the unbaked crisps in a single layer then transfer to a container. Bake straight from frozen adding 7 to 10 minutes to the cooking time.
Perfect Pairings
These cheesy onion crisps complement so many main dishes but shine especially alongside grilled meats or hearty stews. For an appetizer spread, pair them with something fresh like a citrus salad to balance the richness. A cool sour cream or ranch dipping sauce makes them even more irresistible. For beverages, a crisp lager or dry sparkling wine cuts through the richness perfectly.
The Secret to Perfect Slicing
Achieving uniform onion slices is crucial for even cooking. I recommend chilling your onions for 30 minutes before slicing to reduce eye irritation and create cleaner cuts. Use a very sharp knife or mandoline slicer set to about 1/4 inch thickness. Slices that are too thin will burn before cooking through, while thick slices might remain undercooked in the middle. Separate the rings for smaller pieces or keep them intact for larger, more impressive crisps.
Recipe FAQs
- → How do I ensure the onion crisps turn out crunchy?
To ensure a crispy texture, make sure the onion slices are evenly coated with the breading mixture and bake them in a single layer. Drizzling olive oil over the top before baking also helps achieve a golden crunch.
- → Can I prepare these onion crisps ahead of time?
You can prepare the coating mixture and slice the onions ahead of time, but it’s best to bake them just before serving to retain their crispiness.
- → What dipping sauces pair well with these onion crisps?
They pair wonderfully with creamy ranch, garlic aioli, or a tangy marinara sauce. Experiment with your favorite dips!
- → Can I substitute the cheeses in this recipe?
Yes, you can try mozzarella or Gruyère for a different flavor profile. However, the sharpness of cheddar and Parmesan is key to the original recipe’s savory taste.
- → Can I use an air fryer instead of an oven?
Absolutely! Air-frying at 375°F (190°C) offers similar results. Cook in small batches for about 12-15 minutes, shaking occasionally for even crispiness.
- → What’s the best way to store leftovers?
Store leftovers in an airtight container in the refrigerator for up to 2 days. Reheat in the oven or air fryer to restore their crisp texture.