
 Pin
Pin
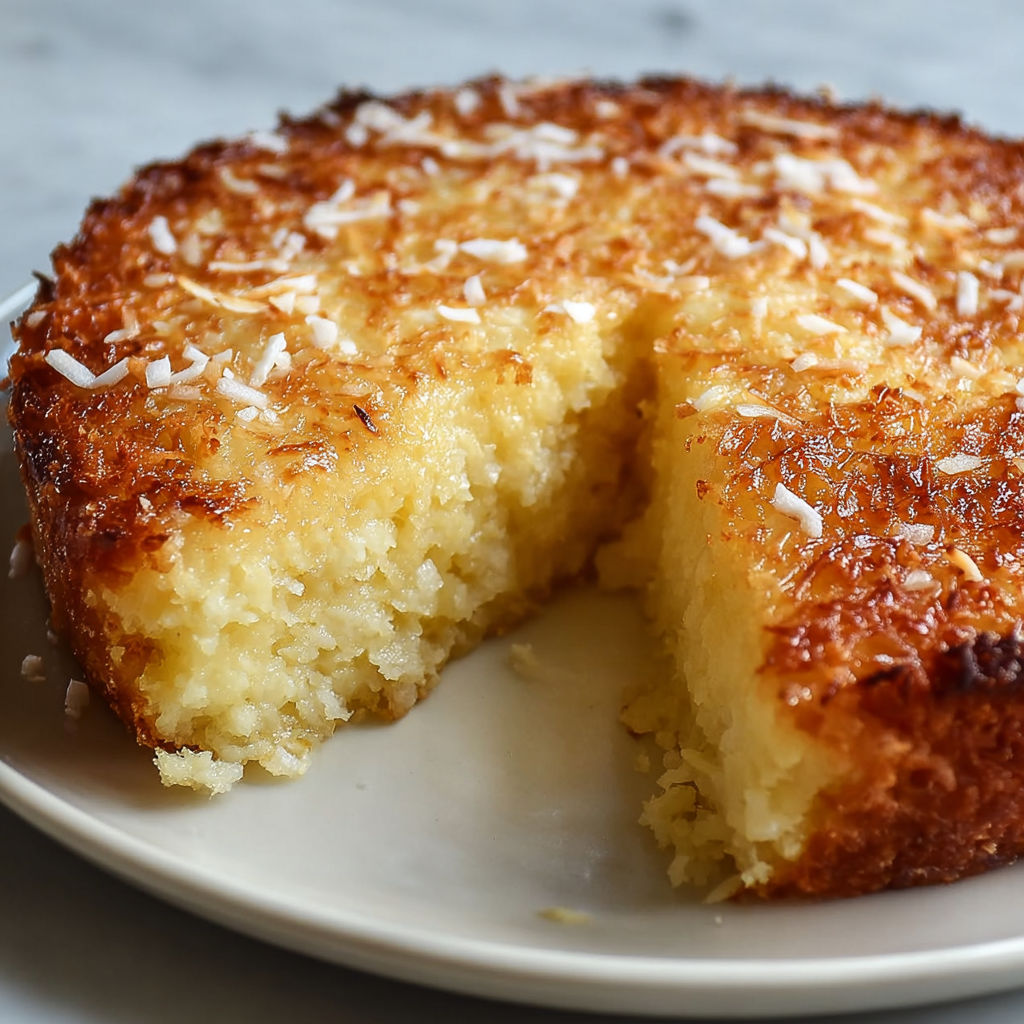
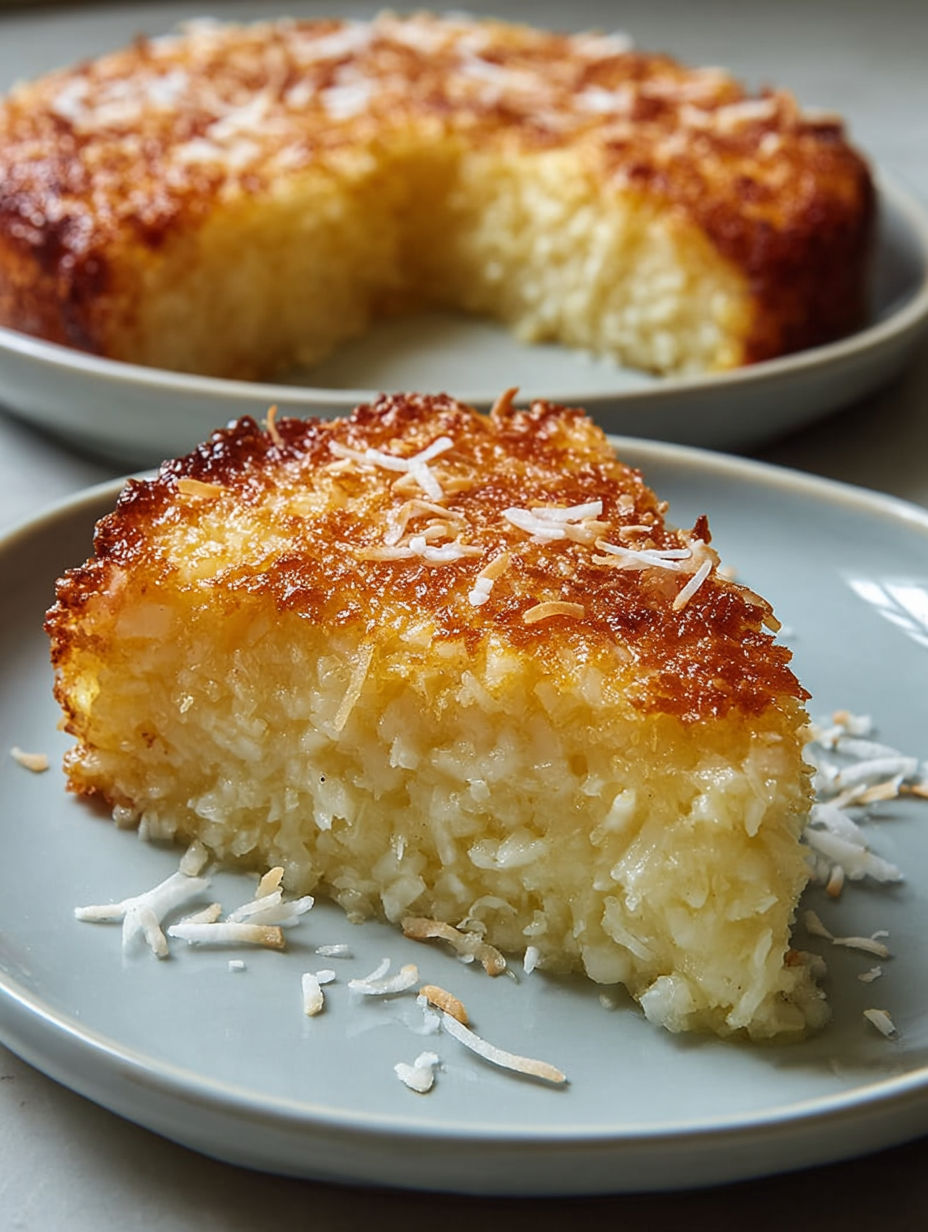
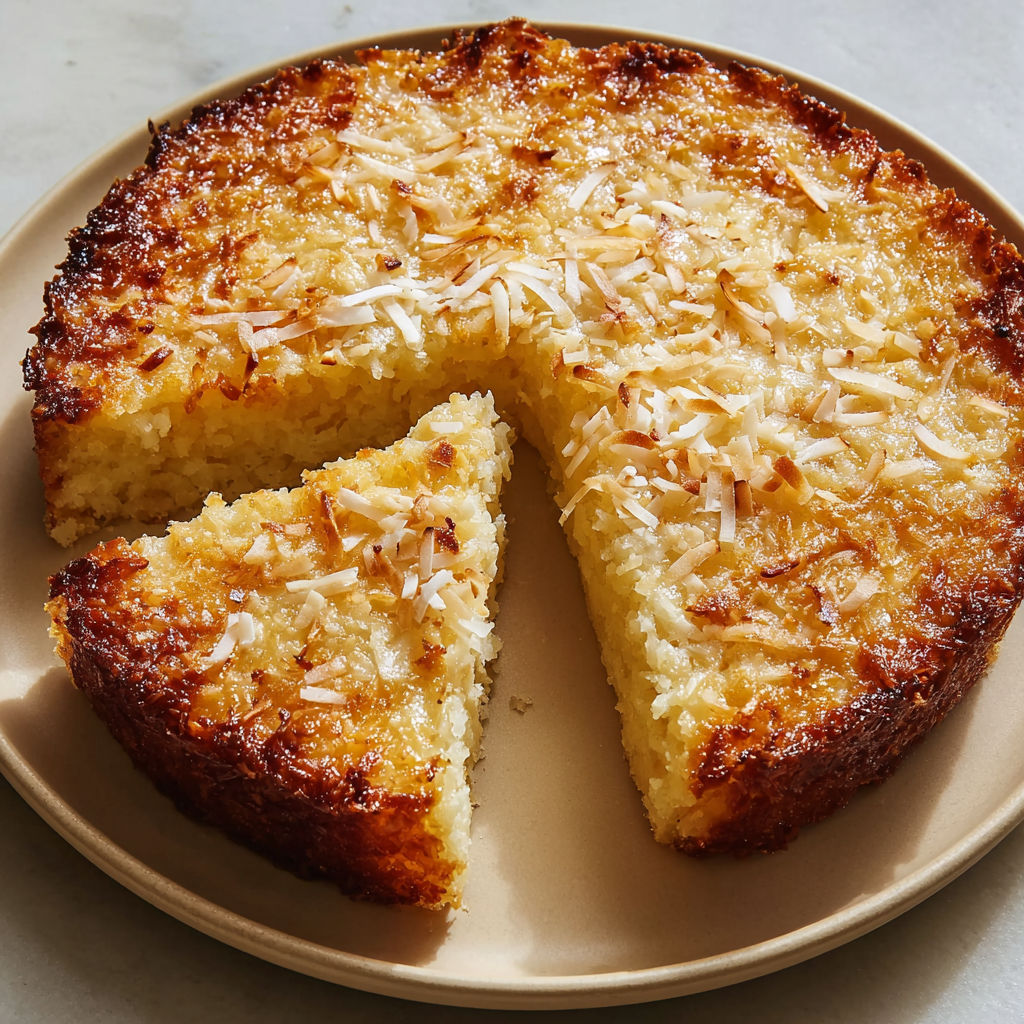
This crustless coconut pie transforms simple pantry ingredients into a magical dessert that creates its own crust while baking. The result is a deliciously sweet treat with a custard-like center and crisp coconut edges that will have everyone asking for seconds.
I first made this pie for a last-minute dinner party when I realized I had no time for a proper crust. It was such a hit that my friends now specifically request "that impossible coconut pie" whenever they visit.
Ingredients
- All purpose flour provides structure while allowing the custard texture to shine
- Granulated sugar balances the coconut flavor without overwhelming it
- Unsalted butter adds richness and helps create that magical crust effect
- Whole milk creates the perfect custard consistency use full fat for best results
- Large eggs bind everything together and create that silky texture
- Vanilla extract enhances the coconut flavor with warm aromatic notes
- Sweetened shredded coconut gives texture and tropical flavor freshly opened packages work best
- Pinch of salt essential for balancing the sweetness and enhancing all flavors
How To Make Crustless Coconut Pie
- Prepare the oven and dish
- Preheat your oven to a moderate 175°C. Take your time to thoroughly grease a 23 centimeter pie dish using either unsalted butter or nonstick spray. Ensure every crevice is coated to prevent sticking which is crucial for easy serving later.
- Combine dry ingredients
- In a spacious mixing bowl whisk together 65 grams of all purpose flour 300 grams of granulated sugar and that important pinch of salt. Mix until they become one homogeneous mixture which ensures even sweetness throughout your pie.
- Add wet ingredients
- Pour in 113 grams of completely melted but not hot butter 480 milliliters of room temperature whole milk 4 large eggs that have been slightly beaten and 5 milliliters of pure vanilla extract. Whisk with purpose until the mixture transforms into a smooth flowing batter without any flour lumps. This should take about 2 minutes of continuous whisking.
- Incorporate coconut
- Add 120 grams of sweetened shredded coconut to your batter. Using a spatula or large spoon fold the coconut in with gentle strokes ensuring it disperses evenly throughout the mixture without deflating the slight airiness you've created.
- Bake to perfection
- Transfer your completed batter into the prepared pie dish carefully pouring from a height of a few inches to eliminate any large air bubbles. Place on the middle rack of your preheated oven and bake for 45 to 50 minutes. The magic happens as it bakes the coconut rises to form a golden crust while the bottom transforms into a custard layer.
- Cool and serve
- Allow your coconut creation to cool completely on a wire rack for at least 1 hour. This cooling period is crucial as it allows the custard to set properly. The pie can be served at room temperature or refrigerated for a firmer texture.
The shredded coconut is truly what makes this dessert special. I remember my grandmother making a version of this pie using coconut she had hand-grated from fresh coconuts. While packaged coconut is more convenient the smell of this pie baking still takes me right back to her kitchen every time.
Make Ahead Options
This crustless coconut pie actually improves with a bit of time. The flavors meld beautifully when allowed to rest for a few hours or overnight in the refrigerator. If serving guests prepare it the day before cover loosely with plastic wrap after cooling completely and refrigerate. For the best texture and flavor remove from the refrigerator about 30 minutes before serving to take the chill off.
Perfect Pairings
This coconut pie stands beautifully on its own but truly shines with thoughtful accompaniments. A dollop of lightly sweetened whipped cream adds a cloud-like contrast to the dense custard. Fresh berries particularly raspberries or strawberries provide a tart counterpoint to the sweet coconut. For an elegant dessert presentation drizzle each serving with a small amount of warm caramel sauce and add a sprinkle of toasted coconut flakes on top.
Storage Tips
Store any leftover pie covered in the refrigerator where it will keep beautifully for up to 5 days. The texture will become more firm when chilled which some people actually prefer. You can also freeze individual slices wrapped tightly in plastic wrap and then aluminum foil for up to 3 months. Thaw overnight in the refrigerator and bring to room temperature before serving for the best texture and flavor experience.
Recipe FAQs
- → Can I use unsweetened coconut instead of sweetened?
Yes, you can substitute unsweetened coconut, but you may want to increase the sugar by about 2-3 tablespoons to compensate for the reduced sweetness. The texture will remain similar, though the final result may be slightly less sweet.
- → Why doesn't this pie need a crust?
The magic happens during baking when the flour in the batter settles and forms a subtle bottom layer while the coconut rises slightly to create a natural edge. The result is a self-contained dessert that doesn't require a traditional pie crust.
- → Can I use non-dairy milk instead of whole milk?
Yes, you can substitute with almond, coconut, or oat milk. Coconut milk works particularly well as it enhances the coconut flavor. Just be aware that the texture may be slightly less rich than when using whole milk.
- → How do I know when the pie is done baking?
The pie is done when the surface turns golden brown and a knife inserted into the center comes out clean. The center should be set but may still have a slight jiggle - it will continue to firm up as it cools.
- → How should I store leftover coconut pie?
Cover and refrigerate any leftovers for up to 3-4 days. The pie actually tastes wonderful chilled, though you can bring it to room temperature before serving if preferred.
- → Can this pie be frozen?
Yes, you can freeze the completely cooled pie for up to 2 months. Wrap it tightly in plastic wrap and then aluminum foil. Thaw overnight in the refrigerator before serving.