
 Pin
Pin
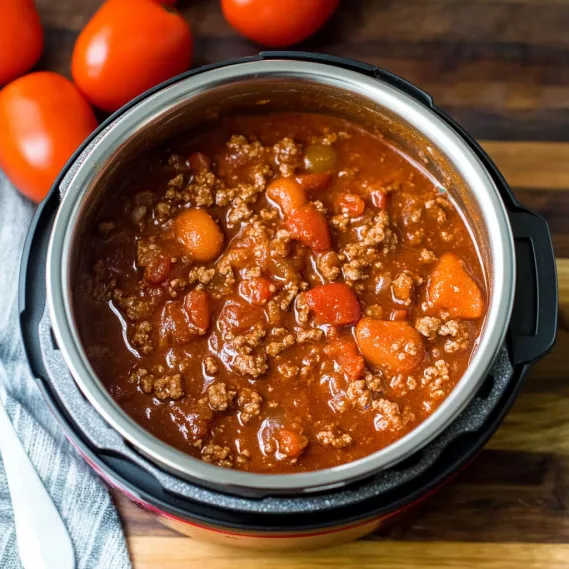
This hearty Instant Pot Chili has become my winter go-to when I need a comforting meal that satisfies the whole family. The pressure cooker transforms simple ingredients into a rich, flavorful dish in just a fraction of the time traditional chili requires.
I first developed this recipe during a particularly cold January when I was craving something substantial but didn't want to spend hours in the kitchen. Now my family requests it weekly, especially when we're hosting game day gatherings.
Ingredients
- 2-3 pounds lean ground beef: Gives this chili its hearty foundation while not adding excessive fat
- 1 onion finely chopped: Creates an aromatic base that enhances all other flavors
- 2 cloves garlic minced: For that essential depth no good chili should be without
- 1 can 28 oz diced tomatoes undrained: Provides both texture and rich tomato flavor
- 1 can 15 oz tomato sauce: Creates the perfect consistency without making the chili too thin
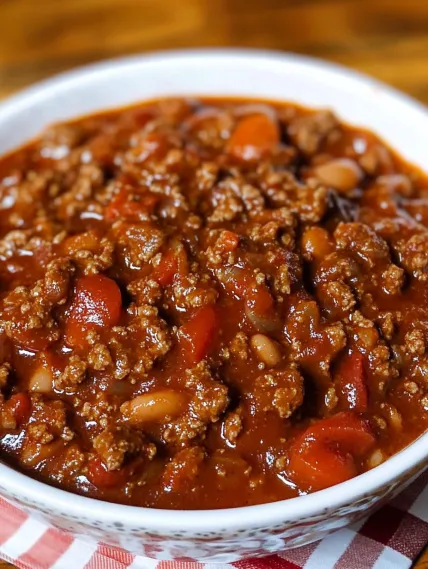
- 1 can 15 oz Bush's Chili Beans: Adds protein and traditional chili texture with minimal effort
- 2 Tbsp chili powder: Delivers that classic chili flavor profile with just the right amount of heat
- 2 tsp cumin: Adds earthy warmth that complements the beef beautifully
- 1 tsp salt: Enhances all the flavors without making the dish too salty
- 1 tsp pepper: Provides a subtle kick that balances the tomato acidity
How To Make Instant Pot Chili
- Brown The Meat:
- Place ground beef and onion in the inner pot of your 6-quart or larger Instant Pot. Set to sauté mode and cook until the beef is completely browned with no pink remaining and the onions have turned translucent and soft. This creates the flavor foundation for your entire chili. Be sure to drain thoroughly to remove excess fat.
- Combine Ingredients:
- Return the drained beef and onion mixture to the Instant Pot and add all remaining ingredients including the tomatoes, sauce, beans, and all seasonings. Stir thoroughly to ensure the spices are evenly distributed throughout the mixture and no pockets of dry ingredients remain.
- Pressure Cook:
- Close the Instant Pot lid securely and set the pressure release valve to the sealing position. Select High Pressure and set the timer for 30 minutes. This pressurized environment will infuse all the flavors together much more effectively than stovetop cooking.
- Natural Release:
- Once the cooking cycle completes, allow the Instant Pot to naturally release pressure for at least 10 minutes. This gradual depressurization prevents the chili from sputtering out of the valve and allows the flavors to settle. After 10 minutes, carefully perform a quick release for any remaining pressure.
My favorite thing about this chili is its versatility. Last winter, I made a double batch before a snowstorm hit, and we enjoyed it for days in different forms. We had it traditional style with cornbread the first night, over baked potatoes the second night, and as Frito pie for game day. The kids still talk about our "chili week" whenever the weather turns cold.
Storage and Reheating
This chili keeps wonderfully in the refrigerator for up to 4 days in an airtight container. The flavors actually intensify and meld together beautifully after a day or two, making it perfect for meal prep. When reheating, add a splash of beef broth if it seems too thick, as the beans continue to absorb liquid during storage.
For longer storage, portion the cooled chili into freezer-safe containers, leaving about half an inch of space at the top for expansion. Frozen chili maintains its quality for up to 3 months. Thaw overnight in the refrigerator before reheating on the stovetop or in the microwave until piping hot throughout.
Customization Options
The beauty of this Instant Pot Chili lies in its adaptability. For a spicier version, add a diced jalapeño with the onions or include a teaspoon of cayenne pepper with the spices. Prefer a milder chili? Reduce the chili powder to 1 tablespoon and focus on enhancing with smoked paprika instead.
For a more complex flavor profile, consider adding a tablespoon of unsweetened cocoa powder or a shot of espresso to the mix. These secret ingredients enhance the depth without making the chili taste like chocolate or coffee. Vegetarians can substitute the beef with two additional cans of beans like black beans and kidney beans, plus a cup of finely chopped mushrooms for that umami flavor.
Serving Suggestions
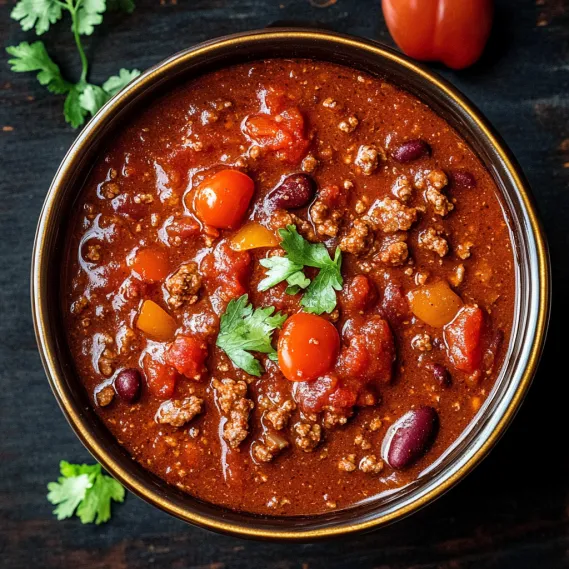
Transform this versatile chili into multiple meals throughout the week. Serve traditionally in bowls topped with shredded cheddar, sour cream, and green onions. For a heartier option, ladle over baked potatoes or sweet potatoes with a sprinkle of cheese.
My family particularly enjoys Frito Chili Pie, made by topping a bed of corn chips with warm chili and all the fixings. For a breakfast twist, spoon some chili over scrambled eggs and wrap in a warm tortilla for a satisfying breakfast burrito. I always keep a batch in the freezer for those busy weeknights when cooking from scratch just isn't happening.
Recipe FAQs
- → How do I adjust the spiciness of this chili?
To adjust the spiciness, you can add more chili powder, a pinch of cayenne pepper, or diced chili peppers. For less heat, reduce the chili powder or skip any added spicy ingredients.
- → What toppings go well with chili?
Popular toppings include shredded cheese, sour cream, diced green onions, chopped cilantro, crushed tortilla chips, or a dollop of guacamole for added flavor and texture.
- → Can I use other types of meat instead of ground beef?
Yes, you can substitute ground turkey, chicken, or even plant-based meat alternatives to suit your dietary preferences or needs.
- → How do I store leftover chili?
Let the chili cool to room temperature, then store it in an airtight container in the refrigerator for up to 4 days. You can also freeze it for up to 3 months if desired.
- → What side dishes pair well with this chili?
Pair this chili with cornbread, a fresh green salad, or baked potatoes for a complete and satisfying meal.
- → Can I make this chili without an Instant Pot?
Yes, you can make it on the stovetop or in a slow cooker by browning the meat, sautéing the onion, and simmering all ingredients together until the flavors meld.