
 Pin
Pin
This crispy Japanese katsu bowl with homemade tonkatsu sauce brings authentic restaurant flavor right to your kitchen table. The perfectly fried cutlet paired with fluffy rice and crunchy cabbage creates a satisfying meal that's both comforting and impressive.
I first learned to make katsu during my trip to Japan, where I was amazed by the contrast between the crunchy exterior and juicy interior. After numerous attempts at home, this version finally captures that magic, and it's become our Friday night tradition.
- Boneless pork chops or chicken breasts these provide the foundation for your katsu and should be evenly cut for consistent cooking
- All purpose flour creates the first layer of coating that helps the egg adhere
- Large egg acts as the essential binding agent for the panko breadcrumbs
- Panko breadcrumbs these Japanese style breadcrumbs are lighter and crispier than western varieties
- Vegetable oil choose a neutral oil with a high smoke point for proper frying
- Ketchup provides sweetness and tomato base for the tonkatsu sauce
- Worcestershire sauce adds complex umami flavor to the sauce
- Soy sauce contributes saltiness and depth to balance the sweetness
- Mirin this sweet rice wine is traditional but honey works as a substitute
- Dijon mustard adds subtle heat and tanginess to round out the sauce
- Garlic powder gives a mellow garlic flavor without the bits
- Japanese short grain rice sticky texture perfect for holding sauce
- Shredded cabbage provides fresh crunch and lightness to balance the fried katsu
- Green onion adds color and mild onion flavor as garnish
- Toasted sesame seeds optional but adds nutty flavor and visual appeal
How To Make Japanese Katsu Bowls with Tonkatsu Sauce
- Prepare the Meat
- Pound your pork chops or chicken breasts to an even thickness of about half an inch. This ensures quick and even cooking while keeping the meat tender. Season both sides generously with salt and pepper to build flavor from the beginning.
- Set Up Breading Station
- Arrange three shallow dishes in a row. Fill the first with flour, the second with beaten egg, and the third with panko breadcrumbs. Having everything in order makes the breading process neat and efficient.
- Bread the Cutlets
- Working with one piece at a time, dredge the meat in flour and shake off excess. Next, dip completely in the beaten egg, allowing excess to drip off. Finally, press firmly into the panko breadcrumbs, ensuring an even coating on all sides.
- Fry to Perfection
- Heat vegetable oil in a heavy skillet until it reaches about 350°F. You can test by dropping a few breadcrumbs in the oil they should sizzle immediately but not burn. Gently place the breaded cutlet in the hot oil and fry for 3 to 4 minutes per side until deeply golden brown and the internal temperature reaches 145°F for pork or 165°F for chicken.
- Rest and Slice
- Transfer the fried katsu to a wire rack or paper towel lined plate to drain excess oil. Let it rest for 3 minutes before slicing into half inch strips. This resting period allows the juices to redistribute within the meat for maximum juiciness.
- Make Tonkatsu Sauce
- While the katsu rests, whisk together all sauce ingredients in a small bowl until completely smooth. The sauce should have a thick but pourable consistency. Taste and adjust seasonings if needed.
- Assemble Your Bowl
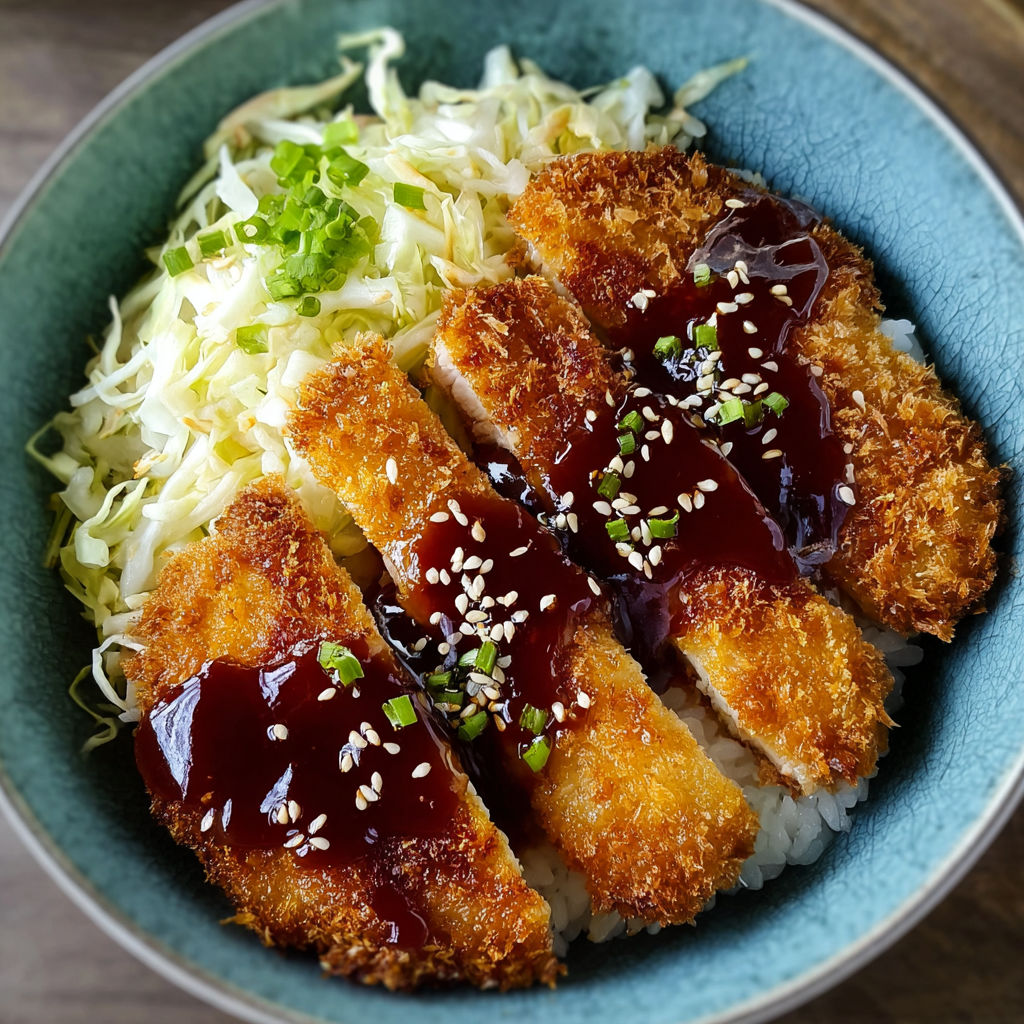
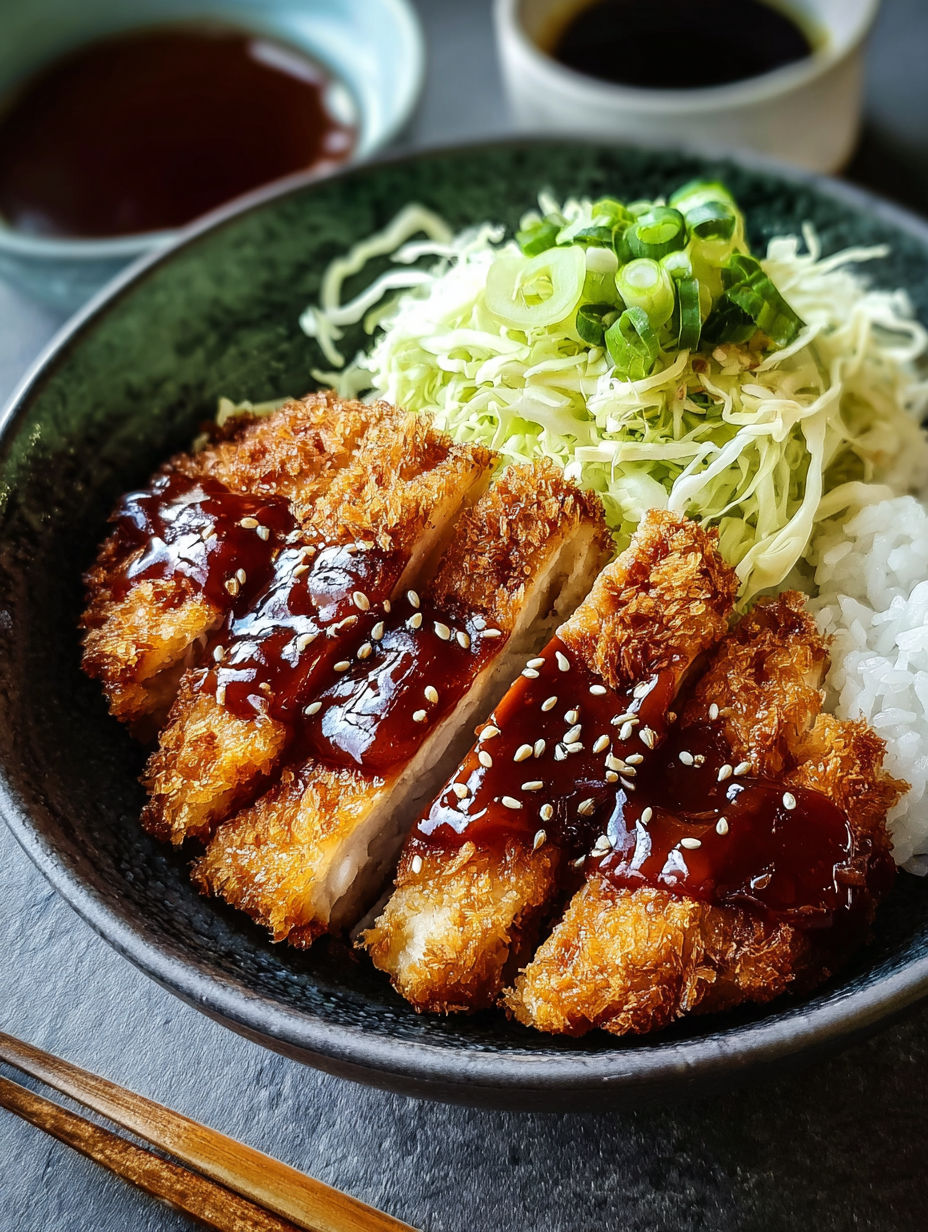
- Place a generous portion of warm rice in each serving bowl. Arrange the sliced katsu on top of the rice at a slight angle for visual appeal. Drizzle with the homemade tonkatsu sauce, then add a small mound of shredded cabbage alongside. Finish with a sprinkle of sliced green onions and toasted sesame seeds.
My family's favorite part is always the homemade tonkatsu sauce. The first time I made it, my son declared it better than the bottled version we used to buy. Now we keep a jar in the refrigerator at all times for dipping everything from vegetable tempura to french fries.
The Secret to Perfect Panko Coating
The key to achieving that signature crunchy katsu coating lies in how you work with the panko breadcrumbs. Unlike regular breadcrumbs, panko should be pressed firmly onto the meat rather than just rolled around. I discovered that letting the breaded cutlets rest in the refrigerator for 15 minutes before frying helps the coating adhere better during the frying process. For extra crunch, try toasting your panko in a dry pan until lightly golden before breading this creates an even more spectacular texture after frying.
Make It A Complete Japanese Meal
Transform your katsu bowl into a full Japanese dining experience by adding complementary sides. Miso soup makes an excellent starter with its warming umami flavor. For sides, consider quick pickled cucumbers or Japanese style potato salad which adds creamy texture to contrast with the crispy katsu. Edamame sprinkled with sea salt provides a protein rich appetizer that's fun to eat. If you want to include a light dessert, try serving fresh fruit with a small scoop of green tea ice cream to cleanse the palate. This combination creates a balanced meal that showcases the variety of Japanese cuisine beyond just the main dish.
Storage and Reheating Tips
Katsu is best enjoyed immediately after frying for maximum crispiness, but leftovers can still be delicious. Store any leftover katsu separate from the rice and cabbage in an airtight container in the refrigerator for up to 2 days. To reheat, avoid the microwave which will make the coating soggy. Instead, place the katsu on a wire rack over a baking sheet and heat in a 350°F oven for 7 to 10 minutes until hot and crispy again. The tonkatsu sauce can be stored in a sealed jar in the refrigerator for up to 2 weeks, making it perfect for meal prep. Cooked rice should be refrigerated separately and can be revived with a sprinkle of water when reheating.
Recipe FAQs
- → Can I bake the katsu instead of frying?
Yes, you can bake the breaded cutlets at 400°F (200°C) for about 20-25 minutes, flipping halfway through. Spray with a little oil before baking for better browning. The texture won't be quite as crispy as fried, but it's a healthier alternative.
- → What's the difference between tonkatsu and katsu?
Tonkatsu specifically refers to breaded and fried pork cutlets ('ton' means pork in Japanese), while katsu is the broader term that can apply to any breaded, fried cutlet including chicken (chicken katsu) or other proteins.
- → What can I substitute for panko breadcrumbs?
Regular breadcrumbs can work, though the texture won't be as light and crispy. For gluten-free options, you can use gluten-free panko, crushed rice cereal, or crushed cornflakes. The key is using something dry and crisp that will maintain texture during frying.
- → Can I make the tonkatsu sauce ahead of time?
Absolutely! The sauce actually develops more flavor when made ahead. Store it in an airtight container in the refrigerator for up to 2 weeks. Just give it a good stir before using as some separation might occur.
- → What sides pair well with katsu bowls?
Traditional Japanese sides like miso soup, pickled vegetables (tsukemono), cucumber salad, or edamame complement katsu bowls perfectly. For a more substantial meal, add a side of gyoza (dumplings) or a simple green salad with a rice vinegar dressing.
- → How do I prevent the breading from falling off during frying?
After breading, let the cutlets rest in the refrigerator for 15-30 minutes before frying. This helps the coating adhere better. Also, make sure your oil is at the proper temperature (around 350°F/175°C) and avoid flipping the cutlets too frequently during cooking.