
 Pin
Pin
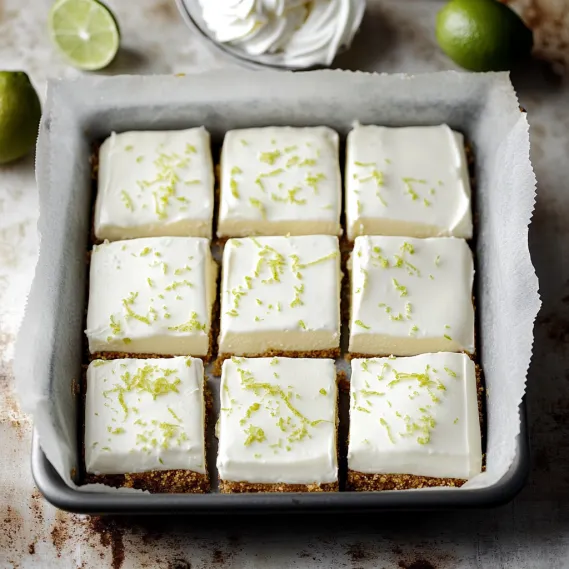
This key lime pie bar recipe has become my warm-weather dessert solution, delivering all the bright citrus flavor of traditional key lime pie but in a convenient, perfectly portioned square form.
I first created these bars for a backyard barbecue last summer, and they quickly became the most requested dessert among my friends. The combination of buttery crust, vibrant citrus filling, and cloud-like whipped cream topping creates an irresistible treat that vanishes within minutes whenever I serve it.
Ingredients
Cookie Crust
- Vanilla wafer cookies: create a perfect base with their subtle sweetness and delicate texture that complements the tangy filling
- Unsalted butter: binds the crust together while adding rich flavor; look for European style butter for extra richness
- Light brown sugar: adds depth and a slight caramel note that enhances the vanilla cookies
Key Lime Pie Filling
- Key lime zest: provides intense aromatic oils that deliver true citrus flavor; concentrate on the green part only avoiding bitter white pith
- Large egg yolks: create a silky smooth custard texture and rich mouthfeel; use fresh eggs at room temperature for best results
- Sweetened condensed milk: delivers perfect sweetness while helping the filling set properly; always use full fat version for proper texture
- Freshly squeezed lime juice: provides the signature tang; fresh juice makes an enormous difference compared to bottled varieties
Whipped Cream Topping
- Heavy whipping cream: with at least 36% fat content whips up into a stable cloud-like topping
- Powdered sugar: gently sweetens while stabilizing the cream without graininess
How To Make Key Lime Pie Bars
Prepare The Crust
Start by lining your baking pan with parchment paper, ensuring the edges hang over for easy removal later. This step is crucial for clean, photo-worthy bars. Grind vanilla wafers until they become fine crumbs, then mix thoroughly with melted butter and brown sugar until the mixture resembles wet sand. Press firmly and evenly into your prepared pan using a flat bottomed measuring cup or glass for a perfectly level base. Bake until just golden, about 13-15 minutes. The slight toasting enhances the buttery vanilla flavor.
Create The Filling
The secret to an exceptionally smooth filling is proper mixing technique. Beat egg yolks with lime zest for a full 4-5 minutes until noticeably lighter in color and thickened. This aerates the mixture and creates the perfect base. Add condensed milk and continue beating for the full recommended time, developing structure that will help your bars set properly. Fold in fresh lime juice last, as the acidity will begin to thicken the mixture immediately. Pour onto the cooled crust and bake just until set but still jiggly, about 15-17 minutes. Overbaking will ruin the silky texture.
Finish With Whipped Cream
For the perfect whipped cream topping, start with thoroughly chilled cream and a cold mixing bowl. Beat until firm peaks form, then switch to hand whisking for the final strokes to prevent over-whipping, which would create a grainy texture. Spread in an even layer over completely chilled filling using an offset spatula for a professional finish. The contrast between the tangy filling and lightly sweetened cream creates the perfect balance in each bite.
I absolutely adore the moment when fresh lime juice hits the condensed milk mixture and begins to thicken before your eyes. It's kitchen science at its most delicious. My grandmother taught me to use the back of a spoon to extract every possible drop of juice from each lime, a tip I still use decades later.
Make Ahead And Storage
These key lime pie bars are perfect for make ahead dessert planning. The bars will keep beautifully in the refrigerator for up to 4 days when stored in an airtight container. For longer storage, you can freeze the bars without the whipped cream topping for up to 3 months. Thaw overnight in the refrigerator and add fresh whipped cream before serving. The slight temperature difference between a fully chilled bar and one just cool enough to eat creates an interesting textural contrast that many people enjoy.
Ingredient Substitutions
While traditional key limes deliver authentic flavor, regular Persian limes work wonderfully when key limes are unavailable. You'll need fewer Persian limes due to their larger size, approximately 3-4 for the same amount of juice. For a graham cracker crust variation, substitute 1½ cups graham cracker crumbs for the vanilla wafers. Dairy free versions can be made using plant based butter for the crust and coconut cream whipped topping, though the filling requires traditional condensed milk for proper setting. For a fun twist, try adding a teaspoon of coconut extract to the filling for a tropical variation.
Serving Suggestions
Serve these refreshing bars directly from the refrigerator for the perfect summer dessert. For an elegant presentation, top each bar with a small dollop of additional whipped cream and a thin lime wheel or twisted zest. These bars pair beautifully with fresh berries on the side, particularly raspberries or blackberries, which complement the citrus notes. For an adult version, consider serving alongside a chilled limoncello or a mojito for a delightful dessert experience.
The History Of Key Lime Pie
The origin of key lime pie traces back to the Florida Keys in the late 19th century. Before refrigeration, sweetened condensed milk became a pantry staple that wouldn't spoil in the tropical heat. Innovative home cooks discovered that the acidic lime juice would thicken the milk without cooking, creating an early no bake version of the dessert. Traditional key lime pie never contained food coloring, despite misconceptions about its color. Authentic key lime pie filling has a pale yellow hue rather than green. These bars honor that tradition while updating the format for modern entertaining.
Recipe FAQs
- → Can I use regular limes instead of key limes?
Yes, you can substitute regular limes, but it may slightly alter the flavor. Key limes are more aromatic and tart, offering the classic taste for this dessert.
- → How should I store these bars?
Store the bars tightly covered in the refrigerator for up to 4 days. They can also be frozen and defrosted for later enjoyment.
- → Can I make these bars in advance?
Yes, these bars are perfect for making ahead. Refrigerate them overnight to enhance the flavor and make slicing easier.
- → What’s the best way to slice the bars neatly?
Use a sharp knife dipped in warm water and wiped clean between cuts for clean, neat slices.
- → Can I use a different type of cookie for the crust?
Yes, graham crackers or digestive biscuits can be used instead of vanilla wafer cookies for a different flavor profile.