
 Pin
Pin
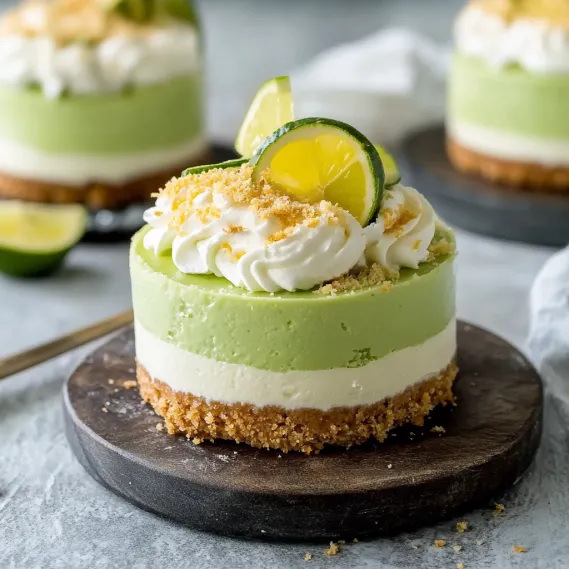
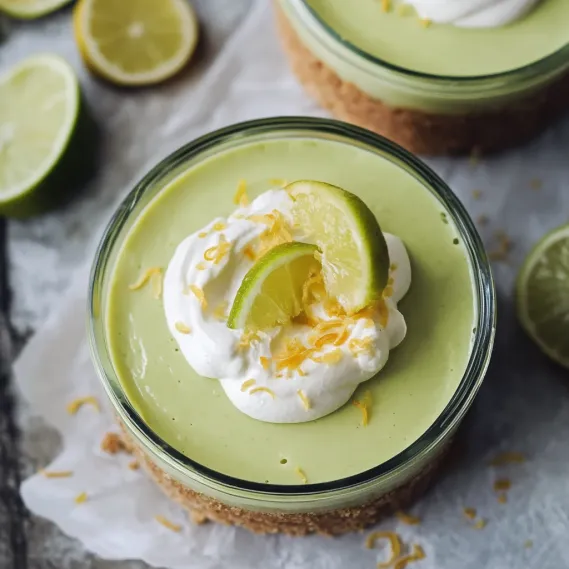
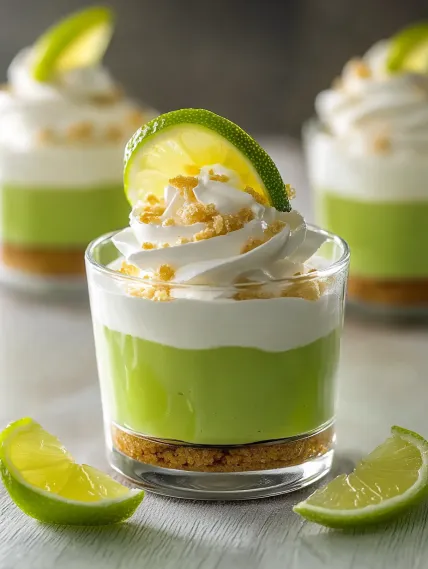
This refreshing no-bake Key Lime Cheesecake Jar recipe transforms tangy citrus and creamy cheese into individual parfaits that brighten any occasion. The perfect balance of sweet and tart flavors creates a dessert that's impressive yet remarkably simple to prepare.
I first created these jars for my sister's summer garden party when the temperature was too hot to even consider turning on the oven. The guests were fighting over the last jar, and now they've become my signature dessert for warm weather gatherings.
Ingredients
- Graham crackers: One cup crushed provides the perfect crunchy foundation and traditional cheesecake flavor
- Melted butter: Binds the crust and adds richness look for unsalted for better flavor control
- Cream cheese: Forms the luxurious base choose full-fat Philadelphia for the creamiest texture
- Powdered sugar: Dissolves perfectly without graininess sift first for ultimate smoothness
- Key lime juice: The star ingredient genuine Key limes offer more complex flavor than regular limes
- Vanilla extract: Balances acidity with warm notes use pure rather than imitation for best results
- Whipped topping: Creates lightness homemade whipped cream works beautifully too
- Lime slices and zest for garnish: Adds visual appeal and intensifies the citrus flavor
How To Make No-Bake Key Lime Cheesecake Jars
- Prepare the crust:
- Thoroughly mix graham cracker crumbs with melted butter until the texture resembles wet sand. The mixture should hold together when pressed between your fingers without being overly greasy.
- Create the foundation:
- Divide the crust mixture evenly among six glass jars, pressing firmly with the back of a spoon to create a compact layer. Take time to ensure the surface is level for the prettiest presentation.
- Whip the base:
- Beat softened cream cheese until completely smooth and free of lumps, about 2 minutes on medium speed. Room temperature cream cheese is essential here to achieve silky smoothness.
- Build the flavor:
- Gradually incorporate powdered sugar, key lime juice, and vanilla extract, mixing thoroughly between each addition. The mixture will initially appear slightly curdled but will smooth out as you continue mixing.
- Lighten the texture:
- Using a rubber spatula, gently fold the whipped topping into the cream cheese mixture using an under-and-over motion. Maintain a light touch to preserve the air bubbles that create the mousse-like consistency.
- Assemble the jars:
- Carefully spoon or pipe the filling over each crust, creating an even layer with a smooth top. Leave about half an inch of space for garnishes if desired.
- Chill thoroughly:
- Refrigerate the assembled jars for at least two hours, though overnight is ideal for flavors to fully develop and the texture to set perfectly.
Key limes truly make all the difference in this recipe. I discovered this while visiting my aunt in Florida, where she introduced me to authentic Key limes from her backyard tree. The intense aromatic quality and complex flavor profile of real Key limes elevates this dessert from wonderful to extraordinary.
Storage Tips
These cheesecake jars maintain peak freshness for up to three days when stored in the refrigerator with airtight lids. The graham cracker crust will gradually soften slightly over time, which many people actually prefer. If making several days in advance, consider adding the crust just before serving for maximum crunch.
Ingredient Substitutions
This recipe welcomes creative adaptations to suit dietary needs or pantry availability. For a gluten-free version, substitute gluten-free graham crackers or vanilla cookies. Dairy-free cream cheese and coconut whipped cream work beautifully for those avoiding dairy. Traditional limes can replace Key limes, though the flavor will be slightly less complex add an extra teaspoon of zest to compensate.
Serving Suggestions
These versatile jars shine as a standalone dessert but can easily become part of a more elaborate presentation. Consider serving alongside fresh berries for a color contrast, or create a dessert board with various toppings like toasted coconut, white chocolate shavings, and candied lime peel for guests to customize their jars. For special occasions, accompany with chilled prosecco or a dessert wine.
The History Behind Key Lime Desserts
The tradition of Key lime desserts originated in the Florida Keys in the late 19th century. Before refrigeration was common, canned sweetened condensed milk provided a shelf-stable dairy option. Combined with the abundant local Key limes and eggs, creative cooks developed the iconic Key Lime Pie. This jar version represents a modern interpretation of those beloved flavor combinations, reimagined for contemporary entertaining.
Recipe FAQs
- → Can I use regular lime juice instead of key lime juice?
Yes, you can substitute regular lime juice for key lime juice, though the flavor may be slightly less tart and distinct.
- → How far in advance can I prepare these jars?
You can prepare these jars up to one day in advance. Store them in the refrigerator until serving.
- → Can I freeze these jars for later use?
Yes, you can freeze the jars for up to one month. Thaw in the refrigerator before serving.
- → What toppings pair well with these jars?
Garnish with lime slices, lime zest, whipped cream, or even crushed graham crackers for added texture and flavor.
- → Can I use a different type of crust for this dessert?
Absolutely! You can try crushed digestive biscuits, crushed cookies, or even a chocolate crust for a unique twist.