
 Pin
Pin
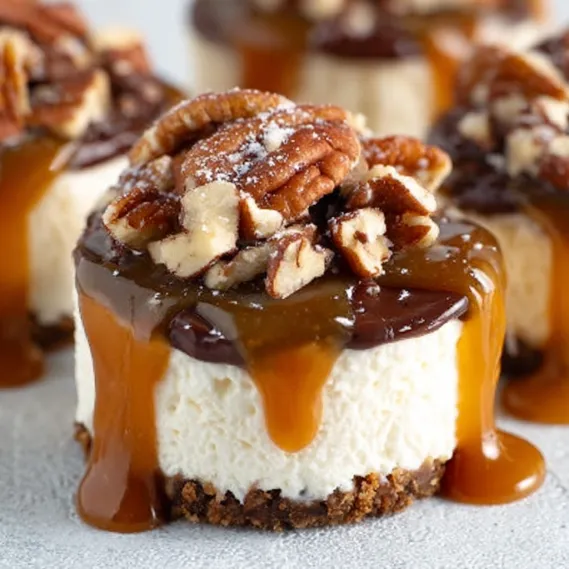
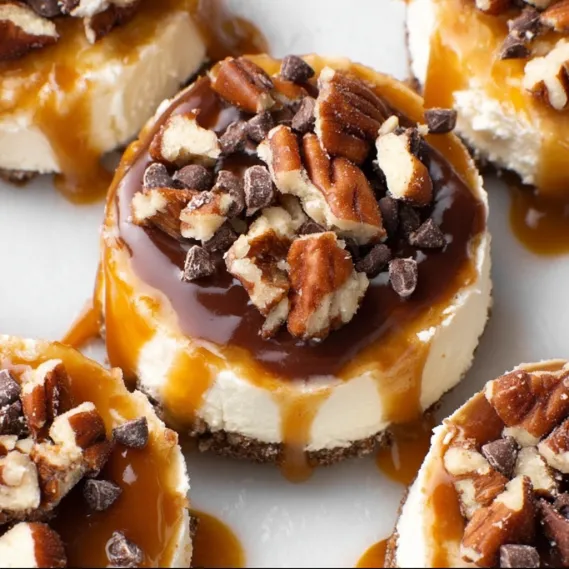
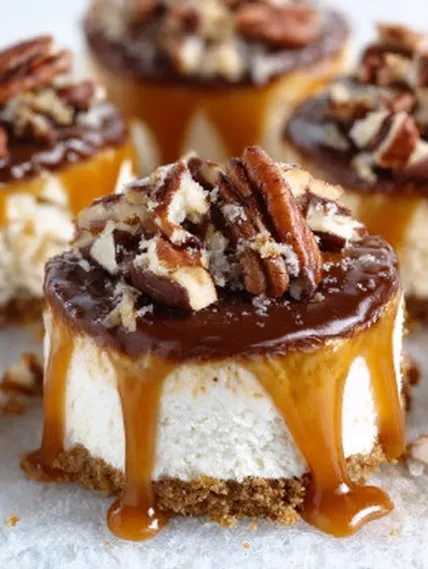
This indulgent no-bake turtle mini cheesecake recipe transforms classic turtle candy flavors into elegant individual desserts perfect for gatherings. The combination of creamy cheesecake, rich chocolate, buttery caramel, and crunchy pecans creates an impressive dessert that requires zero baking time.
I first created these for my daughters birthday when the summer heat made traditional baking unbearable. The look of delight when she bit into that first creamy cheesecake topped with gooey caramel convinced me these would become our signature celebration dessert.
Ingredients
- Chocolate graham cracker crumbs: provide the perfect chocolatey base that complements the turtle flavor profile
- Unsalted butter: binds the crust together use quality butter for best flavor
- Cream cheese: forms the foundation of our filling Philadelphia brand offers the best texture and tanginess
- Granulated sugar: sweetens without overpowering look for pure cane sugar
- Vanilla extract: enhances the creamy notes use pure extract not imitation for best results
- Heavy whipping cream: creates lightness in the filling must be very cold for proper whipping
- Caramel sauce: delivers the signature turtle flavor homemade or store bought both work beautifully
- Chopped pecans: add essential crunch and nutty flavor toast them briefly for enhanced flavor
- Chocolate chips: melted for drizzling use semisweet for balanced flavor
How To Make No-Bake Turtle Mini Cheesecakes
- Prepare the chocolate crust:
- Combine graham cracker crumbs with melted butter until every crumb is moistened. The mixture should hold together when pressed between your fingers without being overly greasy. Press firmly into the bottom of lined muffin tins using the back of a measuring cup to create an even compact layer. Refrigerate for at least 15 minutes to set properly.
- Whip the filling to perfection:
- Beat room temperature cream cheese until absolutely smooth with no lumps remaining about 2 minutes on medium speed. Add sugar gradually while mixing to ensure it dissolves completely then incorporate vanilla. In a separate chilled bowl whip cold heavy cream until stiff peaks form meaning the cream stands straight up when beaters are lifted. Fold whipped cream into cheese mixture using a gentle hand over hand motion to maintain airiness.
- Layer and chill:
- Divide the filling evenly among prepared crusts filling each cup nearly to the top. Use an offset spatula to create perfectly smooth surfaces. Cover loosely with plastic wrap avoiding contact with the filling surface. Refrigerate at least 4 hours though overnight chilling produces the best texture and flavor development.
- Create the turtle topping magic:
- Warm caramel sauce slightly for easier drizzling. Spoon over each chilled cheesecake allowing it to cascade over the edges. Sprinkle generous amounts of chopped pecans pressing gently to adhere to the caramel. Melt chocolate chips in short microwave bursts stirring between each until smooth. Transfer to a piping bag or ziplock with corner snipped and create artistic drizzles across each mini dessert.
My grandmother first introduced me to turtle candies during holiday seasons and these cheesecakes became my modern tribute to her. The moment when caramel meets the cold creamy filling creates that perfect temperature contrast that simply makes people close their eyes with pleasure when taking their first bite.
Perfect Make-Ahead Dessert
These mini cheesecakes actually improve with a day of rest in the refrigerator allowing flavors to meld beautifully. Prepare them up to three days before your event storing them covered in the refrigerator. Add the toppings within 24 hours of serving for best appearance. Their individual portions make them ideal for buffets dinner parties or holiday gatherings where guests can easily help themselves.
Serving Suggestions
Transform these mini cheesecakes into an elegant plated dessert by placing each on a small pool of additional caramel sauce garnished with a perfect pecan half and mint leaf. For special occasions add a small scoop of vanilla bean ice cream alongside. During holiday gatherings arrange them on a tiered stand interspersed with fresh berries and mint sprigs for a stunning visual presentation that guests will photograph before devouring.
Creative Variations
The basic recipe provides endless opportunities for customization. Replace the caramel with fruit compotes like raspberry or blueberry for a fresher flavor profile. Swap pecans for other nuts like toasted walnuts macadamias or pistachios. Create a mocha version by adding instant espresso powder to the filling. For holidays incorporate seasonal flavors such as pumpkin spice in fall peppermint during winter or lemon in spring. The versatile base recipe welcomes your creative touches.
Recipe FAQs
- → How do I prevent lumps in the cheesecake filling?
Ensure that the cream cheese is at room temperature before mixing. This helps create a smooth and creamy filling without lumps.
- → Can I use a different crust base?
Yes, you can use any type of cookie crumbs, such as vanilla wafers or digestive biscuits, instead of chocolate graham crackers.
- → How long should the mini cheesecakes chill before serving?
Refrigerate the cheesecakes for at least 4 hours or until fully set. Overnight chilling works best for optimal firmness and flavor.
- → Can I replace the pecans with another topping?
Absolutely! You can substitute pecans with walnuts, almonds, or even toffee bits for a different flavor and crunch.
- → How should I store the mini cheesecakes?
Store the mini cheesecakes in an airtight container in the refrigerator for up to 3 days. For longer storage, freeze them without the toppings and add toppings when ready to serve.