
 Pin
Pin
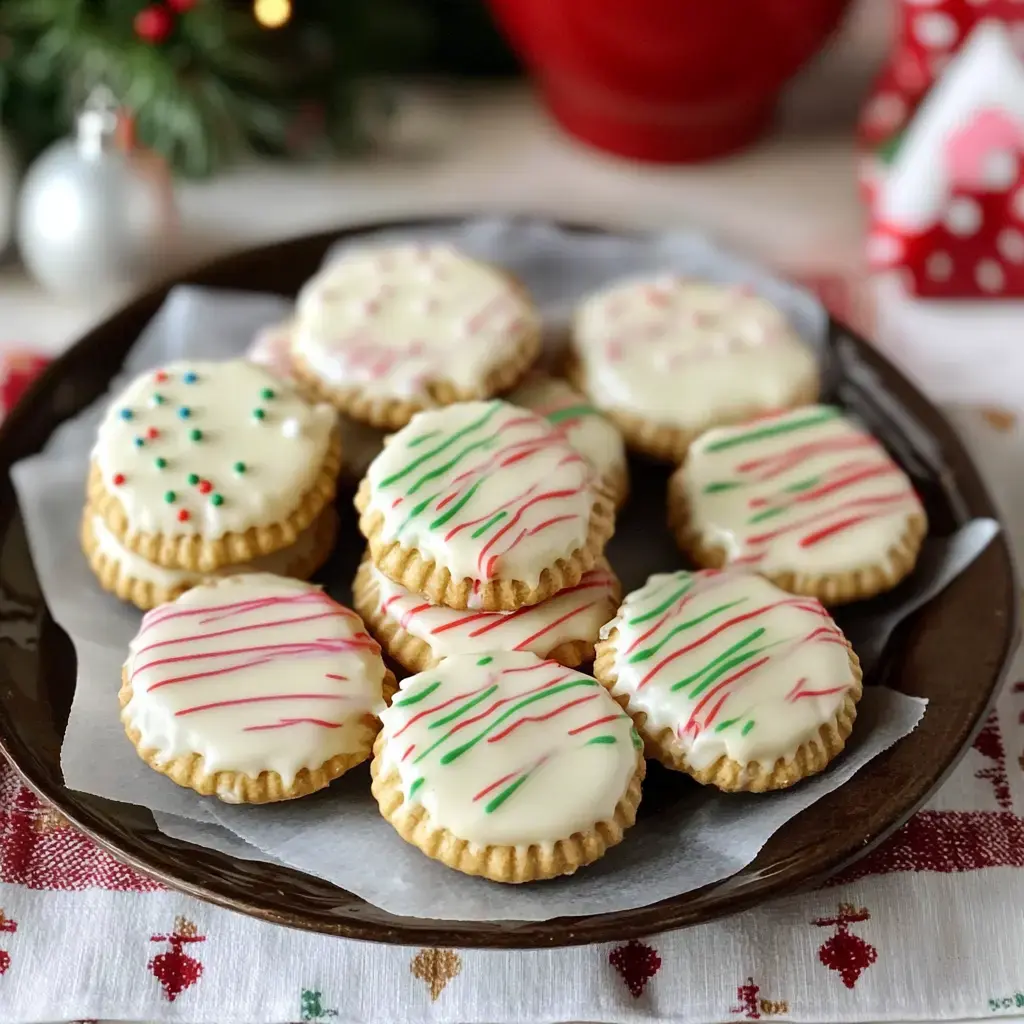
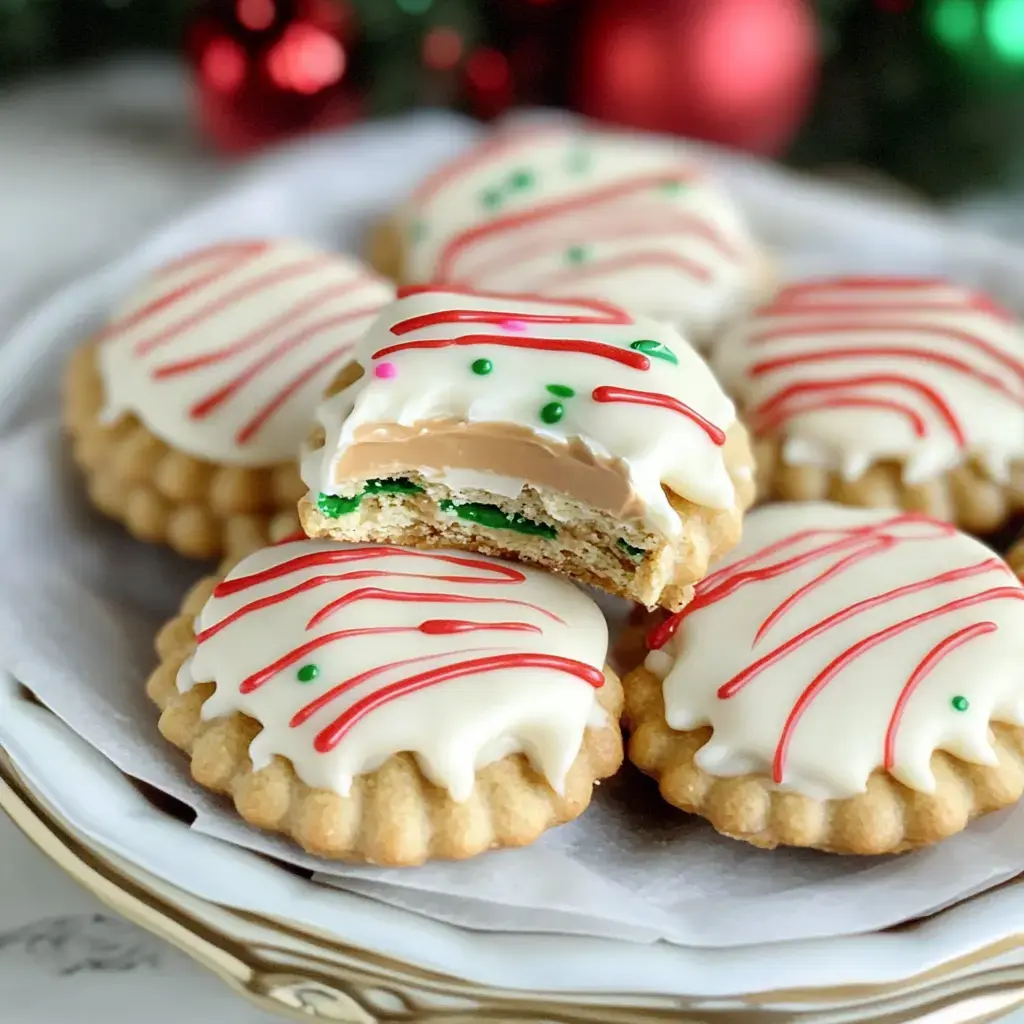
Whip up these fast Ritz Cracker Cookies whenever you crave something sweet. With just three ingredients from your pantry, you'll create snacks that blend amazing flavors. They're perfect for gatherings or solo snacking - combining crunchy crackers with a deliciously sweet outer layer.
Benefits of These Treats
No baking required and super quick to prepare. They're ideal for busy folks or beginner dessert makers. Switch up your toppings or fillings to match any occasion. The combo of salty and sweet keeps people coming back for another bite.
What You Need
- Ritz Crackers: For that salty crunch base
- Peanut Butter: Opt for the creamy variety
- White Candy Coating: Adds the sweetness
- Food Color: Optional for decorative touches
How To Make Ritz Cracker Cookies
- Put Peanut Butter:
- Spread onto a single cracker. Don't go right to the edges.
- Create Sandwich:
- Top with another cracker. Lightly press together.
- Heat Coating:
- Microwave white coating in short bursts. Mix every 20 seconds until it's runny.
- Coat Sandwiches:
- Submerge each cracker sandwich completely.
- Cool Down:
- Arrange on wax paper until firm.
- Add Color:
- Mix food coloring into leftover coating if desired. Transfer to a ziplock bag and snip a tiny hole.
- Decorate:
- Drizzle colored coating across cookies.
- Rest:
- Allow to fully harden before serving.
What Makes Them Special
Just three ingredients create magic. The blend of buttery crackers, creamy peanut butter, and sweet coating hits all the right notes. Better make a big batch as they'll vanish quickly. They're simple but taste like you spent hours in the kitchen.
Perfect Party Treats
Go basic or fancy with these. Change colors to match the season. Try swapping in chocolate coating. Add some fun sprinkles. They'll fit right in at any gathering or just munch them at home while watching TV.
Beginner-Friendly Sweets
You don't need any cooking background. Just your microwave and some counter room. Kids love joining in on the fun. They're enjoyable to decorate and almost impossible to mess up.
Tips For Success
Go easy on the peanut butter or you'll create a sloppy mess. Heat the coating gradually to avoid lumps. Let them set completely or they'll fall apart. Stick them in the fridge if you can't wait long.
Storage Advice
Store in an airtight container at room temperature. They'll stay good for weeks. Move to the fridge during hot weather. Layer with parchment so they won't stick together. You can even freeze them - just thaw before serving.
Troubleshooting
Is your coating too thick? Stir in a drop of oil. Too runny? Add more coating mix. Cookies breaking while dipping? Let them sit longer first. Want extra fancy treats? Try coating them twice.
Summary
Like these? Try sweet nut balls next. Or dip some pretzels. Both quick and easy.
Recipe FAQs
- → Rather use dark coat?
Any sweet coat works fine. Dark's less sweet. Milk kind's real good. Mix kinds for fun. Just melt it slow.
- → Need em without wheat?
Get special crackers. Check all your stuff. Rice ones work good. Some corn ones too. Watch store brands.
- → Can't use nuts?
Seed butter works great. Sun butter's nice. Soy stuff spreads good. Cookie spread works too. Just need thick stuff.
- → Where to keep em?
Box em up tight. Cold keeps em firm. Good bout two weeks. Stack with paper between. Don't let get hot.
- → Want em fancy?
Shake sprinkles on quick. Swirl two coat colors. Make em all same size. Line em up nice. Maybe wrap em pretty.
- → Getting too messy?
Let coat cool bit. Work in small groups. Keep stuff cold. Clean tools lots. Paper under helps.
- → Taking em places?
Pack em real careful. Keep em cold. Box with sides. Put paper between. Maybe take extra.
- → Need em super fast?
Buy ready crackers. Use easy spread stuff. Quick-melt coating. Skip fancy tops. Still taste good.
- → Making big batch?
Work in small groups. Keep stuff ready. Have extra everything. Don't rush the dip. Cool each group good.
- → Coat not smooth?
Melt it slower. Stir lots while warm. Strain lumps out. Add bit of oil. Keep it warm not hot.
- → Want different taste?
Try mint coating. Add cookie bits. Mix in spice. Crush nuts on top. Even salt works nice.
- → Crackers getting soft?
Work faster maybe. Keep em dry good. Don't touch wet hands. Fresh crackers help. Let coat set quick.