
 Pin
Pin
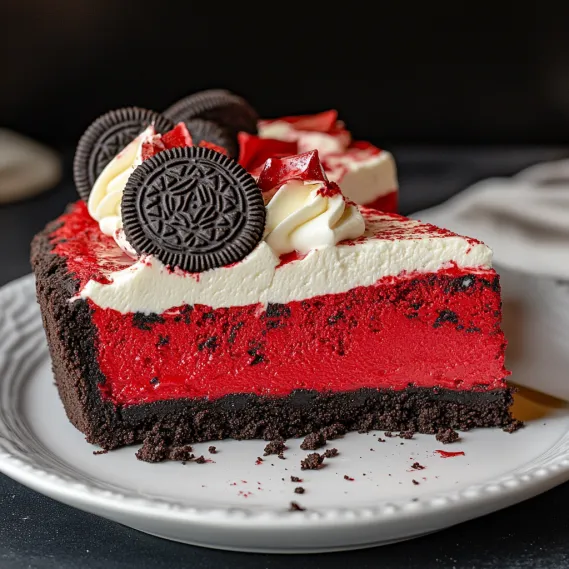
This red velvet Oreo cheesecake combines two beloved desserts into one show-stopping treat that's perfect for special occasions. The deep crimson cheesecake studded with chunks of Oreo cookies sits atop a chocolate cookie crust for a dessert that's as beautiful as it is delicious.
I first made this cheesecake for my daughter's birthday celebration and the entire family fell silent while devouring it. Now it's requested for nearly every special gathering we host, especially during the holiday season when that vibrant red color feels extra festive.
Ingredients
- Oreo cookies: for both the crust and filling provide that distinctive chocolate flavor and wonderful textural contrast
- Full fat cream cheese: delivers the perfect richness and smooth texture essential for a proper cheesecake
- Sour cream: adds tanginess that balances the sweetness while creating a silky mouthfeel
- Red gel food coloring: gives that vibrant red velvet hue without adding too much liquid to the batter
- Cornstarch: helps stabilize the filling and prevents those dreaded cracks
- Vanilla extract: enhances all the flavors and adds wonderful aromatic notes
How To Make Red Velvet Oreo Cheesecake
- Prepare the Oreo crust:
- Process whole Oreos with centers intact until they become fine crumbs. Mix with melted butter and sugar until moistened, then press firmly into your springform pan creating an even layer on the bottom and partially up the sides. The key is pressing firmly to create a compact base that will hold together when sliced.
- Mix the cheesecake batter:
- Beat room temperature cream cheese until completely smooth before adding any other ingredients. This crucial step ensures your cheesecake will have no lumps. Add sugar, sour cream, vanilla, heavy cream, cornstarch and red food coloring, mixing until just combined. Overbeating introduces air bubbles that can cause cracks.
- Add eggs carefully:
- Mix eggs separately first, then incorporate them slowly into the batter on low speed. Stop mixing as soon as they're incorporated and finish by hand. This gentle approach prevents incorporating excess air while ensuring everything is well combined.
- Layer and bake:
- Pour half the ruby-red batter over the cooled crust, sprinkle with chopped Oreos, then add remaining batter. The low and slow baking method starts at 300°F then reduces to 225°F without opening the door. This gradual approach prevents the dramatic temperature changes that often cause cheesecakes to crack.
- Cool gradually:
- The cooling process is equally important as the baking. Let the cheesecake cool in the turned-off oven for an hour, then with the door cracked for another hour before moving to room temperature. This prevents the sudden temperature change that can cause sinking and cracking.
The Oreos are truly the star ingredient in this recipe. I love how they transform from crust to filling with different textures in each application. My husband actually proposed the idea of adding Oreo chunks to the filling after trying a similar version at a local bakery, and his suggestion turned out to be brilliant.
Serving Suggestions
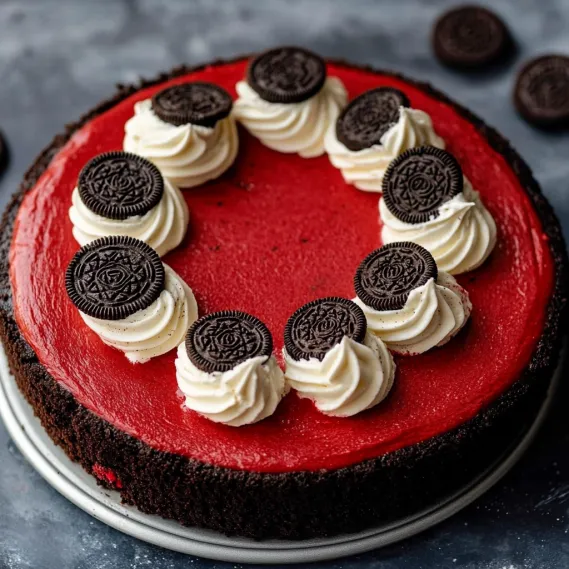
This decadent cheesecake stands beautifully on its own, but adding a garnish of whipped cream, chocolate drizzle, and chopped Oreos takes it to another level of elegance. For an extra special presentation, serve each slice with a small scoop of vanilla ice cream and a light dusting of cocoa powder. The contrast of temperatures and textures creates an unforgettable dessert experience.
Make-Ahead Instructions
This cheesecake actually improves with time as the flavors meld together. You can make it up to three days before serving and keep it refrigerated. For the freshest presentation, add the whipped cream, chocolate drizzle, and cookie garnishes just before serving. If you need to prepare even further ahead, the fully baked and cooled cheesecake can be wrapped tightly and frozen for up to three months. Thaw overnight in the refrigerator before decorating and serving.
Troubleshooting Tips
If your cheesecake develops cracks despite following all instructions, don’t worry. The chocolate drizzle and whipped cream topping will cover any imperfections beautifully. For a creamier texture, make sure all dairy ingredients are truly at room temperature before beginning. If your crust seems too crumbly when slicing, try freezing the cheesecake for about 30 minutes before cutting with a warm, clean knife.
The History of Red Velvet
Red velvet cake originated during the Victorian era when cocoa powder would react with acidic ingredients to produce a reddish-brown hue. Modern recipes typically use food coloring to achieve the vibrant red color we associate with this dessert today. This cheesecake version combines that classic flavor profile with the beloved Oreo cookie, creating a contemporary dessert that honors both traditions while creating something uniquely delicious.
Recipe FAQs
- → How do I prevent my cheesecake from cracking?
Bake the cheesecake at a low temperature and allow it to cool gradually in the oven. Avoid overmixing the batter, as excess air bubbles can lead to cracks.
- → What is the purpose of red gel food coloring?
The red gel food coloring gives the cheesecake its classic red velvet hue without altering the texture of the batter. Use gel-based for vibrant color.
- → Can I use a different crust instead of Oreo cookies?
Yes, you can substitute crushed graham crackers, vanilla wafers, or chocolate cookies for the crust to suit your taste preferences.
- → Can this cheesecake be made ahead of time?
Absolutely! Prepare the cheesecake the day before serving, allowing it to chill in the refrigerator overnight for optimal flavor and texture.
- → What’s the best way to slice the cheesecake cleanly?
Use a sharp knife warmed under hot water before each cut. Wipe the knife clean between each slice to ensure neat, professional-looking servings.
- → How long can I store this cheesecake in the fridge?
Store leftover cheesecake in an airtight container in the refrigerator for up to 5 days.