
 Pin
Pin
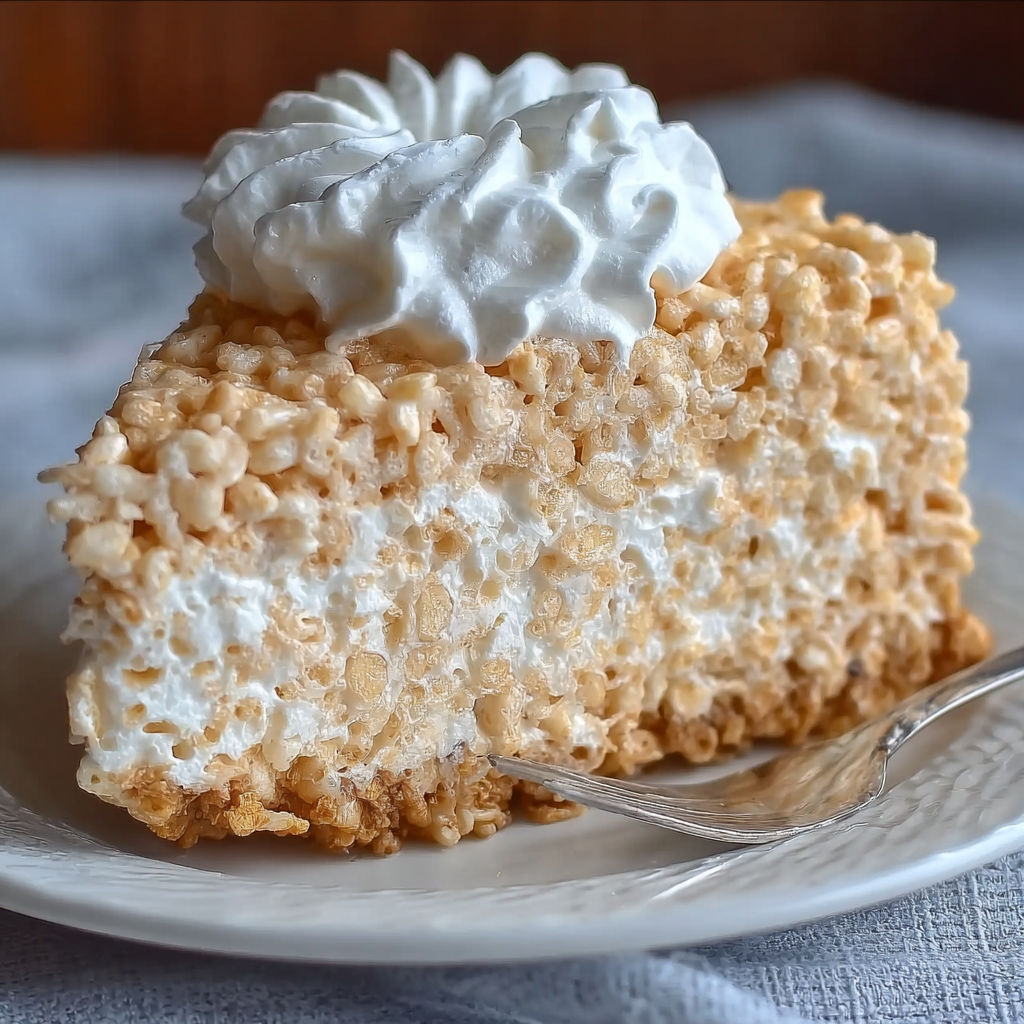
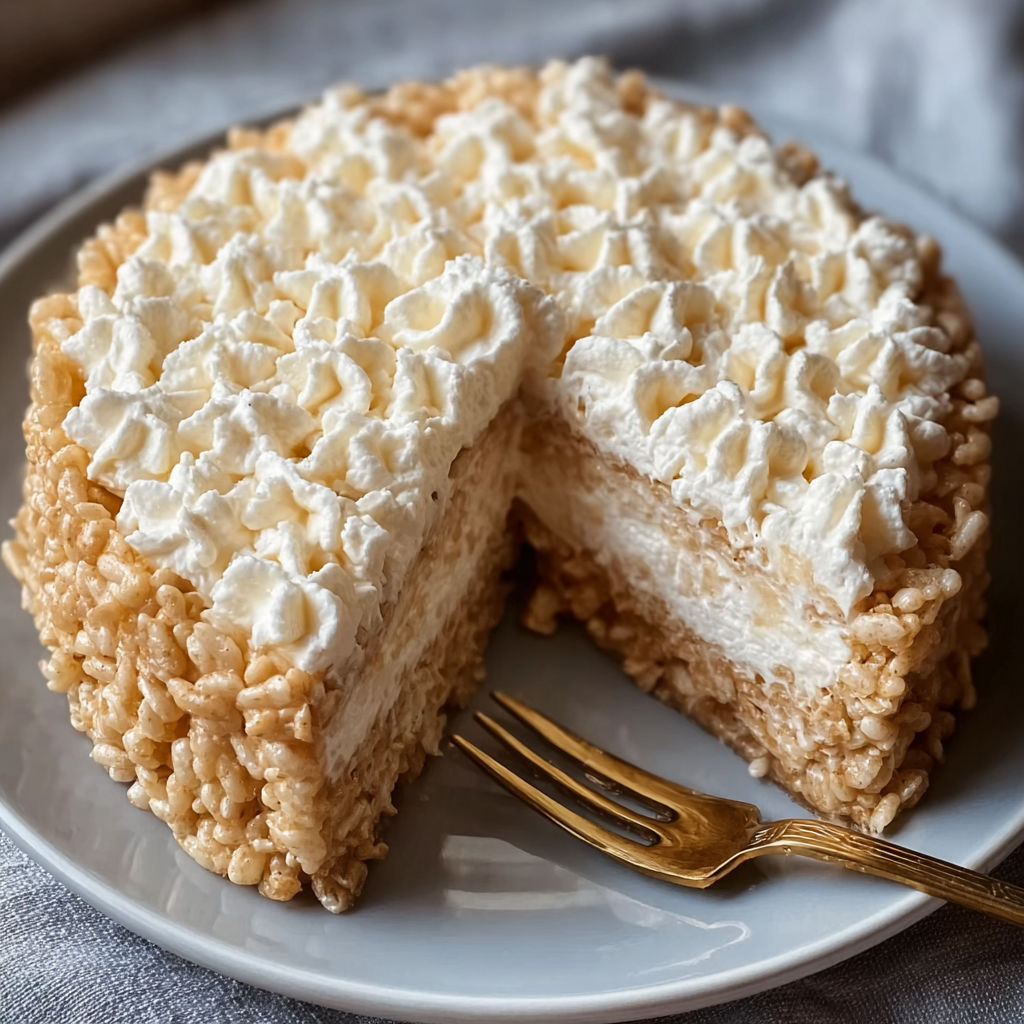
This Rice Krispy Treat No Bake Cheesecake has been a family favorite for celebrations and casual gatherings alike. The playful crunch of the cereal crust paired with the tangy, smooth cheesecake filling is a delightful twist on a classic dessert. I came up with this recipe one summer when it was too hot to turn on the oven, and now it is one of my most requested treats for every occasion.
The first time I made this dessert, everyone was intrigued by the clever use of cereal for the crust. They were hooked after the first bite and now, they keep asking for it anytime we have a family potluck.
Ingredients
- For the Crust:
- Rice Krispies cereal: 6 cups of airy, crispy texture forming the unique base of the cheesecake
- Salted butter: ¼ cup for a rich buttery taste that balances the sweetness
- Miniature marshmallows: 10 oz bag to perfectly bind the crust
- For the Filling:
- Cream cheese: 8 oz softened for that classic cheesecake tang
- Granulated sugar: ½ cup to lightly sweeten the filling without overpowering it
- Pure vanilla extract: 1 tsp to enhance the overall flavor
- Marshmallow crème: 7 oz jar for incredible sweetness and a fluffy consistency
- Cool Whip: 8 oz tub thawed for an airy cheesecake texture
- For Garnish optional:
- Whipped cream: to add a decorative and creamy finishing touch
- Cubed store-bought or homemade Rice Krispy Treats: for a playful topping
How To Make Rice Krispy Treat No Bake Cheesecake
- Prep the Pan:
- Generously grease a 9- or 10-inch springform pan using nonstick spray for easy release before serving.
- Make the Crust:
- In a medium saucepan over low heat, melt the butter and miniature marshmallows together. Stir constantly until completely smooth. Pour the mixture over the Rice Krispies in a large bowl and stir it until evenly coated.
- Form the Crust:
- Transfer the sticky Rice Krispies mixture to the prepared pan. Using a greased spatula or glass, press it down firmly covering the bottom and slightly up the sides. Let the crust sit at room temperature for 15 to 20 minutes to set completely.
- Prepare the Filling:
- Beat softened cream cheese, sugar, and vanilla in a large bowl or stand mixer for about 1 minute until silky and smooth. Add marshmallow crème and mix until fully combined. Gently fold in thawed Cool Whip using a spatula to preserve its light and airy texture.
- Assemble the Cheesecake:
- Pour the prepared filling into the crust. Smooth the top using an offset spatula or the back of a spoon so that it looks polished.
- Chill the Cheesecake:
- Refrigerate the cheesecake for at least 2 hours. This step ensures the filling firms up properly and slices cleanly.
- Garnish and Serve:
- Before serving, decorate with dollops or piped whipped cream around the edges. Top with cubed Rice Krispy Treats for a whimsical finishing touch. Carefully remove the springform collar, and use a warm knife to slice for neat and clean presentation.

One of my fondest memories of this recipe was making it with my niece for her 8th birthday. She loved pressing the Rice Krispies into the pan, calling it her favorite part. Now it's our go-to dessert to make together.
Storage Tips
Store the cheesecake covered tightly in the refrigerator for up to 3 days. For longer preservation, freeze individual slices in airtight containers. Before serving, let them sit at room temperature for 15 minutes for the best texture.
Ingredient Substitutions
If you prefer, homemade whipped cream can replace Cool Whip in the filling. For a unique spin on the crust, try using cocoa-flavored cereal to add a chocolatey flair.
Serving Suggestions
This cheesecake pairs beautifully with fresh berries or a drizzle of chocolate sauce for added richness. For holidays, sprinkle crushed peppermint or drizzle with caramel for a festive twist.
Cultural Context
Marshmallow-based treats have long been an American favorite, evoking a sense of nostalgia and fun. This recipe blends that playful childhood treat with the elegance of a no-bake cheesecake, creating a dessert that bridges the gap between old and new.
This Rice Krispy Treat No Bake Cheesecake is not only simple to put together but also guaranteed to impress. Whether you pair it with your favorite toppings or leave it in its classic form, it is a dessert that brings a smile to everyone’s face. Enjoy this light yet indulgent treat, perfect for any special occasion or casual get-together.
Recipe FAQs
- → Can I use homemade marshmallow crème instead of store-bought?
Yes, homemade marshmallow crème works just as well as store-bought. Just ensure it has a thick, spreadable consistency.
- → How long does the cheesecake need to chill?
The cheesecake should chill for at least 2 hours, or until the filling is firm and holds its shape when sliced.
- → Can I make the crust ahead of time?
Yes, you can prepare the Rice Krispy crust up to a day in advance. Store it covered at room temperature until ready to use.
- → How do I ensure clean cheesecake slices?
Use a warm knife to slice the cheesecake. Wipe the blade clean between each cut for the best results.
- → What alternatives can I use for the whipped topping?
You can substitute Cool Whip with stabilized whipped cream or homemade whipped cream for a similar airy texture.
- → Can I add other flavors to the filling?
Yes, you can incorporate additional flavors like lemon or almond extract to customize your cheesecake filling to your liking.