
 Pin
Pin
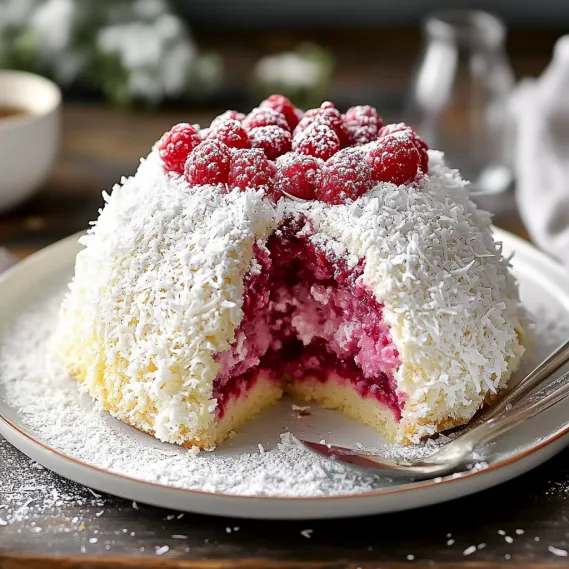
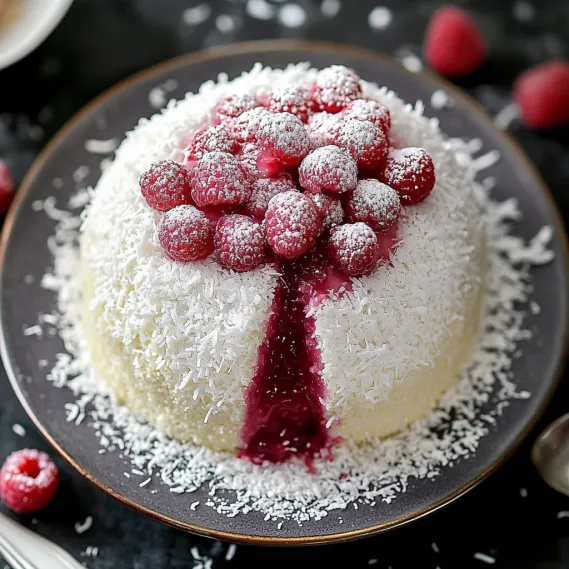
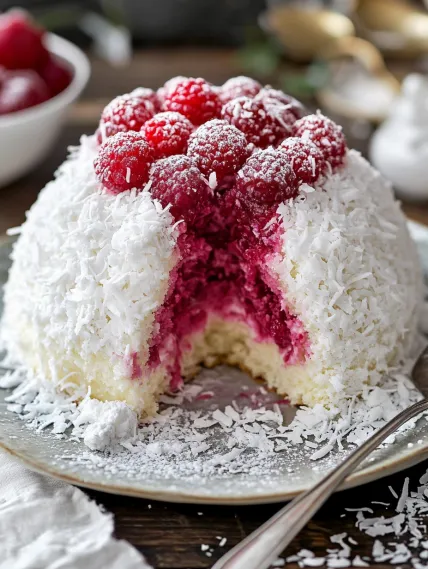
This Snowball Cake has been my winter dessert showstopper for years, combining fluffy vanilla cake with sweet raspberry swirls and a snowy coconut exterior that delights guests of all ages.
I first made this cake for my daughter's winter birthday party, and it became an instant tradition. The children thought it was magical, like bringing a real snowball indoors that wouldn't melt.
Ingredients
- All purpose flour: provides the perfect structure for this dome cake
- Baking powder: ensures proper rise for a light texture
- Fine salt: balances the sweetness and enhances flavor
- Unsalted butter: creates a rich, tender crumb
- Granulated sugar: sweetens while helping create that perfect cakey texture
- Large eggs: bind ingredients and provide structure
- Vanilla extract: adds warmth and depth to the flavor profile
- Whole milk: delivers moisture and richness
- Raspberry preserves: create beautiful swirls and bright flavor contrast
- Sweetened shredded coconut: transforms this into a snowy masterpiece
- Powdered sugar: adds an optional extra touch of winter magic
How To Make Snowball Cake Coconut Raspberry
- Prepare Your Workspace:
- Preheat your oven to 175°C. Take time to properly grease your dome pan or oven safe bowl. This is crucial as the rounded shape makes sticking more likely. Dust with flour after greasing, tapping out excess. This double barrier ensures your cake will release perfectly.
- Mix Dry Ingredients:
- Whisk the flour, baking powder, and salt thoroughly in a medium bowl. This even distribution prevents pockets of leavening agent that could create uneven rising. Proper mixing at this stage creates the foundation for a perfectly textured cake.
- Cream Butter and Sugar:
- Beat softened butter and granulated sugar until the mixture becomes notably lighter in color and fluffy in texture. This process incorporates air, which is essential for a light cake. This typically takes 3 to 5 minutes with an electric mixer. Do not rush this step as it creates the base texture.
- Add Wet Ingredients:
- Incorporate eggs one at a time, allowing each to fully integrate before adding the next. This prevents the mixture from curdling. Add vanilla extract and mix until just combined to preserve the delicate flavor compounds.
- Combine Mixtures:
- Alternate adding flour mixture and milk, beginning and ending with flour. This method prevents overmixing and gluten development. Mix until just combined after each addition, using gentle folding motions for the final additions to maintain maximum tenderness.
- Create Layers:
- Pour half the batter into your prepared pan, carefully spreading to ensure an even layer. Gently warm the raspberry preserves for easier spreading, then spoon over the first layer of batter. Add remaining batter on top, being careful not to disturb the preserves too much.
- Create Swirl Effect:
- Use a knife or skewer to create gentle swirls through the cake. Pull the tool through in figure eight motions, but avoid overmixing as this would blend rather than swirl the preserves. Just 4 to 5 passes should create beautiful raspberry ribbons.
- Bake to Perfection:
- Bake for 45 to 55 minutes until a skewer inserted into the center comes out clean. The dome shape means the center takes longer to cook than a standard cake, so be patient and check multiple spots with your testing skewer.
- Cool Strategically:
- Allow the cake to rest in the pan for exactly 10 minutes. This timing allows the structure to set while preventing the cake from becoming too moist from condensation. Invert onto a wire rack for complete cooling, which may take 1 to 2 hours.
- Apply Coconut Coating:
- Lightly brush the cooled cake surface with water or simple syrup to create a tacky surface. Press coconut firmly into the exterior, working in sections and using your hands to ensure complete coverage. For the snowiest effect, apply a generous amount of coconut, particularly at the top of the dome.
The raspberry preserves are truly the secret weapon in this recipe. I once substituted strawberry and it was lovely, but the slight tartness of raspberry perfectly balances the sweet coconut exterior. My grandmother always said the best cakes have that balance of flavors, and this recipe proves her right every time.
Storage and Freshness
Store this cake under a cake dome or loosely tented with foil at room temperature for up to three days. The coconut layer actually helps seal in moisture, keeping the cake fresh longer than you might expect. If you need to store it longer, you can refrigerate for up to a week, but bring to room temperature before serving for the best texture and flavor. I recommend against freezing the fully decorated cake as the coconut can become soggy upon thawing.
Make Ahead Options
This cake works beautifully as a make ahead dessert. You can bake the cake up to two days in advance and store tightly wrapped at room temperature. Apply the coconut coating the day of serving for the freshest appearance. You can also freeze the undecorated cake for up to three months. Simply wrap in plastic wrap followed by aluminum foil before freezing. Thaw completely at room temperature before decorating with coconut. This makes it perfect for busy holiday planning.
Serving Suggestions
Serve this snowball cake with a dusting of powdered sugar for extra snowfall effect. It pairs wonderfully with fresh raspberries on the side and a dollop of lightly sweetened whipped cream. For a more decadent presentation, offer warm raspberry sauce to drizzle over each slice. This creates a beautiful "melting snow" effect that delights guests. Coffee or hot chocolate makes the perfect warming beverage accompaniment.
Holiday Traditions
This snowball cake has deep roots in winter celebrations across many cultures. Similar coconut covered cakes appear in Eastern European holiday traditions, while the dome shape evokes the Russian kulich. In my own family, we started decorating the base of the cake plate with sprigs of rosemary and cranberries to create a festive winter scene. Children particularly love this dessert as it combines the playfulness of snow with a delicious treat that isn't overly rich after a holiday meal.
Recipe FAQs
- → How do I achieve the perfect raspberry swirl?
Spoon the warmed raspberry preserves over the first batter layer and use a skewer or knife to gently swirl it before adding the remaining batter. Avoid overmixing to maintain the delicate swirl effect.
- → Can I use fresh raspberries instead of preserves?
Yes, you can simmer fresh raspberries with sugar to create a jam-like consistency for swirling into the cake.
- → What is the best way to adhere the coconut coating?
Lightly brush the cooled cake with water or simple syrup to create a tacky surface. Then firmly press the shredded coconut onto the cake to ensure it sticks evenly.
- → Can this cake be made in a regular bundt pan?
Yes, you can use a standard bundt pan, but adjust the baking time slightly and monitor doneness with a skewer.
- → What are some tips to keep the cake moist?
Ensure not to overbake the cake, and consider brushing it with simple syrup after cooling to retain moisture.