 Pin
Pin
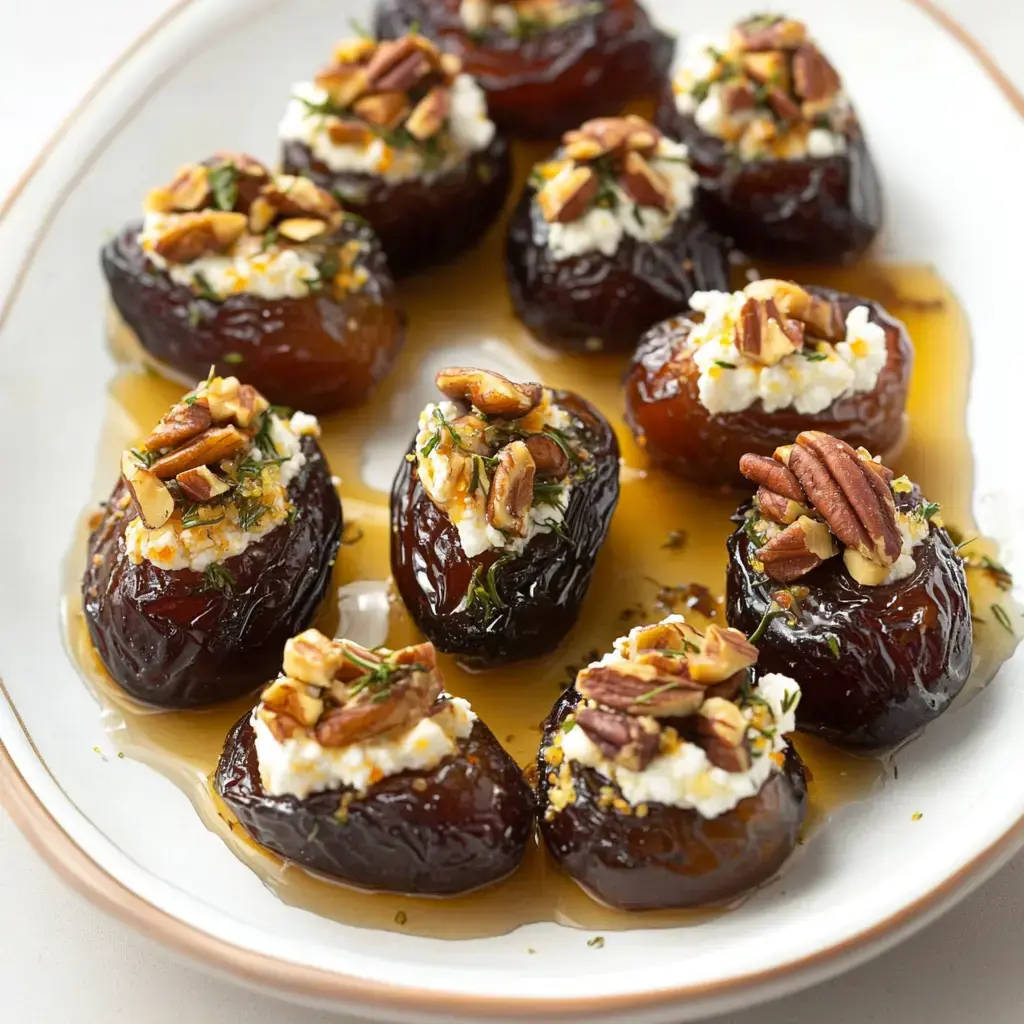
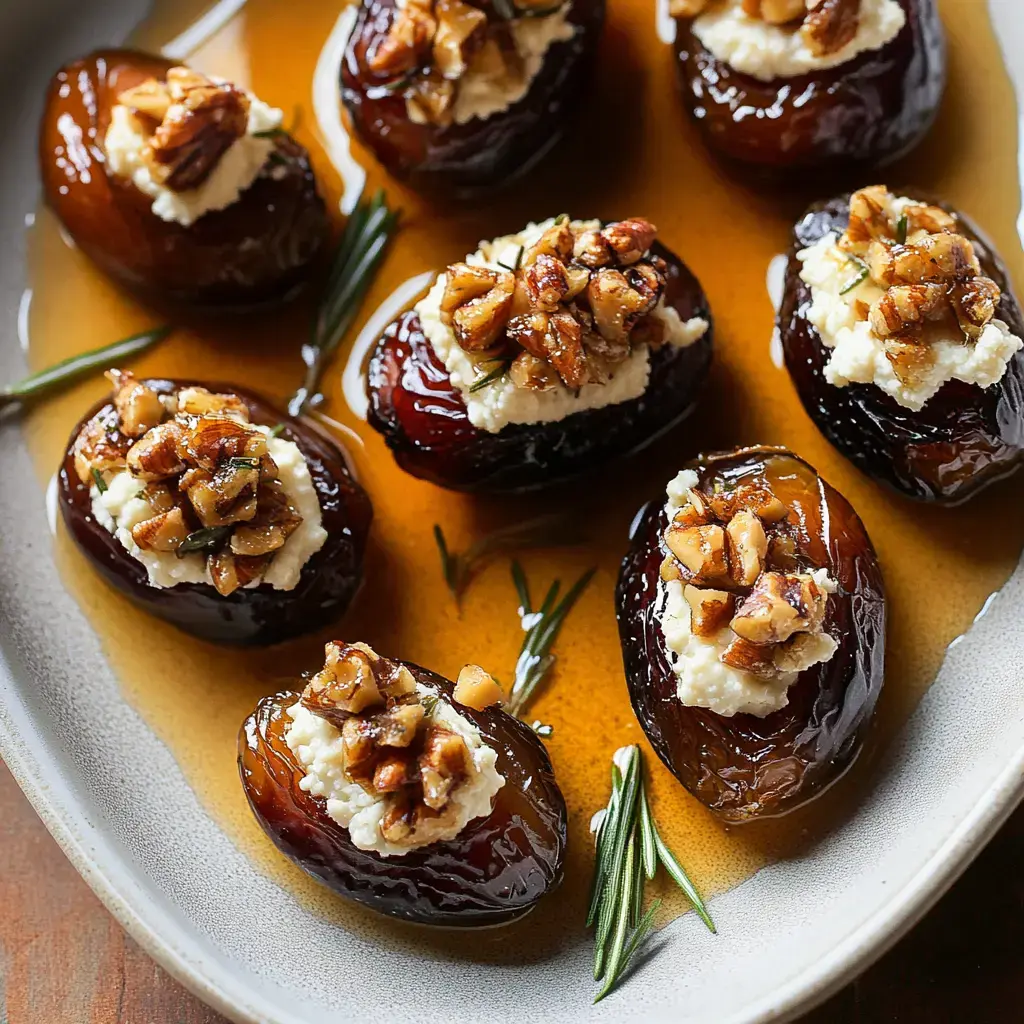
Imagine biting into the perfect combination of sweet and savory, where warm dates meet creamy goat cheese and crunchy spiced walnuts! These stuffed dates have become my ultimate party trick. The first time I served them at a holiday gathering, my friend Sarah literally followed me around the kitchen begging for the recipe. There's something magical about how the dates get all caramelized and gooey while roasting, while the goat cheese turns perfectly creamy. Top it all off with that rosemary-walnut crunch and a drizzle of hot honey... pure heaven on a plate!
Why These Little Bites Make Everyone Happy
You know those appetizers that disappear before you even finish putting them on the table? This is one of them! Last Christmas, I had to make three batches because they vanished so quickly. My vegetarian sister loves them, my cheese-obsessed brother can't resist them, and even my picky nephew who 'doesn't eat dates' was caught sneaking seconds. The best part? They look so fancy and impressive, but they're actually super easy to make. Plus, you can prep them ahead and just pop them in the oven when guests arrive your kitchen will smell absolutely amazing!
Everything You Need
- The Stars of the Show: Big, juicy Medjool dates are the heart of this recipe. Look for ones that are soft, fresh, and slightly sticky—these are the easiest to work with and provide the perfect balance of sweetness. Avoid dried-out or overly firm dates, as they can be tricky to slice and stuff.
- The Creamy Filling: High-quality goat cheese is essential for that tangy, creamy filling. Choose a plain variety to let the other flavors shine, but if you're feeling adventurous, a herbed or honeyed goat cheese can add a delightful twist.
- The Crunch Factor: Walnuts are the go-to choice for their mild, buttery flavor and satisfying crunch. Toast them lightly in a dry pan to bring out their nuttiness, and make sure they’re fresh—stale nuts can ruin the dish.
- Aromatic Herbs: Fresh rosemary adds a fragrant, piney note that pairs beautifully with the sweet dates and tangy cheese. Chop it finely so it integrates seamlessly into the topping.
- Citrus Kick: The zest and juice of a fresh orange add brightness and a hint of acidity that balances the richness of the cheese and the sweetness of the dates.
- Sweet Heat: Hot honey is the ultimate finishing touch, providing a sweet, spicy glaze that ties all the flavors together. If you can’t find hot honey, mix regular honey with a pinch of cayenne or red pepper flakes for a similar effect.
- Seasoning: A touch of cinnamon adds warmth and depth, while good olive oil helps bind the topping together. Don’t forget a pinch of salt—it enhances every element of the dish and makes the flavors pop.
Let's Create Some Magic
- Preparing the Dates
- Start with the freshest, softest Medjool dates you can find. These should feel plump and slightly sticky when you squeeze them gently. Using a sharp knife, make a careful slice along one side of each date, creating a pocket for the filling. Remove the pits, but take care not to slice all the way through. A pro tip: If your dates are a bit dry, soak them in warm water for a few minutes to rehydrate them, then pat them dry before proceeding.
- Making the Creamy Filling
- Allow your goat cheese to come to room temperature for easier handling. In a small bowl, whip the cheese slightly with a spoon to make it smoother and more spreadable. For added flavor, you can mix in a drizzle of honey or a pinch of black pepper. Using a small spoon or a piping bag, generously fill each date with the goat cheese, making sure the filling is flush with the edges of the date. This ensures a tidy presentation and makes them easier to eat.
- Crafting the Crunchy Topping
- Finely chop your walnuts, leaving some slightly larger pieces for added texture. In a bowl, combine the walnuts with freshly chopped rosemary, orange zest, and a squeeze of orange juice. Add a dash of ground cinnamon for warmth, a small pinch of salt to enhance the flavors, and just enough olive oil to bind everything together. Stir well until the mixture is evenly coated and fragrant. This topping should be sticky enough to adhere to the cheese but loose enough to sprinkle easily.
- Assembling the Dates
- Carefully top each stuffed date with a generous spoonful of the walnut mixture, pressing gently to ensure it sticks. Arrange the dates on a serving platter, making sure they don’t touch to avoid disturbing the toppings. Just before serving, drizzle each date with hot honey, letting it cascade down the sides for a glossy, elegant finish. If you’re feeling extra festive, garnish the platter with sprigs of fresh rosemary or thin slices of orange for a pop of color and added aroma.
Tips From My Kitchen Adventures
Chill dates slightly for easier slicing. Keep walnut topping fresh in a jar for later use. Always make extra—they disappear quickly!
Making Them Your Own
Experiment with bacon wrapping, blue cheese stuffing, pistachios, or maple-candied pecans for variations. Add balsamic glaze or dark chocolate drizzle for an extra twist.
Perfect Party Planning
Prep dates and cheese mixture ahead, keeping components separate. Create a stuffed date bar for guests to customize toppings.
Serving With Style
Arrange dates on rustic boards or cake stands. Add fresh rosemary sprigs and a hot honey drizzle for the perfect finishing touch.

The Heart of Entertaining
These stuffed dates bring people together, sparking conversations and creating new traditions. Make plenty—they'll quickly become everyone's favorite!
Recipe FAQs
- → Why use Medjool dates?
Medjool dates are larger, softer, and sweeter than other varieties, making them perfect for stuffing.
- → Why bring goat cheese to room temperature?
Room temperature goat cheese is easier to work with and spreads smoothly without breaking the dates.
- → Can I make these ahead?
Yes, prepare up to a week ahead and store in fridge. Reheat at 350°F for 15 minutes when ready to serve.
- → What can I substitute for hot honey?
Regular honey with a pinch of cayenne works well, or use plain honey for less heat.
- → Why let them rest after baking?
Resting allows the cheese to set slightly so it doesn't spill out when moving to serving plate.
