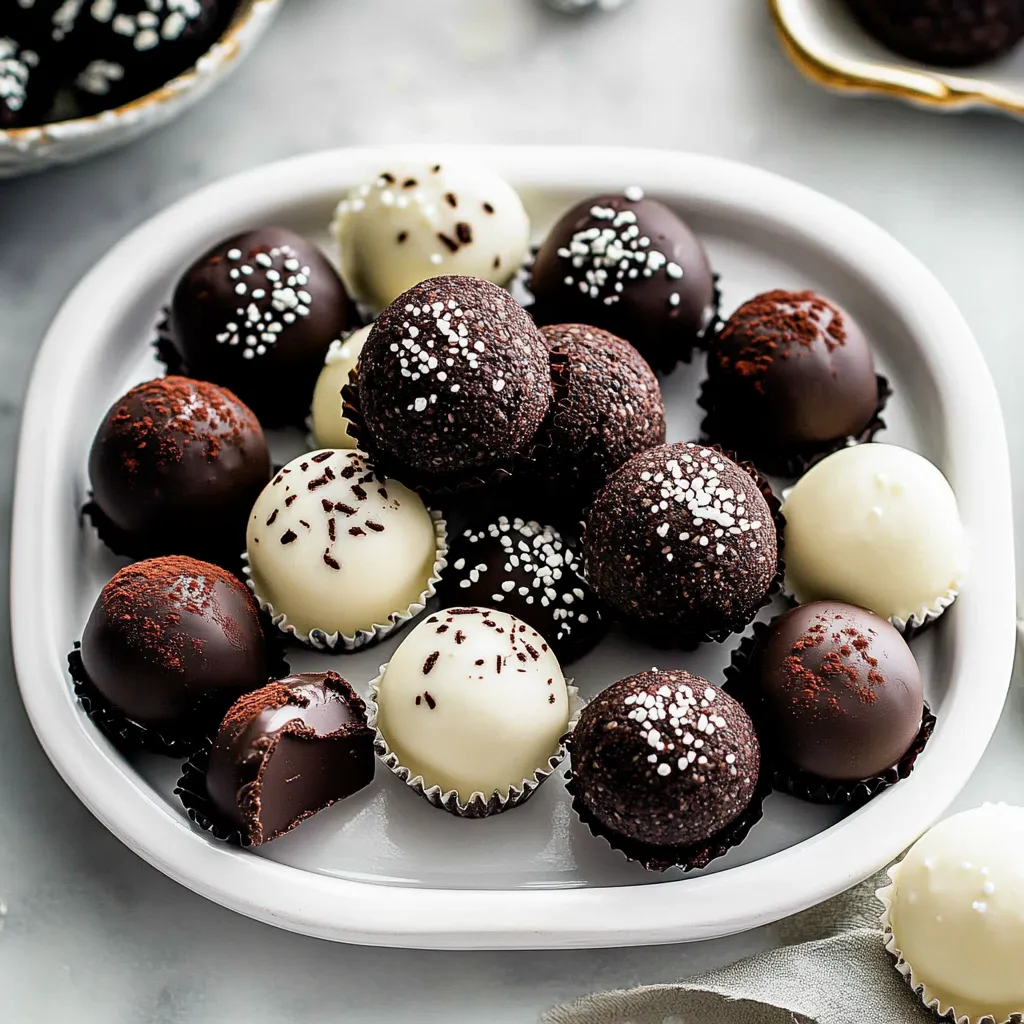
These Valentine's Day Oreo truffles transform simple ingredients into luxurious chocolate-covered treats perfect for showing someone you care. Made by combining crushed Oreos with cream cheese, then shaped into bite-sized balls and dipped in melted chocolate, they're surprisingly easy yet look professionally made. The secret to their perfect texture is using brick-style cream cheese and chilling the mixture properly before shaping. You can dress them up with pink and red sprinkles, heart-shaped decorations, or drizzle with white chocolate for that special Valentine's touch. They're perfect for gifting, sharing at parties, or enjoying with your sweetheart, and can be made ahead since they store beautifully in the fridge for up to two weeks.
The perfect Oreo ball combines the beloved cookies-and-cream flavor with the elegance of a handcrafted truffle. When crushed Oreos meet creamy cheese and premium chocolate coating, something magical happens - a bite-sized treat that's simultaneously familiar and luxurious. In my kitchen, these truffles have become a holiday tradition, transforming simple ingredients into something that makes everyone's eyes light up with delight.
Last holiday season, I brought these to a family gathering, and they disappeared within minutes. My nephew, who usually turns his nose up at "fancy" desserts, ate four in one sitting. The secret? Taking time with each step and using quality ingredients for the coating.
Essential Ingredients and Selection Tips
Oreo Cookies: Use regular Oreos, not Double-Stuf - the classic filling ratio ensures perfect texture
Cream Cheese: Only full-fat brick cream cheese at room temperature will do. Low-fat versions create a too-soft mixture
Chocolate: Choose high-quality baking bars like Ghirardelli or Lindt - never chips, which won't melt properly
Vegetable Oil: A touch helps thin the chocolate for smoother coating
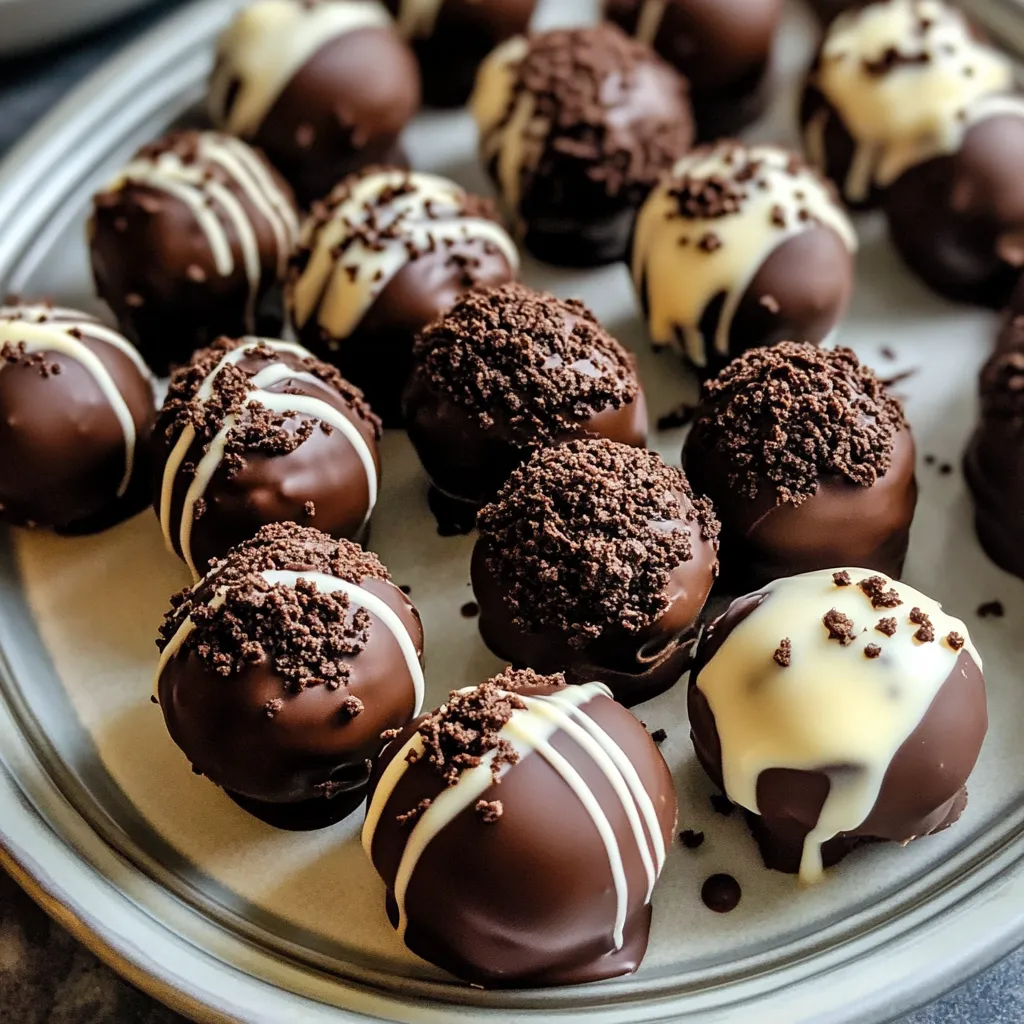
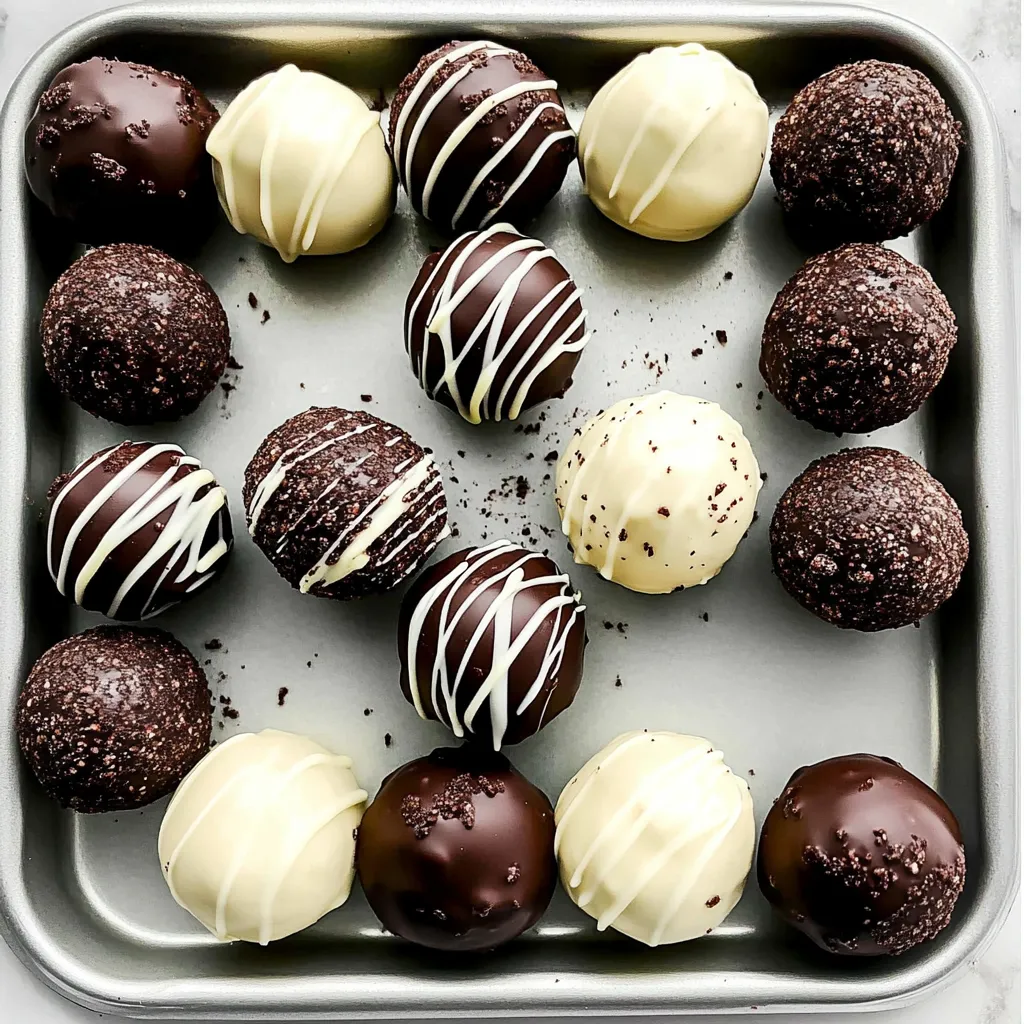
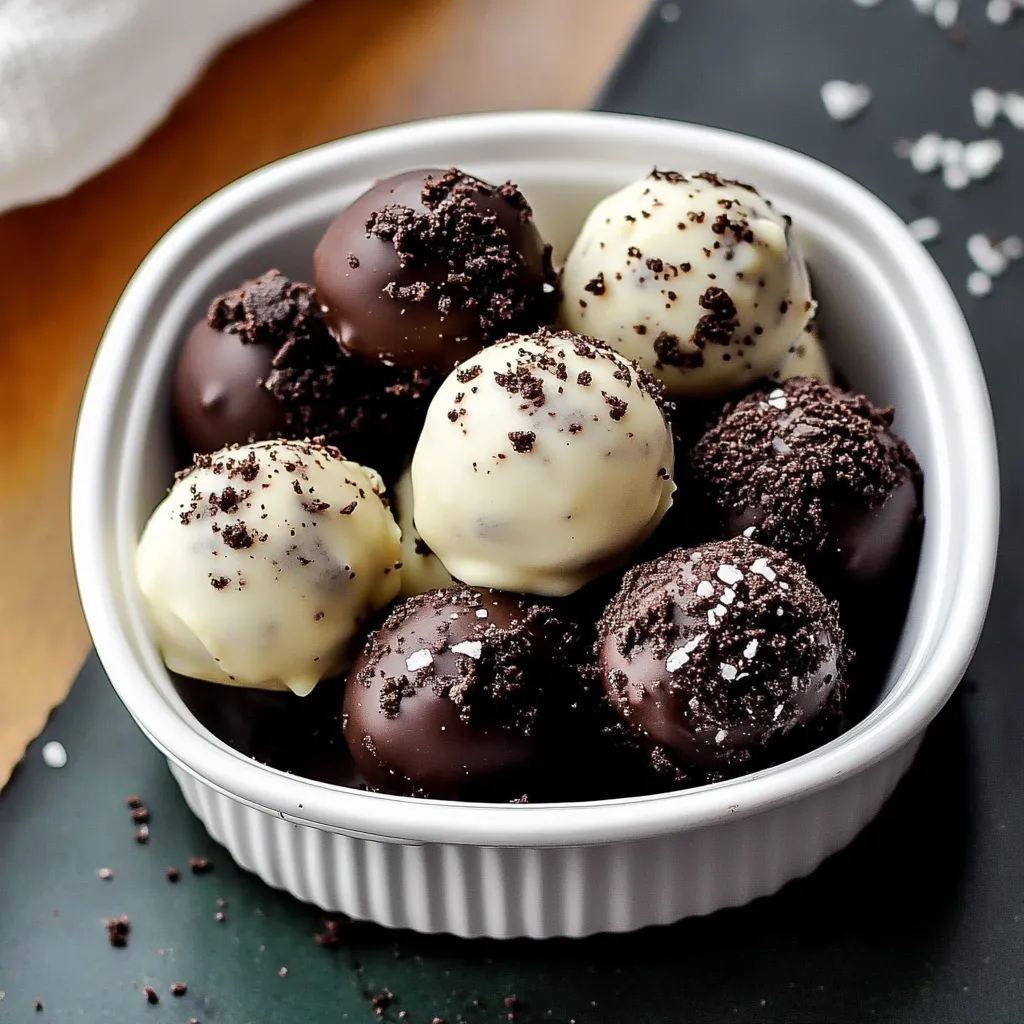
Optional Toppings: Keep sprinkles, crushed Oreos, or contrasting chocolate ready for decorating
Detailed Instructions
1. The Perfect Setup
Begin with mise en place - your food processor ready, cream cheese softened, and a baking sheet lined with parchment. Create a dedicated truffle-making station with all tools within reach. Through years of making these, I've learned that organization is key to smooth execution.
2. The Crumb Creation
Transform whole Oreos (cream filling and all) into fine crumbs using your food processor. Pulse in short bursts until you achieve a texture like dark, moist sand. No cookie chunks should remain - uniform texture is crucial for smooth truffles. If using a rolling pin method, double-bag those cookies to prevent mess.
3. The Crucial Mix
Blend your room-temperature cream cheese with the Oreo crumbs until completely combined. Watch for the mixture to turn uniform in color with no white streaks remaining. The texture should be like soft cookie butter - moldable but not too sticky. If using a mixer, scrape down the sides frequently.
4. The Rolling Process
Using a tablespoon measure (about 18-22g per ball), scoop portions of your mixture. Roll between your palms into perfect spheres - think small golf balls. Work efficiently but don't rush; each ball should be smooth and uniform. Place them on your prepared sheet, and if the mixture becomes too soft, pause and refrigerate for 15 minutes.
5. The Chocolate Magic
While your balls chill (minimum 1 hour), prepare your chocolate coating. Chop chocolate into uniform pieces and combine with oil. Melt in 20-second microwave intervals, stirring between each. The chocolate should be smooth and glossy but not too hot - let it cool for 5 minutes before dipping.
6. The Dipping Process
Working with a few balls at a time (keeping others chilled), dip each in melted chocolate. Use a fork or dipping tool, allowing excess chocolate to drip off. Tap the fork gently on the bowl's edge - this creates an even coating. Transfer carefully to parchment paper. If using toppings, add them immediately before the chocolate sets.
How to Make Oreo Balls Truffles | zestplate.com
My journey with Oreo balls began during a holiday baking marathon with my best friend Amy. What started as a simple experiment has become our annual tradition, with each year bringing new decorating ideas and techniques.
The Art of Coating
Through countless batches, I've discovered that perfect coating requires patience. The chocolate should be fluid but not hot enough to melt the filling. I keep half the balls in the refrigerator while working with the others, ensuring each batch maintains its shape during dipping.
Storage Secrets
These truffles actually develop better flavor after 24 hours in the refrigerator. Layer them between parchment paper in airtight containers, and they'll keep beautifully for up to two weeks - though they rarely last that long!
Seasonal Variations
Throughout the year, I adapt these truffles for different occasions. Golden Oreos with white chocolate coating for spring, mint Oreos with dark chocolate for Christmas, and birthday cake Oreos for celebrations. Each variation brings its own charm while maintaining that irresistible cookies-and-cream center.
How to Make Oreo Balls Recipe | zestplate.com
Gifting Guide
For gifting, I arrange them in small paper candy cups inside decorative boxes. The presentation elevates them from homemade treats to elegant confections. A mix of white and dark chocolate coatings with various toppings creates a professional-looking assortment that rivals any chocolate shop.
Temperature Mastery
Working with chocolate-covered treats requires attention to environment. During summer months, I keep my kitchen cool and work quickly. In winter, letting the finished truffles come to room temperature for 5 minutes before serving brings out their best texture and flavor. These small adjustments ensure consistent results in any season.
Chef's Essential Tips
How to Make Oreo Balls (Truffles) Recipe | zestplate.com
Clean your fork or dipping tool between each truffle for the smoothest coating
Keep a bowl of ice water nearby to cool your hands between rolling batches
Add oil to chocolate gradually - you can always thin it more but can't thicken it back up
Let chocolate-dipped truffles set at room temperature for the smoothest finish
Final Thoughts
Creating perfect Oreo balls is about finding the right balance between technical precision and creative freedom. Every batch is an opportunity to try new decorations or perfect your technique. Whether they're destined for a holiday platter or packaged as gifts, these little bites of joy never fail to bring smiles.
Recipe FAQs
→ How can I make these more Valentine's Day themed?
Use pink or red sprinkles, heart-shaped decorations, or drizzle with pink-tinted white chocolate for a romantic look.
→ Can I make these ahead for Valentine's Day?
Yes! They keep for up to 2 weeks in the fridge, making them perfect for preparing before Valentine's Day.
→ Why is my mixture too sticky to roll?
If it's sticky, refrigerate the mixture for 15 minutes before rolling into balls - this makes handling much easier.
→ What's the best chocolate for dipping?
Use quality baking chocolate bars like Baker's or Ghirardelli - not chocolate chips - for the smoothest coating.
→ Can I freeze these for later?
Yes, they freeze well for up to 3 months. Thaw overnight in the refrigerator before serving.
Valentines Day Oreo Truffles
Easy Valentine's Day Oreo truffles dipped in chocolate and decorated with festive sprinkles - a perfect homemade treat to share with loved ones.
028 ounces brick cream cheese (226g), room temperature
→ Coating
0312 ounces semi-sweet or white chocolate (339g), chopped
041/2 teaspoon vegetable oil or coconut oil
→ Optional Garnish
05Valentine's sprinkles
06Oreo crumbs
07Additional melted chocolate for drizzling
Directions
Step 01
Pulse whole Oreo cookies (filling and cookie) in a food processor until finely ground.
Step 02
Beat Oreo crumbs with softened cream cheese until well combined using a mixer or food processor.
Step 03
Scoop tablespoon portions (18-22g each) and roll into balls. Place on lined baking sheet. Refrigerate at least 1 hour.
Step 04
Melt chopped chocolate with oil in 20-second microwave intervals, stirring between each. Let cool 5 minutes before dipping.
Step 05
Dip each chilled ball in melted chocolate. Tap off excess and place on lined baking sheet. Add Valentine's sprinkles while chocolate is wet if desired.
Step 06
Refrigerate for at least 1 hour until chocolate is completely set before serving.
Notes
Stores in refrigerator for up to 2 weeks
Can use regular, Golden, or Mint Creme Oreos
Use brick cream cheese, not spreadable kind
Required Equipment
Food processor or blender
Electric mixer
Baking sheets
Parchment paper
Fork or candy dipping tool
Allergen Information
Review each component for possible allergens and consult a health professional when concerned.

 Pin
Pin