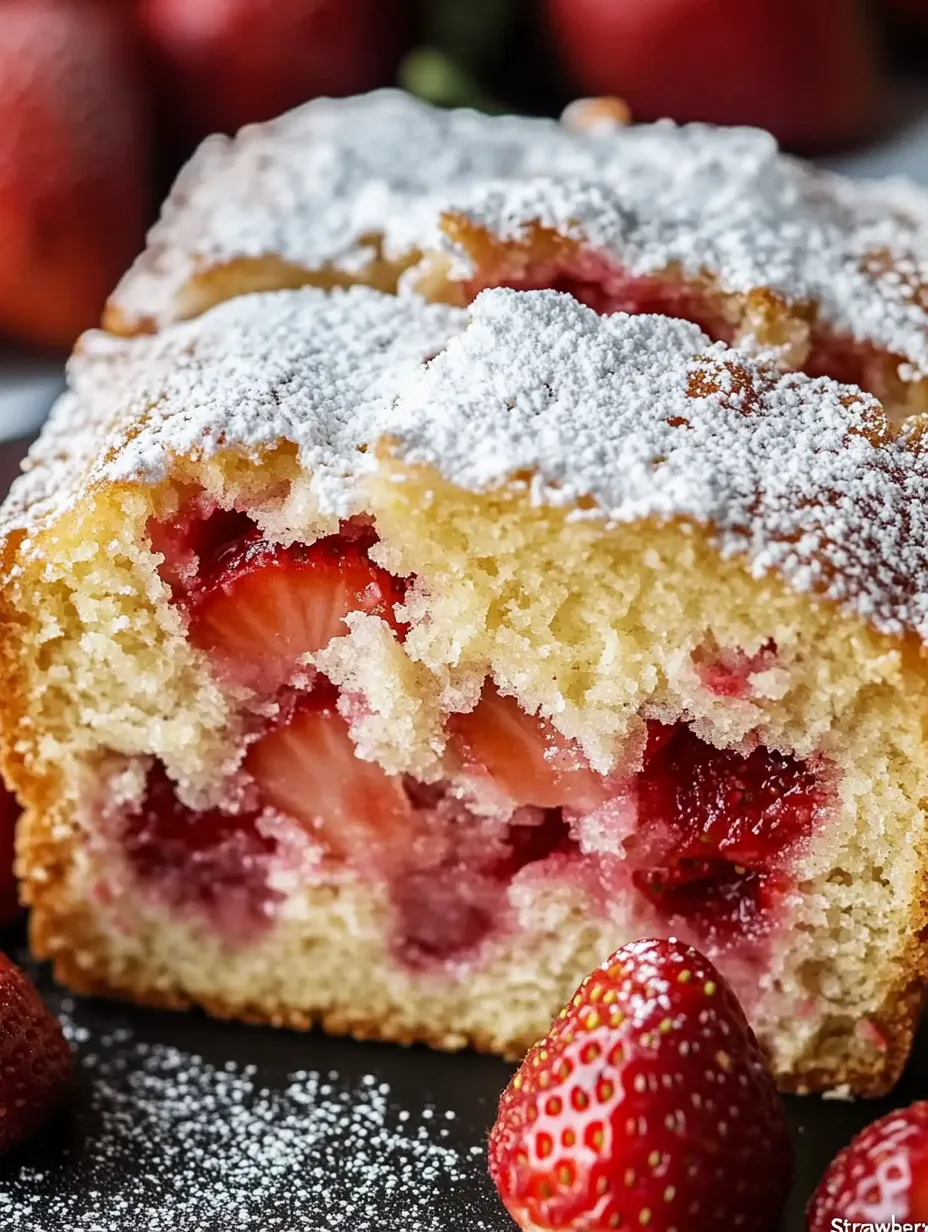
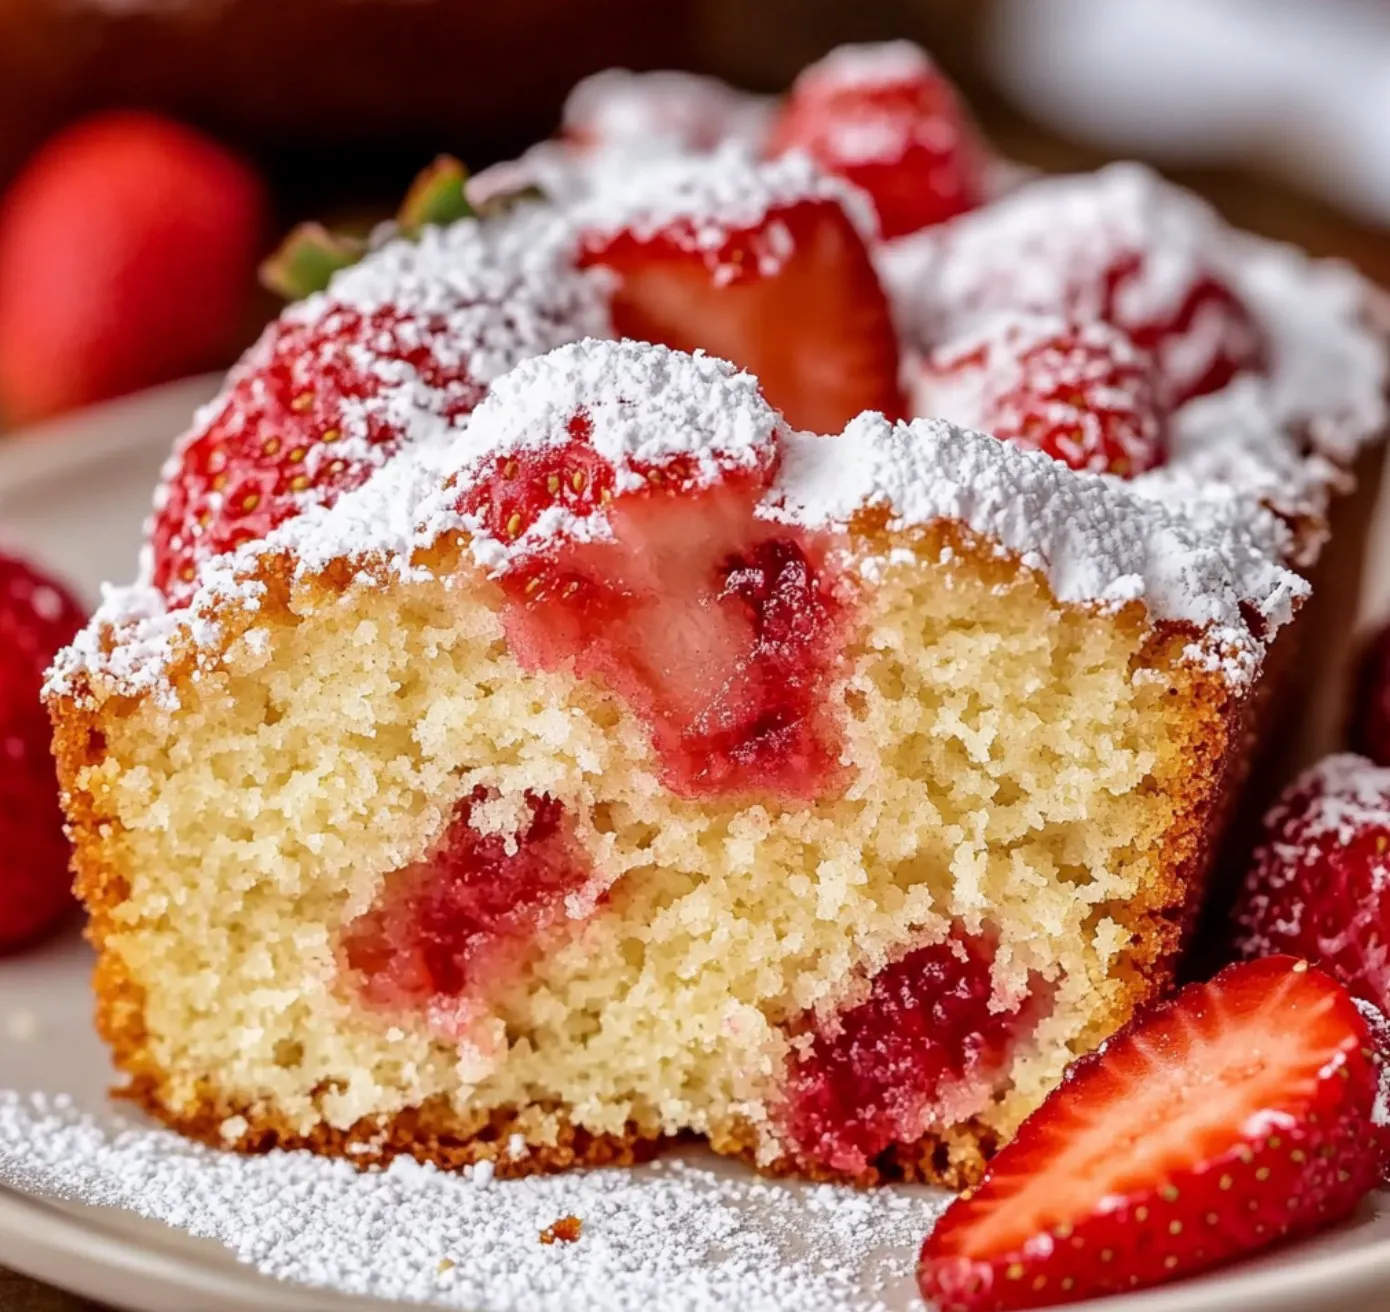
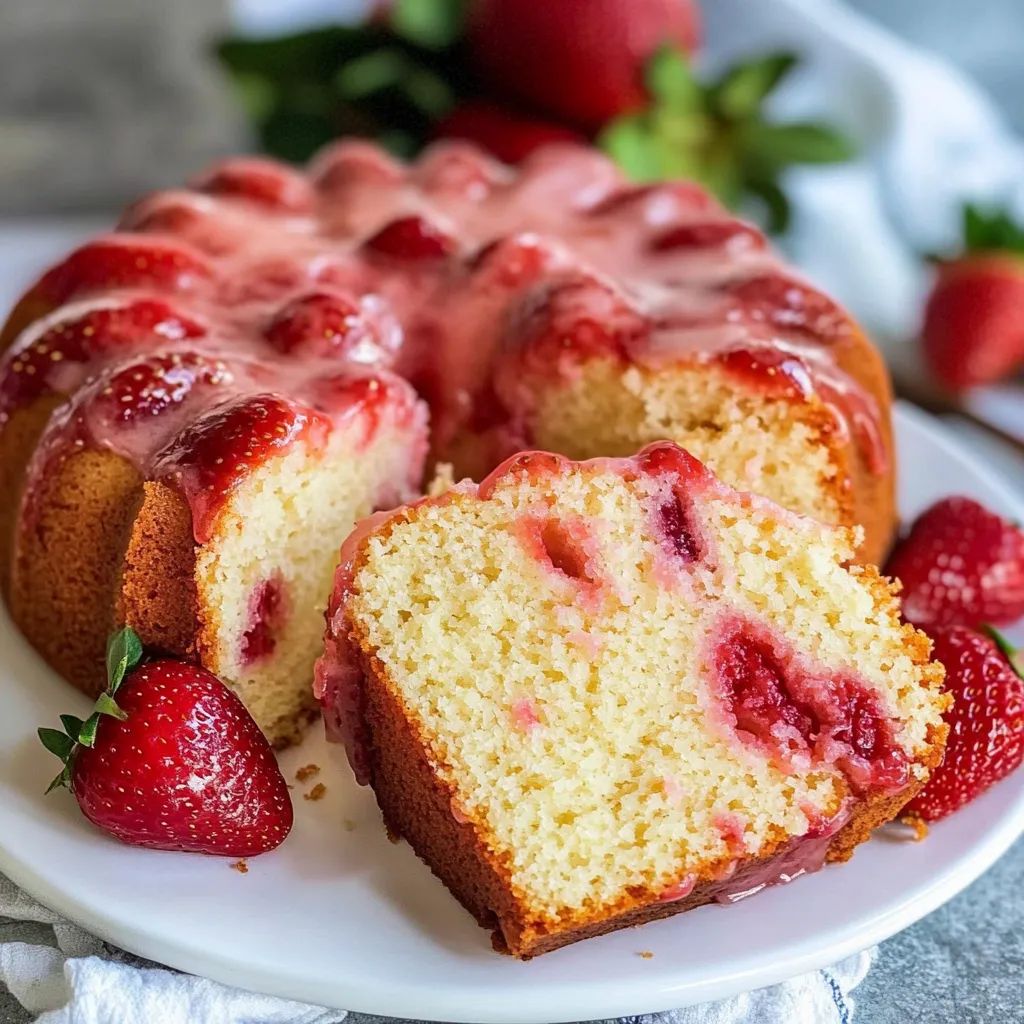
This Valentine's strawberry pound cake is the perfect way to show your love through baking. Made with fresh strawberries folded into a rich, buttery batter, each slice reveals beautiful pink bursts of fruit. The cake's perfectly balanced sweetness and moist texture comes from carefully creaming butter and sugar until light and fluffy, then alternating dry and wet ingredients. Fresh strawberries are gently folded in to create pockets of fruit throughout. Finished with a dusting of powdered sugar, it's an elegant yet heartfelt dessert that's perfect for Valentine's Day sharing.
A perfect Strawberry Pound Cake is a study in contrasts - dense yet tender, rich yet brightened by fresh fruit, simple yet sophisticated. This version marries the buttery decadence of traditional pound cake with juicy pockets of fresh strawberries, creating something that's both familiar and extraordinary. Each slice reveals a beautiful marriage of golden cake studded with ruby-red berries.
Just last weekend, I served this at a garden party, and guests were amazed by how the fresh strawberries transformed a classic pound cake into something extraordinary.
Essential Ingredients and Selection Tips
Butter: European-style with higher butterfat produces the richest flavor. Room temperature should mean softened but still cool to touch
Fresh Strawberries: Look for berries that are ripe but firm, with a bright red color throughout. Avoid any with white shoulders or mushy spots
Eggs: Farm-fresh, large eggs at precise room temperature (30 minutes on counter) ensure proper emulsion
Flour: All-purpose, but preferably unbleached for better structure. Measure after sifting for accuracy
Vanilla Extract: Pure, never artificial, preferably Madagascar bourbon vanilla for its rich, complex notes
Detailed Method
1. Preparation Phase
Begin with all ingredients at proper room temperature - this typically means setting them out 30-45 minutes before baking. Your butter should give slightly when pressed but still maintain its shape. Meanwhile, prepare your loaf pan meticulously, greasing every corner and dusting with flour.
2. Butter and Sugar Creaming Process
This crucial step deserves up to 8 minutes of mixing time. Start with softened butter, beating alone for 1 minute until smooth. Add sugar gradually, not all at once, and beat until the mixture becomes almost white in color and notably fluffier in volume. The texture should be similar to well-whipped frosting - light, airy, and almost mousse-like. You'll notice the mixture clinging to the sides of the bowl; scrape them down frequently.
3. Egg Integration
Add each egg individually, allowing a full minute of beating between additions. Watch for the mixture to fully absorb each egg before adding the next. If the batter starts to curdle or separate, stop adding eggs and beat in a tablespoon of your measured flour. The mixture should remain smooth and emulsified throughout this process. After all eggs are incorporated, beat in the vanilla extract until just blended.
4. Flour Mixture Addition
Your dry ingredients must be perfectly sifted together to ensure even distribution of leavening agents. Add them to the batter in three portions, alternating with two portions of milk, always beginning and ending with flour. This prevents the batter from curdling and ensures proper gluten development. Mix each addition until just barely combined - overworking the flour at this stage leads to a tough cake.
5. Strawberry Incorporation
Fold in your chopped strawberries with the utmost gentleness using a large rubber spatula. Use a down-and-up motion, rotating the bowl as you go, rather than stirring in circles. This preserves the air you've worked so hard to incorporate and prevents the berries from bleeding too much color into the batter.
6. Baking Process and Temperature Control
Pour the batter into your prepared pan with intention - work in layers, gently tapping the pan after each addition to eliminate air pockets. The surface should be slightly lower in the center than the edges, as it will rise in the middle during baking. Your oven should be preheated for at least 20 minutes to ensure true temperature. Place the cake on the center rack, slightly towards the back where heat tends to be most consistent. Monitor the baking process carefully - in the first 30 minutes, the cake will rise significantly. Watch for the edges to begin pulling away from the pan ever so slightly. Around the 45-minute mark, if the top is browning too quickly, tent with foil, shiny side up, being careful not to let the foil touch the cake's surface. The final 15-20 minutes are crucial - the cake should be golden brown, with a slight crack along the top, a hallmark of perfect pound cake. Test for doneness using multiple methods: the toothpick test (should come out with a few moist crumbs), gentle pressure on the surface (should spring back), and internal temperature (should reach 205-210°F). The strawberries will create pockets of moisture, so test in several spots.
7. Cooling and Setting Phase
The cooling process is as important as the baking. Let the cake rest in the pan for exactly 10 minutes - any less and it might break, any more and it could become soggy. Run a warm knife around the edges to release any stuck spots. When turning out onto the cooling rack, do so with confidence in one smooth motion. The cake must cool completely - at least 2 hours - before cutting or wrapping.
Strawberry Pound Cake Recipe | zestplate.com
Advanced Storage and Preservation Techniques
The first 24 hours are critical for your pound cake's texture development. Once completely cool, wrap it in a double layer of plastic wrap, ensuring no air pockets remain. For optimal freshness, place the wrapped cake in an airtight container. If storing longer than a day, add a piece of parchment between the cake and container to prevent any moisture accumulation. At room temperature, the cake maintains peak texture for three days, developing an even richer flavor profile after the first 24 hours.
Professional Serving Suggestions and Presentation
For the perfect slice, use a serrated knife warmed under hot water and dried between cuts. Make long, smooth strokes rather than sawing motions. Each slice should be between 3/4 to 1 inch thick for optimal texture appreciation. For elegant presentation, dust with powdered sugar just before serving - never in advance, as the sugar will dissolve into the cake. Consider serving options based on the occasion: for breakfast, toast slices lightly; for dessert, add a dollop of whipped cream and fresh strawberry fan; for afternoon tea, serve plain with a light dusting of sugar.
Troubleshooting Common Issues
If your cake develops a pronounced dome, it's likely due to too-high oven temperature or improper pan preparation. For sunken strawberries, try tossing them in a tablespoon of your measured flour before folding into the batter. If the cake seems dense, the likely culprit is undermixed butter and sugar or overworked flour. For crumbly texture, check your egg size and temperature - cold eggs can cause improper emulsion.
Seasonal Adaptations and Variations
While peak-season strawberries are ideal, this recipe can be adapted year-round. In winter, use high-quality frozen strawberries, thawed and well-drained. In summer, consider adding a handful of fresh basil or mint to the batter. Fall variations might include warming spices like cinnamon or cardamom. The basic recipe remains the same, but these subtle changes create distinct seasonal personalities for your pound cake.
Easy Strawberry Pound Cake | zestplate.com
Remember,
mastering this Strawberry Pound Cake is about understanding not just the steps, but the why behind each technique. Pay attention to temperature, timing, and texture cues throughout the process, and you'll create a cake that's both technically perfect and deliciously memorable.
Expert Baker's Final Notes and Advanced Tips
The mastery of Strawberry Pound Cake lies in the subtle details that transform a good cake into an exceptional one. Temperature control isn't just about your oven - every ingredient should be at precisely the right temperature. Butter at 65-67°F will cream perfectly; anything warmer will create a greasy texture, while colder butter won't incorporate enough air. Test by pressing your finger into the butter - it should leave a slight indentation while still feeling cool to the touch.
Recipe FAQs
→ Why use room temperature ingredients?
Room temperature ingredients blend more evenly and create a smoother batter, resulting in a better texture.
→ Can I use frozen strawberries?
Fresh strawberries are recommended as frozen ones can release too much moisture.
→ Why rotate the pan while baking?
Rotating ensures even baking and prevents hot spots from affecting the cake's texture.
→ Can I make this ahead for Valentine's Day?
Yes! Bake it up to a day ahead and store in an airtight container at room temperature.
→ How should I serve this for Valentine's Day?
Dust with powdered sugar and serve with fresh strawberries or whipped cream for extra romance.
Valentines Strawberry Pound Cake
A romantic Valentine's pound cake featuring fresh strawberries and a tender, buttery crumb - perfect for sharing with someone special.

 Pin
Pin