
 Pin
Pin
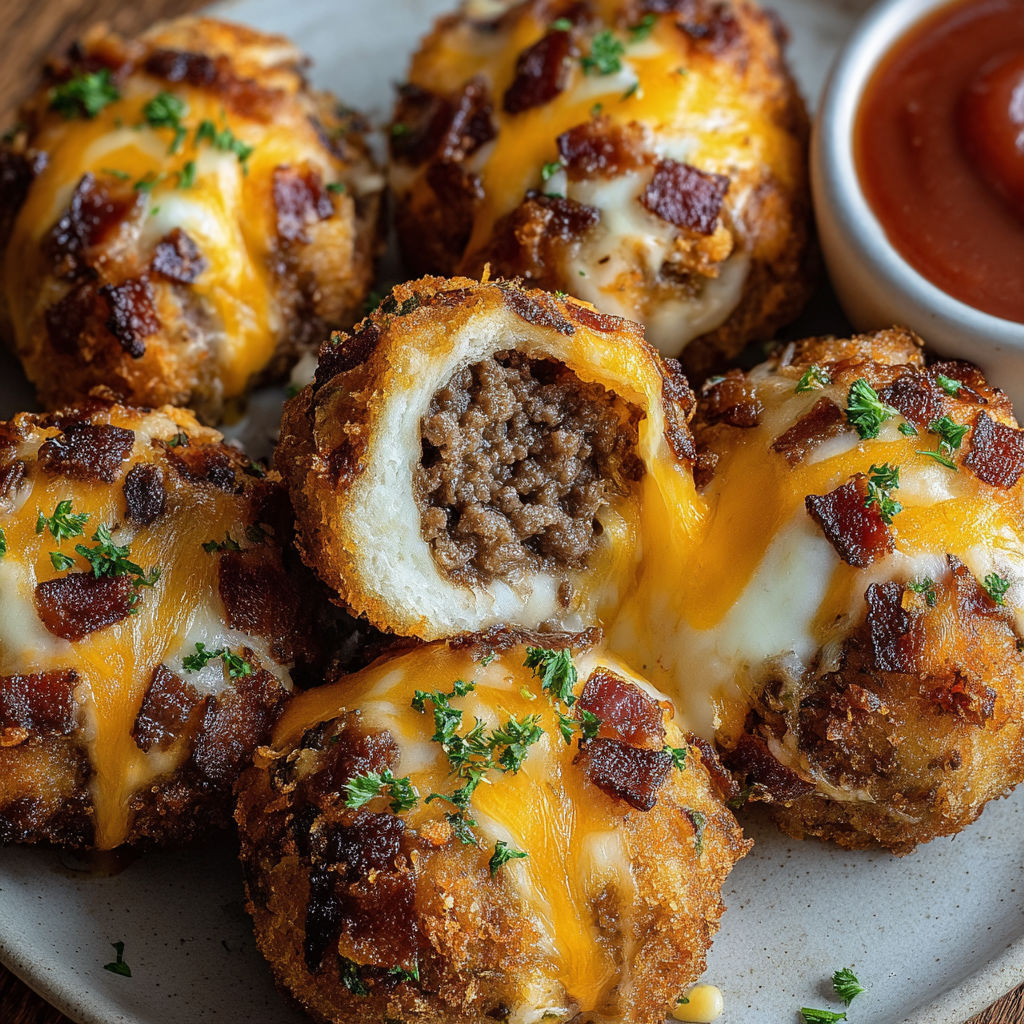
This bacon cheeseburger mozzarella bombs recipe transforms all your favorite burger flavors into fun, portable, cheese-filled bites perfect for game day snacking or an impressive appetizer that will have everyone reaching for seconds.
I first created these cheesy bombs when hosting a last minute football watch party. They disappeared faster than any other dish I've ever served and now my family requests them for every gathering regardless of the occasion.
- Mozzarella sticks provides that iconic cheese pull everyone loves
- Shredded cheddar cheese adds that classic burger flavor profile
- Ground beef pre cooked and seasoned creates the authentic burger experience
- Bacon crumbles offer smoky crunch and unmistakable flavor
- Refrigerated biscuit dough creates a perfect golden exterior with minimal effort
- Melted butter ensures a beautifully browned and flavorful exterior
- Garlic powder adds subtle savory depth to the outer layer
- Sesame seeds mimic the look of burger buns for an authentic presentation
How To Make Bacon Cheeseburger Mozzarella Bombs
- Prepare Your Oven
- Preheat your oven to 190°C to ensure even cooking. Line a baking sheet with parchment paper which prevents sticking and makes cleanup significantly easier.
- Prepare The Dough
- Open your refrigerated dough and separate into individual portions. Using your palms and fingers flatten each portion into approximately 4 inch circles being careful not to create any thin spots or tears.
- Create The Filling
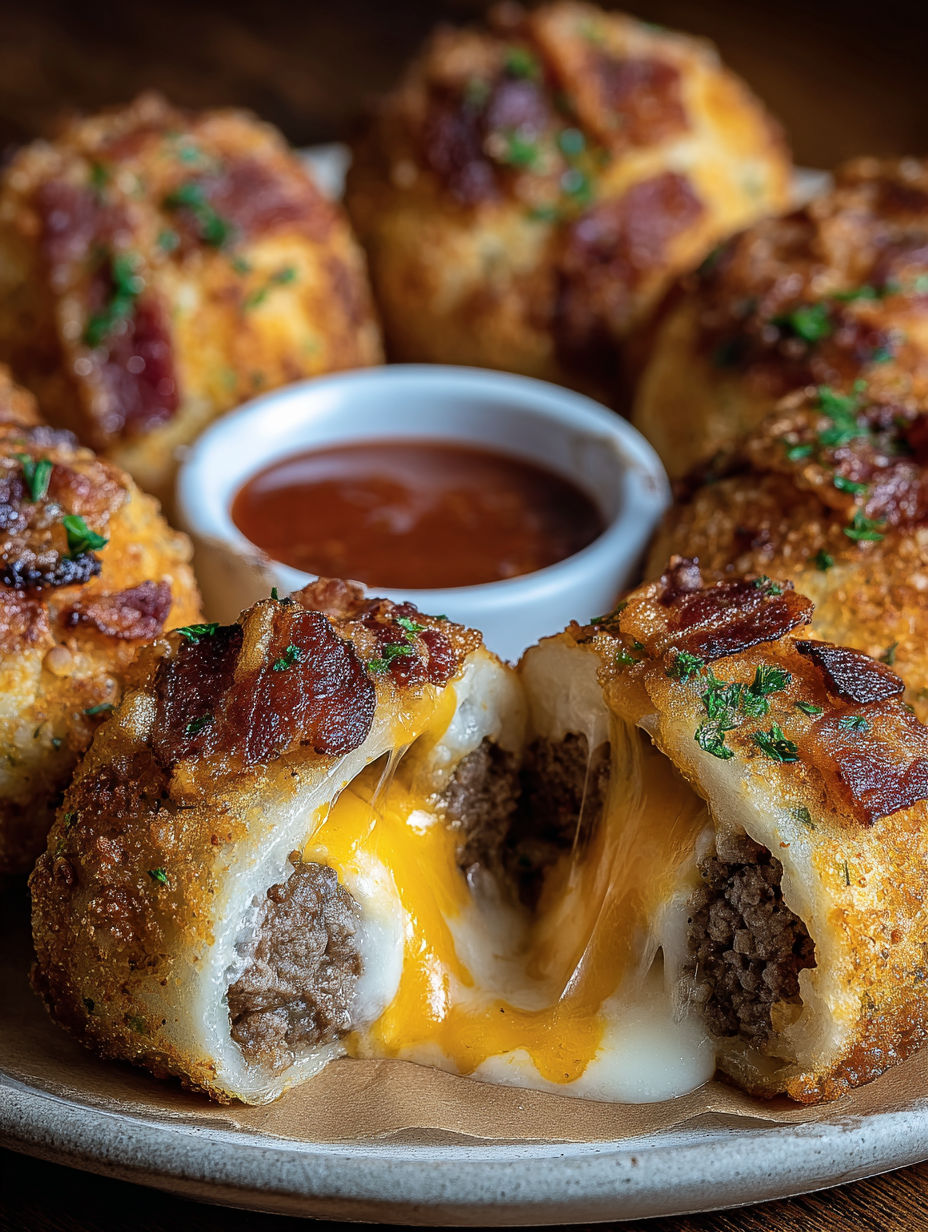
- Place a generous tablespoon of your seasoned cooked ground beef in the center of each flattened dough circle. Add a pinch of crumbled bacon ensuring even distribution. Sprinkle a layer of shredded cheddar cheese over the meat mixture. Finally position half a mozzarella stick directly on top of your filling.
- Seal The Bombs
- Gently lift the edges of your dough circle up and around the filling working your way around the circumference. Pinch the edges firmly together to create a complete seal ensuring no openings remain that could allow cheese to escape during baking. Place each sealed bomb with the seam side down on your prepared baking sheet.
- Add Finishing Touches
- Brush the surface of each bomb generously with melted butter using a pastry brush to cover the entire exposed surface. Sprinkle garlic powder evenly across the buttered surface. Add sesame seeds or chopped parsley if desired for visual appeal.
- Bake To Perfection
- Place your baking sheet in the preheated oven and bake for 12 to 15 minutes watching carefully toward the end of cooking time. Look for a deep golden brown color on the surface and slight firmness when gently touched.
- Rest And Serve
- Allow the bombs to rest for 2 to 3 minutes after removing from the oven which helps the molten cheese set slightly for easier handling. Serve warm with your favorite dipping sauces in small bowls alongside.
The mozzarella cheese is truly the star ingredient here. I discovered through many test batches that halving the sticks lengthwise rather than crosswise creates the perfect cheese to filling ratio and ensures that amazing stretch when pulled apart.
Make Ahead Options
These bombs work beautifully as a make ahead appetizer. Simply assemble the bombs up to the point of baking then cover tightly with plastic wrap and refrigerate for up to 24 hours. When ready to serve add an additional 2 to 3 minutes to the baking time since you're starting with chilled dough. This makes them perfect for entertaining when you want to minimize last minute preparation.
Customization Ideas
Think of these bombs as a blank canvas for your favorite burger flavors. Try incorporating diced pickles mushrooms or caramelized onions into the meat mixture. Swap the cheddar for pepper jack blue cheese or smoked gouda for different flavor profiles. For a spicy version add diced jalapeños or a dash of hot sauce to the beef mixture. The possibilities are endless and I encourage experimentation based on your favorite burger toppings.
Serving Suggestions
While these bombs are delicious on their own they truly shine when served alongside complementary items. Create a dipping sauce station with warm marinara ranch burger sauce honey mustard and barbecue sauce options. For a complete meal pair with a simple green salad dressed with vinaigrette to cut through the richness. If serving at a party arrange on a platter with pickle spears fresh vegetable sticks and additional bacon bits for garnish.
Storage And Reheating
Leftover bombs if you have any can be stored in an airtight container in the refrigerator for up to 3 days. To reheat place them on a baking sheet in a 350°F oven for 7 to 10 minutes until warmed through. Avoid microwave reheating as it tends to make the dough tough and the cheese rubbery. For longer storage freeze fully cooled bombs in a single layer then transfer to a freezer bag for up to 2 months. Reheat from frozen in a 350°F oven for 15 to 20 minutes.

Recipe FAQs
- → Can I prepare these bacon cheeseburger mozzarella bombs ahead of time?
Yes! You can assemble these bombs up to 24 hours ahead and store them covered in the refrigerator. When ready to serve, brush with butter, add toppings, and bake. You may need to add 2-3 extra minutes to the baking time if cooking from cold.
- → What's the best way to reheat leftover mozzarella bombs?
For the best texture, reheat in an oven or toaster oven at 150°C for 5-7 minutes until warmed through. Microwaving is quicker but may make the dough slightly chewy instead of crisp.
- → Can I freeze these bombs for later?
Absolutely! Freeze assembled but unbaked bombs on a baking sheet until solid, then transfer to a freezer-safe container. When ready to enjoy, bake from frozen, adding about 5-7 minutes to the baking time.
- → What can I substitute for the refrigerated biscuit dough?
Pizza dough works great as mentioned in the recipe, but you can also use crescent roll dough, puff pastry, or even homemade bread dough. Each will give a slightly different texture but equally delicious results.
- → Can I make these mozzarella bombs vegetarian?
Yes! Replace the beef and bacon with plant-based alternatives or try a vegetarian filling like sautéed mushrooms, onions, and bell peppers for a veggie bomb variation. The cheese and dough preparation remains the same.
- → What other fillings could work well in this recipe?
Get creative with fillings like pepperoni and pizza sauce for pizza bombs, buffalo chicken with blue cheese, or ham and Swiss for a Cuban-inspired version. The technique works for endless flavor combinations!