
 Pin
Pin
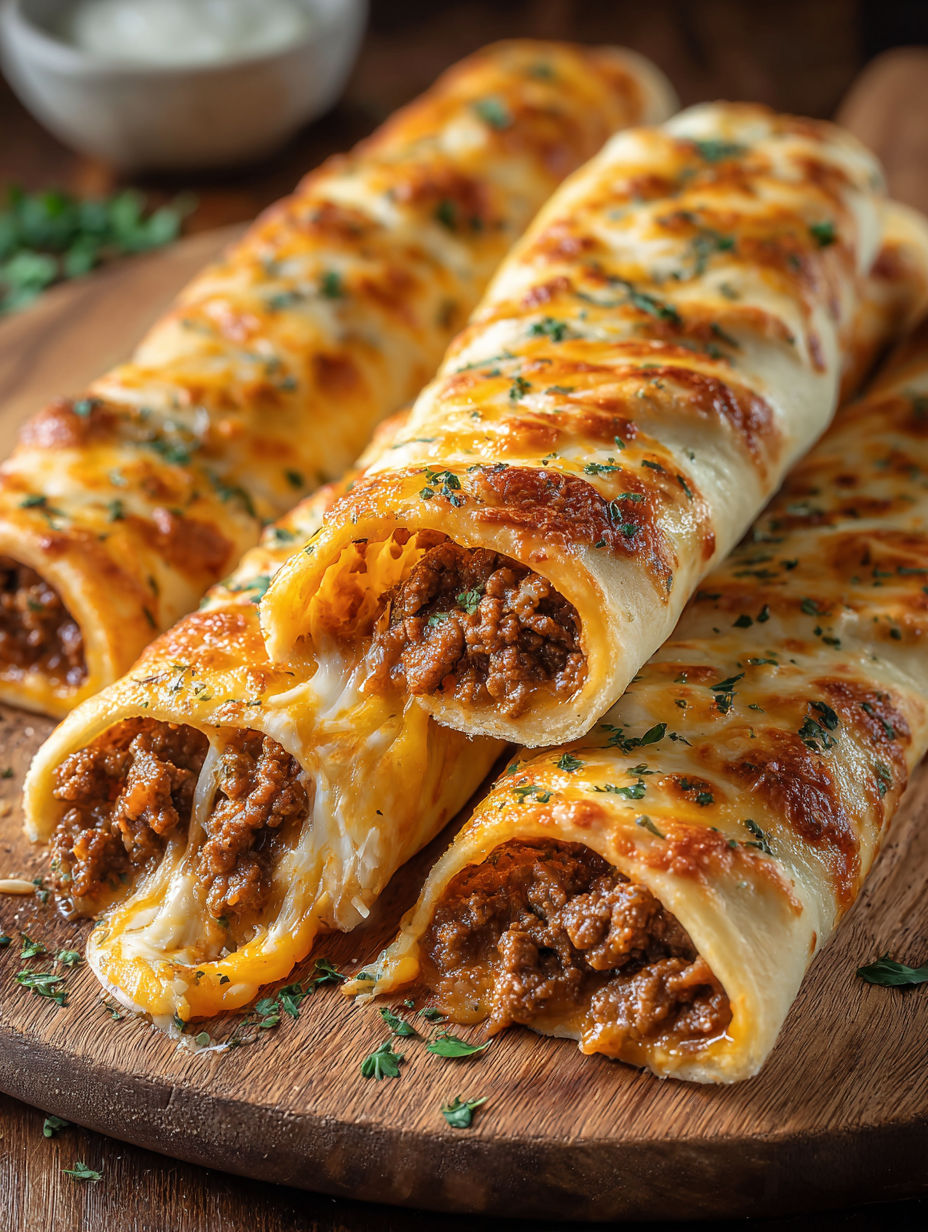
This Cheesy Taco Breadsticks recipe combines two family favorites into one irresistible appetizer that disappears within minutes at every gathering. The gooey cheese pull and seasoned beef filling create the perfect handheld snack that both kids and adults can't resist.
I first made these for a last minute Super Bowl party when I needed something substantial but quick. They were such a hit that they've become my signature contribution to potlucks and the first thing my nieces and nephews ask for when they visit.
Ingredients
- Ground beef creates the hearty filling and works perfectly with the taco seasonings
- Taco seasoning packet saves time but you can use homemade blend for controlling spice level
- Refrigerated pizza dough provides the perfect chewy yet crisp exterior with minimal effort
- Colby jack and cheddar cheese sticks offer the perfect meltability factor and that satisfying cheese pull
- Butter mixture with garlic and parsley adds a savory finish that elevates these breadsticks beyond basic
- Garlic powder infuses butter with aromatic flavor without burning like fresh garlic might
- Dried parsley adds color and mild herbaceous notes to complement the richness
How To Make Cheesy Taco Breadsticks
- Prepare the oven
- Preheat your oven to 220°C and lightly coat a large baking sheet with nonstick spray. This high temperature ensures the breadsticks get golden and crisp while the cheese inside melts perfectly.
- Cook the beef filling
- In a skillet over medium high heat cook the ground beef breaking it into small crumbles until fully browned. Drain any excess fat then return to the skillet. Add the taco seasoning and stir thoroughly until well coated. Allow the seasoned beef to cool to room temperature which prevents the dough from getting soggy during assembly.
- Prepare the dough portions
- Roll out the refrigerated pizza dough on a clean surface. Cut the dough in half lengthwise then slice into 10 equal rectangles. I find using a pizza cutter makes this step quick and precise ensuring evenly sized breadsticks.
- Assemble the breadsticks
- Place approximately 1 tablespoon of seasoned beef onto the center of each dough rectangle. Top with a halved cheese stick carefully positioning it in the middle. Roll the dough around the filling making sure to pinch all seams completely sealed to prevent cheese from leaking during baking.
- Add flavor coating
- In a small bowl combine melted butter garlic powder and dried parsley until well mixed. Using a pastry brush generously coat the tops of each assembled breadstick with this aromatic mixture which will create a beautiful golden crust with delicious flavor.
- Bake to perfection
- Arrange the prepared breadsticks on your baking sheet leaving some space between each one. Bake in the preheated oven for 10 to 12 minutes or until the tops are golden brown and the dough is completely cooked through. The cheese inside should be gloriously melty.
The cheese sticks are my secret weapon in this recipe. I discovered through multiple attempts that cutting them lengthwise rather than using shredded cheese creates that perfect stretchy cheese pull that makes these irresistible. My teenage son once ate seven of these in one sitting after a soccer game proving just how satisfying they are.
Make Ahead Options
These taco breadsticks can be assembled up to 24 hours in advance and kept refrigerated. Simply prepare everything up to the butter brushing step then cover with plastic wrap and refrigerate. When ready to serve brush with the butter mixture and bake adding an extra minute or two to the cooking time since they'll be cold from the refrigerator. This makes them perfect for entertaining when you want to minimize last minute preparation.
Serving Suggestions
Transform these breadsticks into a complete meal by serving alongside complementary dips and sides. My family loves them with small bowls of guacamole salsa and sour cream for dipping. A simple side salad with a lime vinaigrette balances the richness perfectly. For parties arrange them on a platter with colorful dipping options creating an interactive appetizer station that guests love.
Customization Ideas
The basic recipe is delicious as is but can be easily customized to suit different preferences or dietary needs. For a lighter version use ground turkey or chicken in place of beef. Vegetarians can enjoy these by substituting the meat with a mixture of black beans and corn seasoned with the same taco spices. For those who love heat add diced jalapeños to the meat mixture or sprinkle some crushed red pepper flakes into the butter topping. My husband prefers his extra spicy so I often make half the batch with added cayenne pepper just for him.

Recipe FAQs
- → Can I make these cheesy taco breadsticks ahead of time?
Yes! You can prepare them up to the baking step, then refrigerate for up to 24 hours. When ready to serve, brush with the garlic butter mixture and bake, adding 2-3 minutes to the cooking time since they'll be cold.
- → What dipping sauces pair well with these breadsticks?
Salsa, guacamole, sour cream, and queso dip all make excellent companions. For a spicy option, try chipotle ranch or jalapeño cream cheese dip.
- → Can I use homemade pizza dough instead of refrigerated?
Absolutely! Homemade pizza dough works wonderfully. Just roll it to about 1/4 inch thickness before cutting and filling as directed in the instructions.
- → How can I make these breadsticks vegetarian?
Substitute the ground beef with plant-based ground meat, black beans, or a mixture of diced vegetables sautéed with the same taco seasoning. The cheese can be replaced with dairy-free alternatives.
- → What's the best way to reheat leftover taco breadsticks?
For the best texture, reheat in an oven or toaster oven at 180°C for about 5-7 minutes. Microwaving works in a pinch (30-45 seconds), but the breadsticks won't be as crispy.
- → Can I freeze these taco breadsticks?
Yes! Freeze them either before or after baking. If freezing unbaked, don't apply the butter mixture until ready to bake. Frozen baked breadsticks can be reheated directly from frozen at 180°C for 10-12 minutes.