
 Pin
Pin
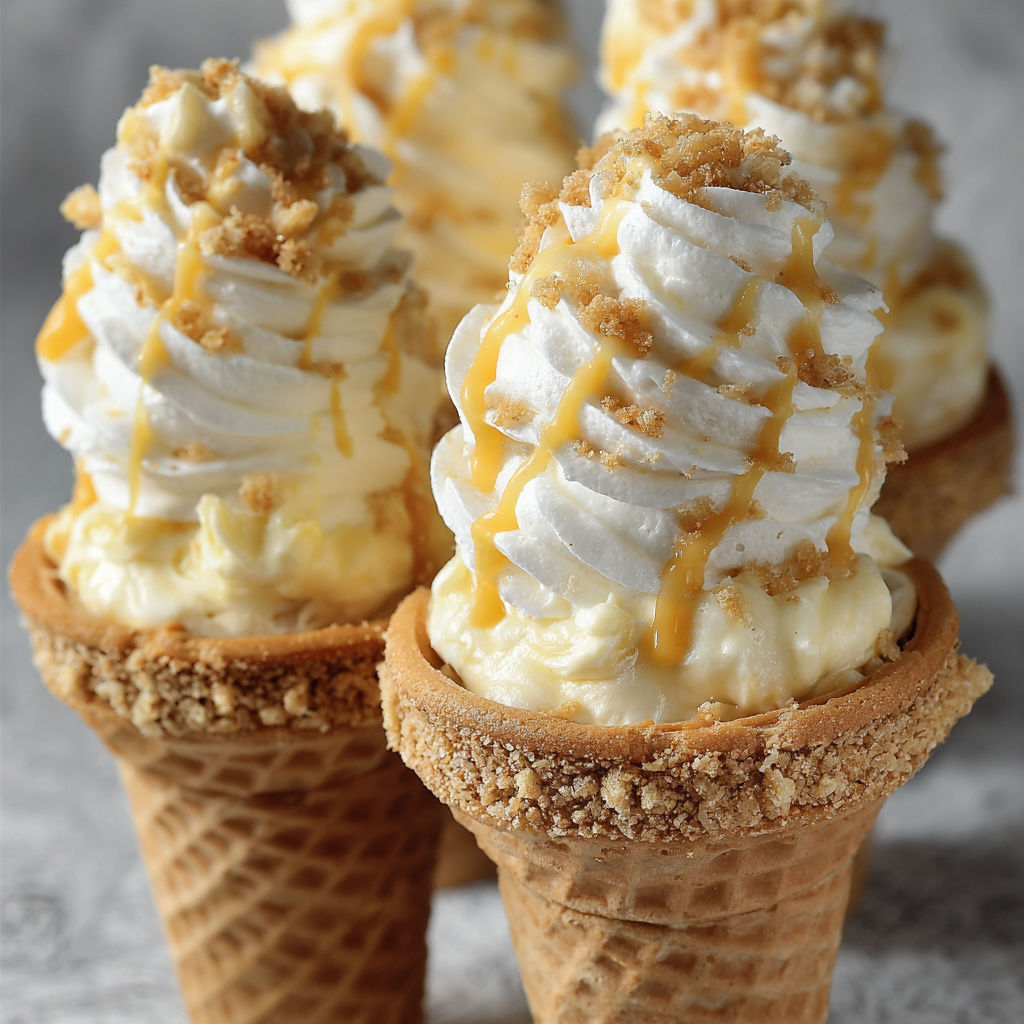
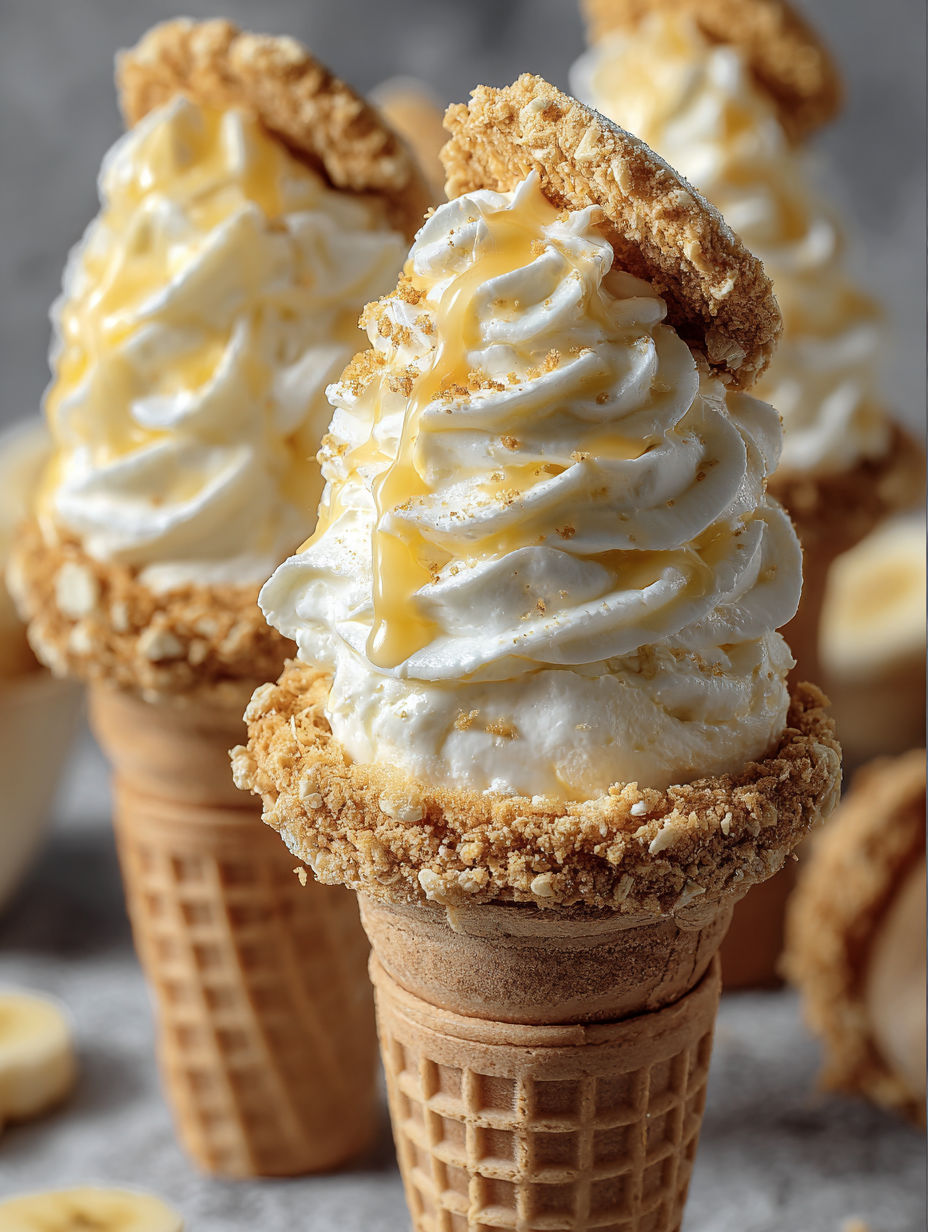
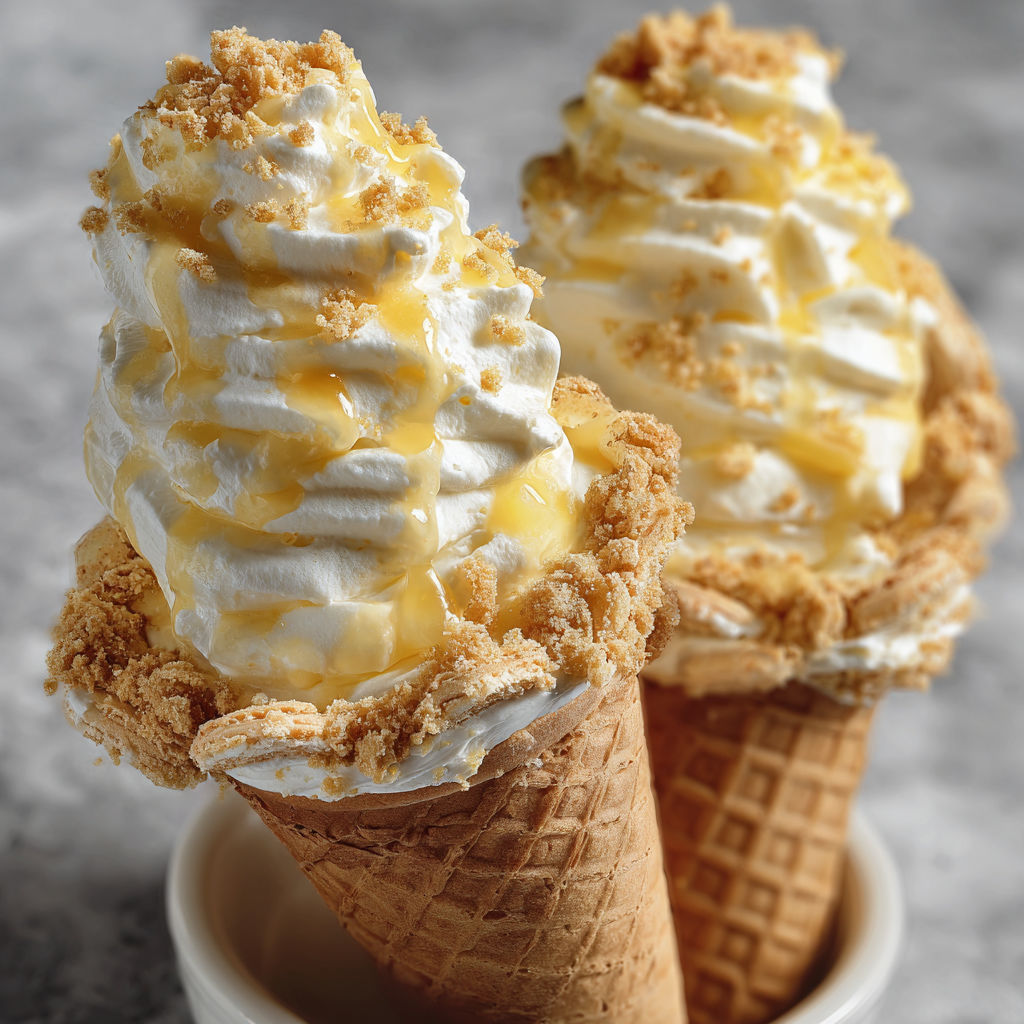
This banana pudding cheesecake cone recipe transforms classic Southern banana pudding into a portable treat that's perfect for summer gatherings or when you want to impress guests with a creative dessert. The creamy banana pudding cheesecake filling pairs beautifully with the crunch of waffle cones and vanilla wafer cookies.
I created these for my daughter's birthday party last summer, and they were such a hit that the adults were fighting over the last few cones. The combination of nostalgic banana pudding flavors with the fun of an ice cream cone brings out the kid in everyone.
Ingredients
- For Cheesecake Filling: Cream cheese provides the classic cheesecake tanginess and creamy base
- Powdered sugar: sweetens without graininess
- Heavy whipping cream: creates lightness and helps the filling hold its shape
- Vanilla extract: enhances all the flavors especially the banana
- Instant banana pudding mix: delivers that authentic banana pudding flavor
- Cold whole milk: activates the pudding and provides richness
- For Cones: Waffle cones or sugar cones the sturdier the better to hold your filling
- Vanilla wafer cookies: crushed for authentic banana pudding texture
- Unsalted butter: binds the cookie crumbs and adds richness
- For Garnish: Fresh banana slices use slightly underripe bananas for best flavor and texture
- Whipped cream: adds a light cloud on top
- Extra crushed vanilla wafers: for that essential texture contrast
- Optional caramel sauce: for decadent sweetness
How To Make Banana Pudding Cheesecake Cones
- Prepare the cream cheese base:
- Beat softened cream cheese with powdered sugar until completely smooth and free of lumps. This usually takes 2-3 minutes with an electric mixer. Make sure your cream cheese is truly room temperature to avoid lumps.
- Whip the cream:
- In a separate chilled metal bowl, whip the heavy cream until soft peaks form. The cream should hold its shape but still have a slight droop at the peaks. Don't overwhip or it will become butter.
- Mix the pudding:
- Whisk together the instant banana pudding mix with cold milk until it begins to thicken, about 2-3 minutes. The pudding should be thick but still pourable. The cold milk is essential for proper setting.
- Combine the mixtures:
- Gently fold the whipped cream into the cream cheese mixture using a rubber spatula with a light hand to maintain air bubbles. Then carefully fold in the banana pudding until fully incorporated but not overmixed. The filling should be light yet stable.
- Create cookie crumb rims:
- Mix crushed vanilla wafers with melted butter until moistened. Dip the tops of each cone into water, then into the cookie mixture, pressing gently to adhere. Allow to set for 5 minutes.
- Fill the cones:
- Spoon the filling into a piping bag fitted with a large round tip, or use a zip-top bag with the corner snipped off. Pipe the filling into each cone, filling all the way to the cookie rim.
- Garnish and serve:
- Top each cone with fresh banana slices, a swirl of whipped cream, a sprinkle of crushed vanilla wafers, and a drizzle of caramel sauce if desired. Serve immediately for best texture and presentation.
My absolute favorite part of this recipe is watching people's faces light up when they take their first bite. My grandfather, who grew up in Tennessee and considers himself a banana pudding expert, declared these "even better than Mama's recipe" – which is the highest compliment in our family.
Make-Ahead Tips
You can prepare the banana pudding cheesecake filling up to 24 hours in advance and keep it refrigerated in an airtight container. The cookie crumb mixture can also be prepared ahead and stored at room temperature in a sealed container. For the freshest experience, always assemble the cones just before serving. The filling will stay creamy and delicious, but once in the cone, a countdown begins before sogginess sets in.
Flavor Variations
This versatile recipe can be adapted to suit different tastes and occasions. Try substituting chocolate pudding mix for a chocolate banana version that tastes like a sophisticated banana split. For a tropical twist, add 1/4 cup finely chopped pineapple to the filling and garnish with toasted coconut. During fall, consider a pumpkin version using pumpkin spice pudding mix instead of banana – it pairs wonderfully with the vanilla wafers and creates a portable pumpkin cheesecake experience.
Serving Suggestions
These banana pudding cheesecake cones make a fantastic dessert station at parties. Set up a "build your own" bar with the filled cones and various toppings like chocolate chips, different sauces, sprinkles, and fresh fruits. For an adult gathering, consider serving with a shot of banana liqueur or rum on the side for optional drizzling. These cones also pair beautifully with coffee or, for a complete banana experience, a banana smoothie.
Recipe FAQs
- → Can I make these banana pudding cheesecake cones ahead of time?
You can prepare the banana pudding cheesecake filling up to 24 hours in advance and store it in the refrigerator. However, it's best to fill the cones just before serving to prevent them from becoming soggy. If you need to assemble them slightly ahead, keep them refrigerated and add the fresh banana slices and toppings right before serving.
- → How long will these cheesecake cones stay fresh?
Once assembled, the cones are best enjoyed immediately or within 2-3 hours. The filled cones will gradually soften as they sit. The banana pudding cheesecake filling itself can be stored in an airtight container in the refrigerator for up to 3 days.
- → Can I use a different flavor of pudding mix?
Absolutely! While banana pudding creates the classic flavor profile, you can experiment with other flavors like vanilla, chocolate, or butterscotch pudding mix. Just adjust your toppings to complement your chosen pudding flavor.
- → What can I use instead of waffle cones?
If you don't have waffle cones, sugar cones work well as a substitute. For a different presentation, you could serve the filling in small dessert cups or glasses layered with the crushed vanilla wafers for a parfait-style dessert.
- → How do I prevent the bananas from browning?
To prevent the fresh banana slices from browning, you can brush them lightly with lemon juice or pineapple juice. However, since these cones are best served immediately after assembly, the bananas shouldn't have much time to brown.
- → Can I make a larger batch for a party?
Yes! This recipe scales up easily for parties. You can double or triple the ingredients as needed. For easier serving at events, consider pre-filling the cones and arranging them in a cone holder or in a shallow box with holes cut to hold them upright.