 Pin
Pin
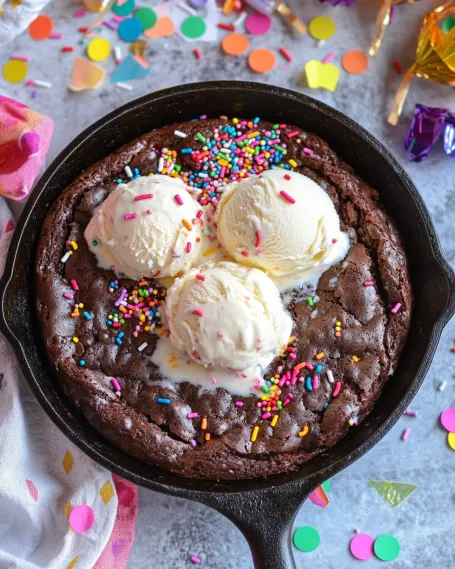
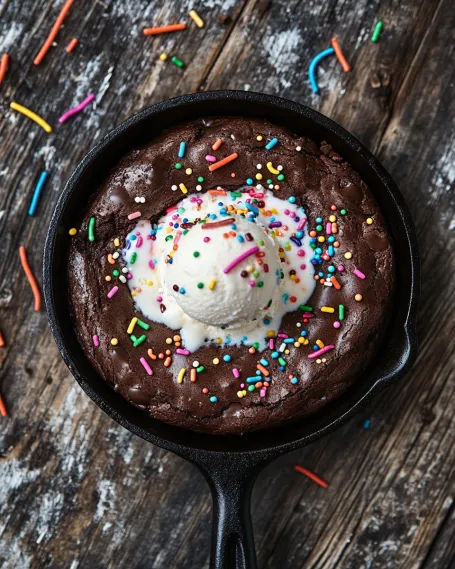
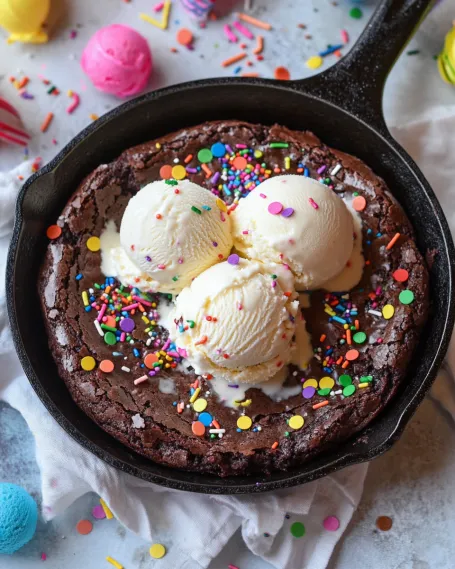
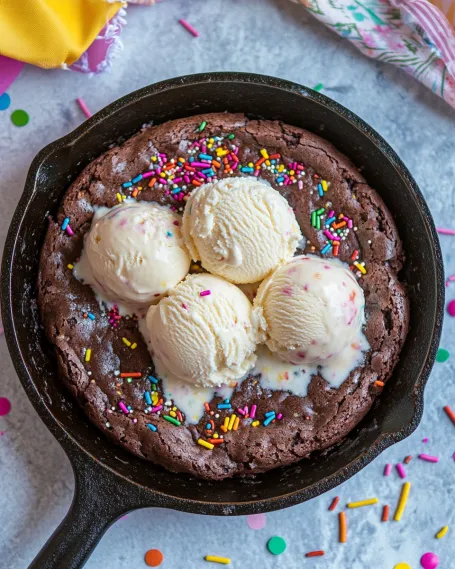
There's something magical about a dessert that transforms an ordinary day into a celebration, and this Birthday Cake Brownie Skillet does exactly that. A decadent brownie base loaded with colorful sprinkles surrounds a hidden layer of chopped Birthday Cake Lindor Truffles that melt into pools of creamy sweetness. The entire creation is topped with scoops of ice cream, rich chocolate fudge, and (of course) more sprinkles for a dessert that's as fun to look at as it is to devour. Whether it's actually your birthday or you're simply channeling that "it's my birthday too!" energy from Cheers, this skillet dessert brings the party to your table any day of the year.
Last month, I made this for a friend who was feeling down, declaring it her "un-birthday" celebration. The moment I placed the warm skillet topped with rapidly melting ice cream in the center of the table, her face lit up. By the time we'd dug our spoons into that magical combination of warm brownie, melted truffles, and cold ice cream, everyday troubles were forgotten in favor of pure dessert bliss.
Essential Ingredients and Selection Tips
- Brownie Mix: Choose a high-quality fudgy brownie mix as your base. While homemade brownies are wonderful, the convenience factor of a mix makes this dessert accessible for any occasion.
- Birthday Cake Lindor Truffles: These white chocolate truffles with colorful sprinkles add a creamy sweetness and festive flair. If you can't find them, substitute regular white chocolate truffles and add extra sprinkles, or try another flavor that pairs well with chocolate.
- Rainbow Sprinkles: Invest in good quality sprinkles that won't immediately bleed their color into the batter. Jimmies (the long, thin sprinkles) hold up best during baking.
- Ice Cream: Vanilla is a classic choice that allows the brownie to shine, but birthday cake flavor creates a theme-perfect pairing. Choose a premium brand with a high fat content for the best melting quality.
The beauty of this recipe lies in how a few special ingredients transform a simple brownie into something extraordinary. When I first developed this dessert, I was amazed at how the Lindor truffles melted into the brownie, creating pockets of creamy goodness that elevated the entire experience.
Detailed Cooking Instructions
- Step 1: Prepare Your Workspace
- Begin by preheating your oven to 350°F and thoroughly coating a 9-inch cast iron skillet with baking spray. The cast iron creates those perfectly crispy edges while keeping the center moist and gooey. Make sure your skillet is well-seasoned to prevent sticking and to make cleanup easier. Gather all ingredients and chop the truffles into quarters before beginning the brownie mix to ensure a smooth process.
- Step 2: Create the Sprinkle-Studded Batter
- Prepare the brownie batter according to the package directions, being careful not to overmix, which can lead to tough brownies. Once the batter is just combined, gently fold in 1/2 cup of rainbow sprinkles using a rubber spatula. Fold just until the sprinkles are evenly distributed throughout the batter, being careful not to overmix which would cause the colors to bleed. The batter should be thick but pourable.
- Step 3: Layer for Maximum Impact
- Pour half of the prepared brownie batter into the greased skillet, using the back of a spoon to spread it evenly to the edges. This first layer forms the foundation of your dessert. Next, evenly distribute the chopped Lindor truffles across the surface, keeping them about 1/2 inch away from the edges to prevent them from melting out during baking. Carefully dollop the remaining brownie batter over the truffles, gently spreading it to cover most of the truffle layer. Don't worry about creating a perfectly smooth top - the rustic look adds to the charm.
- Step 4: Master the Baking Time
- Bake the skillet brownie for 25-30 minutes, watching carefully toward the end. The perfect brownie skillet should have crispy edges that pull slightly away from the pan, while the center remains somewhat soft but not completely raw. A toothpick inserted about 2 inches from the edge should come out with a few moist crumbs, while the center will be softer due to the melted truffles. Remember that the brownie will continue to cook slightly from residual heat after removal from the oven.
- Step 5: Serve with Flair
- Allow the skillet to cool for 5-10 minutes before serving. This cooling period allows the brownie to set slightly while still maintaining that warm, gooey center. Top with generous scoops of ice cream, arranging them around the skillet so everyone can access the perfect brownie-to-ice cream ratio. Drizzle with warm chocolate fudge sauce and finish with an extra shower of rainbow sprinkles for that perfect birthday aesthetic. Serve immediately with spoons for everyone to dig directly into the skillet.

My first attempt at this recipe taught me valuable lessons about timing. I left it in the oven a few minutes too long, resulting in a brownie that was more cake-like than fudgy. Now I always err on the side of underbaking slightly, knowing that the residual heat will finish the job perfectly without overcooking.
Serving Inspiration
Transform this skillet dessert into an interactive experience by creating a topping bar alongside it. Provide small bowls of different ice cream flavors, warm sauces (chocolate, caramel, and strawberry), and various toppings like crushed cookies, chopped nuts, and of course, different types of sprinkles. Let everyone customize their portion for a personalized treat. For a more elegant presentation, serve individual portions in small bowls, topping each with a birthday candle for a special touch even on non-birthdays.

Sweet Variations
While the birthday cake version is wonderfully festive, I've created several variations that offer different flavor profiles. For a s'mores theme, use chocolate truffles in the center and top with marshmallow ice cream and graham cracker pieces. During the holidays, try mint chocolate truffles with peppermint ice cream and crushed candy canes. For chocolate lovers, use double chocolate brownie mix with dark chocolate truffles and chocolate ice cream for an intense chocolate experience that's still visually impressive.
Make-Ahead Options
This dessert is at its best when served freshly baked, but you can prepare components ahead of time to streamline the process. The brownie batter can be mixed and refrigerated for up to 24 hours before baking - just let it come to room temperature for about 20 minutes before assembling in the skillet. If you do have leftovers, store them in an airtight container and reheat individual portions in the microwave for 20-30 seconds before topping with fresh ice cream.

This Birthday Cake Brownie Skillet has become my go-to dessert for turning ordinary evenings into celebrations. There's something about gathering around a warm skillet filled with gooey chocolate, melting ice cream, and festive sprinkles that brings people together and creates joy. The beauty of this dessert lies not just in its delicious flavors and textures, but in how it reminds us that sometimes we don't need a special occasion to enjoy something special - sometimes the dessert itself becomes the occasion.
Recipe FAQs
- → Can I use a different type of Lindor truffles?
- Absolutely! While the Birthday Cake Lindor truffles add to the festive theme, you can substitute any Lindor truffle flavor you prefer or have on hand. Classic milk chocolate, white chocolate, or dark chocolate truffles all work beautifully in this recipe. You could even mix different flavors for a variety of chocolate pockets throughout the brownie.
- → What if I don't have a cast iron skillet?
- No problem! While a cast iron skillet gives nice crispy edges, you can use any oven-safe 9-inch round baking dish or cake pan instead. A glass pie dish works well too. Just watch the baking time as different materials conduct heat differently - check a few minutes earlier than the recipe suggests.
- → Can I make this recipe from scratch instead of using a box mix?
- Yes! If you prefer homemade brownies, use your favorite brownie recipe that fits a 9-inch pan. The process remains the same - spread half the batter, add the chopped truffles, then top with remaining batter. This will give you even more control over the flavor and texture of your dessert.
- → How do I know when the brownie skillet is done baking?
- The edges should be set and slightly crispy, while the center should be firm but still slightly gooey. If you insert a toothpick about 2 inches from the edge, it should come out with a few moist crumbs. Remember that the brownie will continue to set as it cools, and for this dessert, slightly underbaked is better than overbaked.
- → Can I make this ahead of time for a party?
- Yes! You can bake the brownie skillet up to a day ahead. Let it cool completely, then cover tightly with foil. Before serving, reheat it in a 300°F oven for about 10 minutes or until warmed through. Add the ice cream and toppings just before bringing it to the table. This makes party planning much easier!
- → What are some good variations for this recipe?
- This recipe is super versatile! Try adding 1/2 cup of chopped nuts or peanut butter chips to the batter. For a s'mores version, use chocolate truffles and top with marshmallows for the last 2 minutes of baking. For holidays, use seasonal sprinkles and coordinating Lindor truffle flavors - red and green for Christmas, orange and black for Halloween, etc. You can also switch up the ice cream flavor to complement your theme.
