
 Pin
Pin
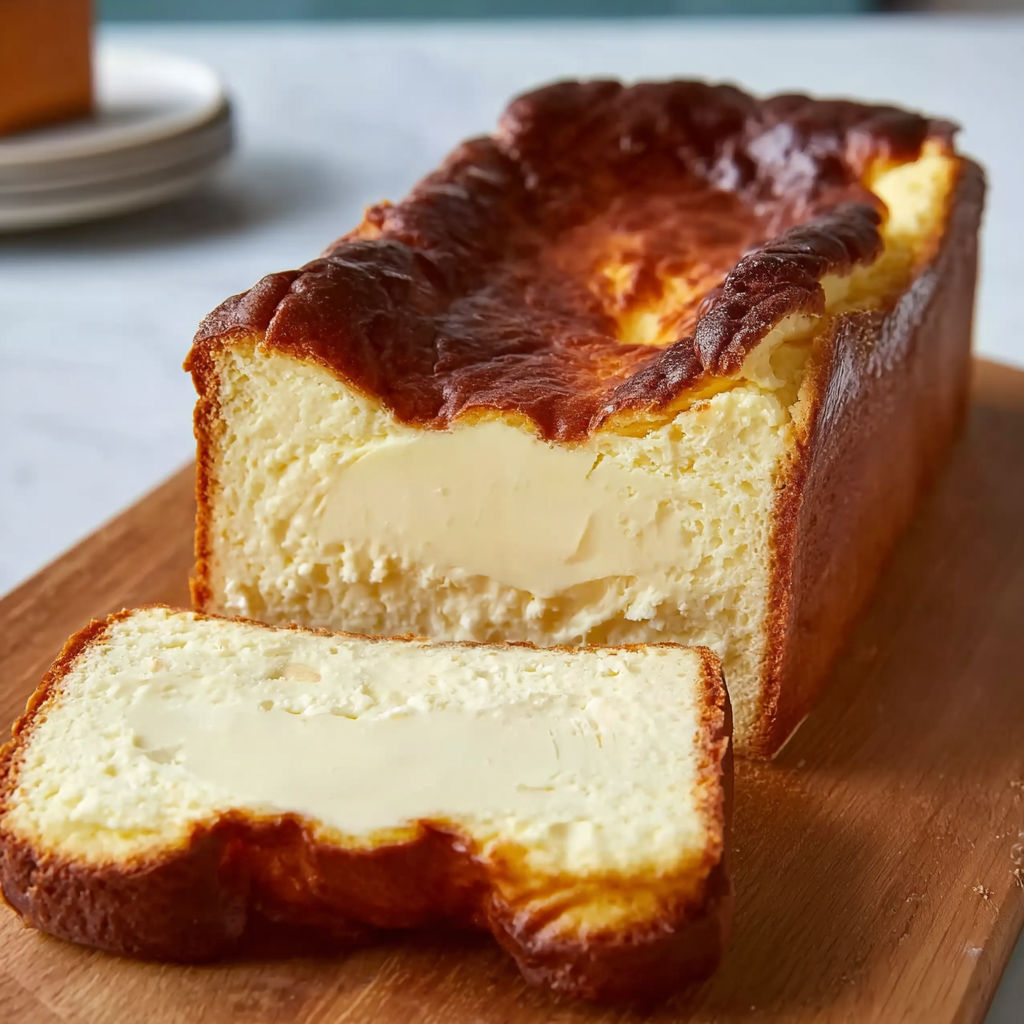
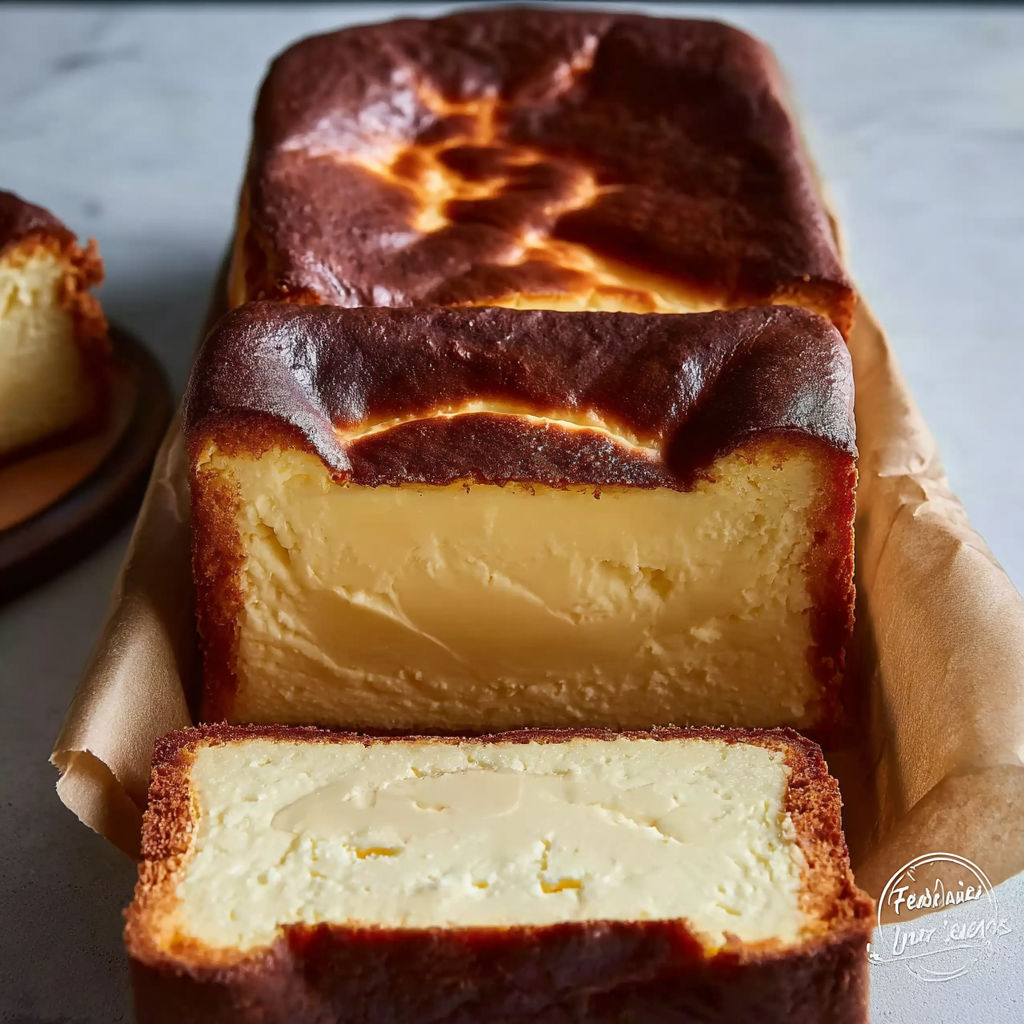
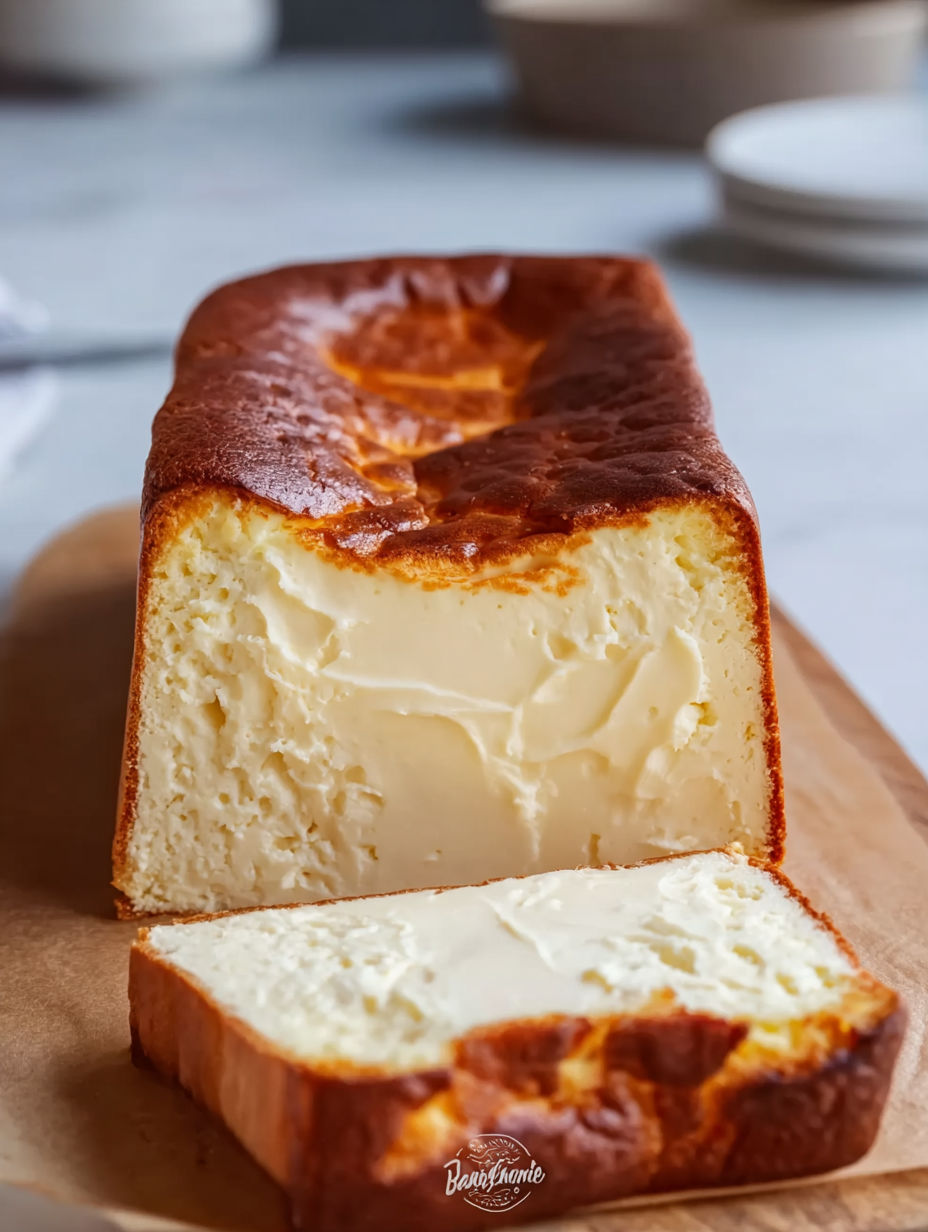
This decadent Burnt Basque Cheesecake transforms into a sliceable masterpiece when baked in a loaf pan. The caramelized exterior gives way to an impossibly creamy interior that will make you question why you ever bothered with traditional cheesecake recipes.
I discovered this recipe during lockdown when cream cheese was one of the few dairy products still available at my local store. What started as a pandemic experiment has become my signature dessert for dinner parties.
Ingredients
- Cream cheese Full fat provides the richest flavor and best texture. Always use brick-style, never the spreadable kind
- Granulated sugar Creates the perfect level of sweetness and helps achieve that caramelized top
- Eggs The backbone of structure in this cheesecake. Room temperature ensures proper incorporation
- Heavy cream Adds luxurious silkiness and prevents the texture from becoming too dense
- Vanilla extract A touch of warmth and depth. Use pure extract not imitation for best results
- Salt Enhances all the flavors and balances the sweetness
- All-purpose flour Just a tablespoon stabilizes without making the cake taste floury
How To Make Burnt Basque Cheesecake in a Loaf Pan
- Prepare the pan
- Line your loaf pan with parchment paper, allowing plenty of overhang on the sides. The paper will wrinkle this is part of the rustic charm. The excess paper makes removal effortless after baking.
- Create the base mixture
- Beat cream cheese and sugar together for a full 3 minutes until light and genuinely fluffy. Scrape down the bowl several times to ensure no lumps remain. The mixture should look almost whipped.
- Add eggs properly
- Incorporate eggs one at a time, mixing for 30 seconds between additions. This gradual approach prevents the batter from breaking and ensures a silky smooth texture.
- Introduce the liquid ingredients
- Pour in heavy cream, vanilla, and salt. Beat until the mixture looks like thick pancake batter with a glossy sheen about 1 minute. Be patient here as proper incorporation affects the final texture.
- Incorporate flour gently
- Sift flour directly over the bowl to prevent lumps, then fold with a spatula using a gentle bottom-to-top motion. Overmixing at this stage can toughen the cheesecake.
- Bake with confidence
- Pour into the prepared pan and bake at a high temperature 400°F. The intense heat creates that signature burnt top while keeping the interior creamy. When done, the edges will be set but the center should wobble slightly like barely set jello.
My favorite part of this recipe is watching guests taste it for the first time. The contrast between the caramelized exterior and the creamy interior always elicits wide eyes and requests for the recipe. My neighbor even claimed it was better than any cheesecake she had in her travels through Spain.
The Art of Perfect Doneness
Achieving the ideal doneness for Basque cheesecake is part science, part intuition. Look for deep golden brown edges with a center that has risen but still retains some movement when gently shaken. Underbaking results in a pudding-like center that will not set properly, while overbaking creates a cake that is too firm and loses the signature creamy texture. Trust that the carryover cooking will continue the process even after removing from the oven.
Storage and Make-Ahead Tips
This cheesecake actually improves with time in the refrigerator. Store it covered for up to 5 days, though the texture is at its peak between 24-48 hours after baking. The flavors meld and deepen while the interior becomes increasingly silky. You can freeze individual slices wrapped tightly in plastic wrap and then foil for up to 2 months. Thaw overnight in the refrigerator for best results.
Flavor Variations
While the classic recipe shines on its own, you can customize with subtle flavor additions. Incorporate 1 tablespoon of citrus zest or a teaspoon of espresso powder into the batter. For an adult version, add 2 tablespoons of your favorite liqueur such as Grand Marnier or Amaretto. Serve with fresh berries or a drizzle of warm jam to complement the creamy texture with bright fruity notes.
The Spanish Connection
This cheesecake originated at La Viña restaurant in San Sebastián, Spain, where it has been served since the 1990s. Unlike traditional cheesecakes with graham cracker crusts and careful temperature control, Basque cheesecake embraces high heat and simplicity. The loaf pan version offers the same incredible flavor with perfect portioning for smaller households. Each slice reveals the beautiful gradient from caramelized exterior to creamy heart.
Recipe FAQs
- → How do I know when my Burnt Basque Cheesecake is properly baked?
The cheesecake is ready when the top is deeply golden brown (almost burnt-looking) while the center still jiggles slightly when gently shaken. This will ensure the classic contrast between the caramelized exterior and creamy interior. Don't worry about cracks—they're part of this cheesecake's rustic charm.
- → Can I use low-fat cream cheese for this cheesecake?
Full-fat cream cheese is strongly recommended for this recipe. The higher fat content creates the signature creamy texture and rich flavor that defines Basque cheesecake. Low-fat substitutes may result in a less satisfying texture and flavor profile.
- → Why does the cheesecake need to chill for so long?
The long chilling period (at least 4 hours, preferably overnight) allows the cheesecake to fully set and develop its perfect texture. This patience-requiring step ensures clean slices and allows the flavors to meld together beautifully.
- → Can I add other flavors to this Basque cheesecake?
While the classic version celebrates simplicity, you can experiment with additions like lemon zest, a splash of liqueur, or a touch of espresso powder. Just be careful not to overwhelm the delicate flavor balance that makes Basque cheesecake special.
- → How should I store leftover Basque cheesecake?
Store leftover cheesecake in the refrigerator, covered with plastic wrap or in an airtight container, for up to 5 days. Let it sit at room temperature for about 15-20 minutes before serving for the best texture and flavor.
- → What's the difference between Basque cheesecake and regular cheesecake?
Basque cheesecake intentionally has a caramelized, almost burnt top, and a creamier, more custard-like interior than traditional cheesecake. It doesn't use a graham cracker crust, requires no water bath, and embraces its rustic, cracked appearance rather than aiming for a perfectly smooth top.