
 Pin
Pin
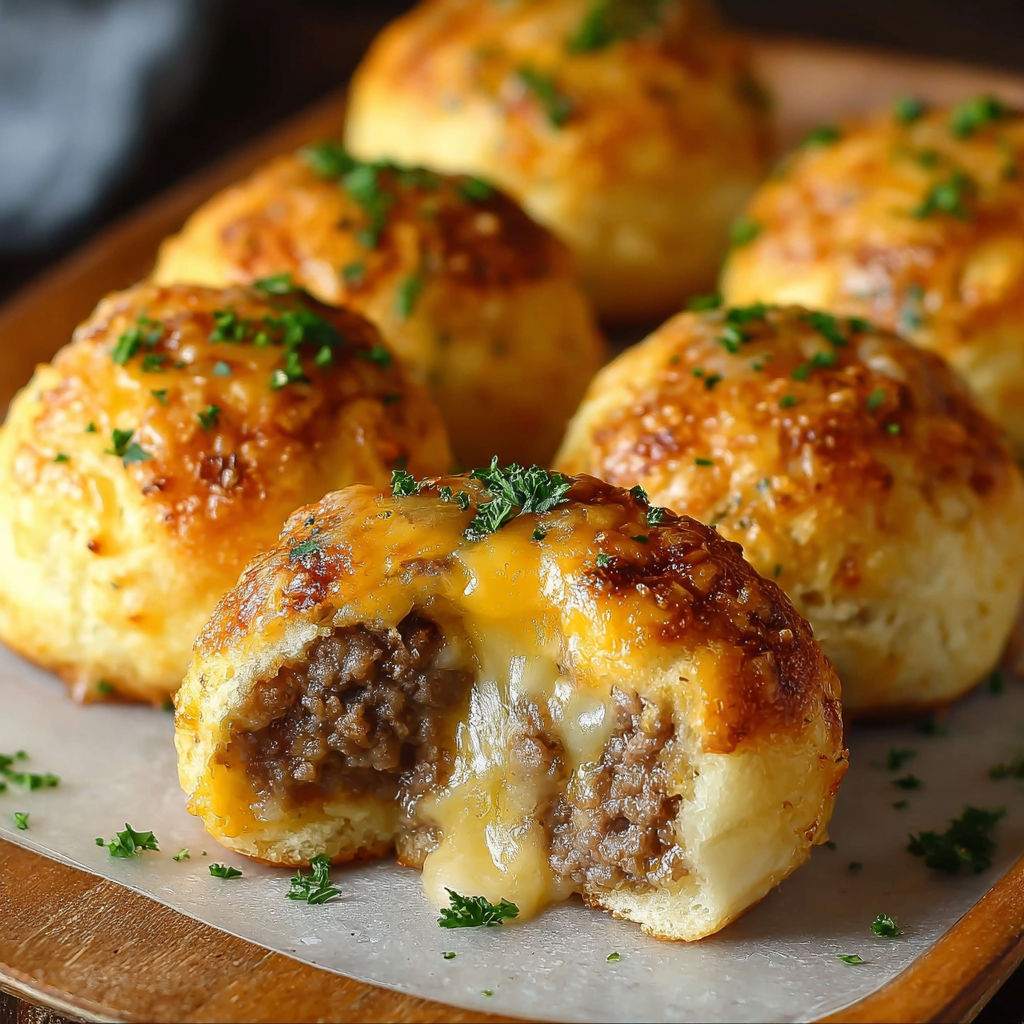
This savory Cheeseburger Garlic Bombs recipe transforms simple ingredients into irresistible handheld bites that satisfy all your comfort food cravings. The flaky biscuit exterior gives way to a gooey, cheesy beef center infused with garlic for an explosion of flavor that will have everyone reaching for seconds.
I first made these bombs for a last minute football gathering and they disappeared faster than any other dish on the table. Now they're requested at every casual get together and my teenagers have even learned to make them on their own.
- 16.3 oz can of biscuit dough: provides the perfect pillowy exterior that bakes to golden perfection
- 1 lb of ground beef: creates the hearty base look for 80/20 for best flavor
- 2 minced garlic cloves: infuse the meat with aromatic flavor fresh is always better than powdered
- 1 cup cubed cheddar cheese: adds that classic burger melt factor choose sharp for more pronounced flavor
- 1/2 cup diced Parmesan cheese: brings a nutty saltiness that elevates the entire bite
- 2 tbsp melted butter: creates that irresistible golden crust and carries the garlic flavor
- 1 tbsp chopped parsley: adds fresh color and a hint of brightness use Italian flat leaf for best flavor
How To Make Cheeseburger Garlic Bombs
- Preheat the Oven:
- Set your oven to 375°F 190°C and allow it to fully preheat while you prepare the filling. This ensures your bombs start cooking immediately when they go in creating that perfect crispy exterior.
- Cook the Beef Mixture:
- Brown the ground beef in a skillet over medium heat adding the minced garlic about halfway through cooking. Break the meat into small crumbles and cook until no pink remains about 7 to 8 minutes. Drain excess grease thoroughly to prevent soggy bombs.
- Create the Cheesy Filling:
- Remove the skillet from heat and immediately stir in both the cubed cheddar and diced Parmesan cheese. The residual heat will slightly melt the cheese creating a cohesive mixture that stays together when stuffed into the biscuits.
- Assemble the Bombs:
- Take each biscuit round and flatten it into a 4inch circle using your palms or a rolling pin. Place about 2 tablespoons of the beef and cheese mixture in the center then fold the edges upward and pinch firmly to seal completely. Roll gently between your palms to ensure a tight seal.
- Prepare for Baking:
- Arrange your sealed bombs on a parchment lined baking sheet with at least an inch of space between each one. Brush each bomb generously with melted butter ensuring the entire surface is covered for maximum flavor and browning.
- Bake to Perfection:
- Place the baking sheet in the center of your preheated oven and bake for 12 to 15 minutes watching carefully toward the end. The bombs are done when they've expanded and turned a deep golden brown color with visible flaky layers.
- Garnish and Serve:
- Remove from the oven and let cool for just 3 to 4 minutes as the filling will be extremely hot. Sprinkle with fresh chopped parsley and serve while still warm when the cheese inside is perfectly gooey.
The minced garlic is truly the secret ingredient that elevates these from regular cheeseburger bites to something special. My husband who normally avoids garlic insisted I add more the second time I made them. Now I always keep garlic cloves on hand specifically for this recipe since it's become our go to for impromptu gatherings.
Delicious Variations
These Cheeseburger Garlic Bombs serve as a perfect base recipe that welcomes personalization. For a bacon cheeseburger version add 4 strips of cooked crumbled bacon to your meat mixture. Mushroom lovers can sauté 1/2 cup of finely diced mushrooms with the beef. You can even create a pizza burger variation by adding 1/4 cup of pizza sauce and substituting mozzarella for the cheddar cheese.

Storage Tips
These bombs maintain their flavor beautifully when stored properly. Keep leftovers in an airtight container in the refrigerator for up to 3 days. For best reheating results place them in a 350°F oven for 7 to 10 minutes or in an air fryer at 325°F for 3 to 4 minutes. The microwave works in a pinch but sacrifices the crispy exterior. If freezing arrange unbaked bombs on a baking sheet until solid then transfer to a freezer bag for up to 1 month adding 5 minutes to the baking time when cooking from frozen.
Perfect Pairings
Turn these savory bites into a complete meal by serving alongside a crisp green salad with ranch dressing or a simple tomato soup for dipping. For entertaining arrange them on a platter with small bowls of classic burger condiments like ketchup dill pickle relish or special sauce. They also pair wonderfully with sweet potato fries or a tangy coleslaw for a complete burger experience without the mess.

Recipe FAQs
- → Can I make these Cheeseburger Garlic Bombs ahead of time?
Yes, you can prepare these bombs up to 24 hours in advance. Assemble them completely, place on a baking sheet, cover with plastic wrap and refrigerate. When ready to bake, simply brush with garlic butter and add a few extra minutes to the baking time since they'll be cold.
- → What can I serve with these cheese-filled bombs?
These bombs pair wonderfully with marinara sauce, ranch dressing, or even ketchup and mustard for dipping. For a complete meal, serve alongside a fresh green salad or vegetable sticks to balance the richness.
- → Can I use homemade biscuit dough instead of canned?
Absolutely! Homemade biscuit dough works beautifully. Roll it out to about 1/4 inch thickness and cut into circles before filling. You may need to adjust baking time slightly depending on your dough recipe.
- → How do I know when the bombs are fully cooked?
The bombs are done when the outside is golden brown and the dough is fully cooked through (not doughy in the center). If you're concerned about doneness, you can test one by cutting it open - the dough should be cooked through and the cheese fully melted.
- → Can I freeze these cheese bombs?
Yes, these freeze well! Bake them completely, let cool, then freeze in a single layer on a baking sheet. Once frozen, transfer to a freezer bag. Reheat in a 350°F oven for about 10 minutes until heated through.
- → What variations can I make to the filling?
Get creative with your filling! Try adding chopped bacon, diced jalapeños, caramelized onions, or different cheese varieties. You can also season the ground beef with taco seasoning or Italian herbs for different flavor profiles.