
 Pin
Pin
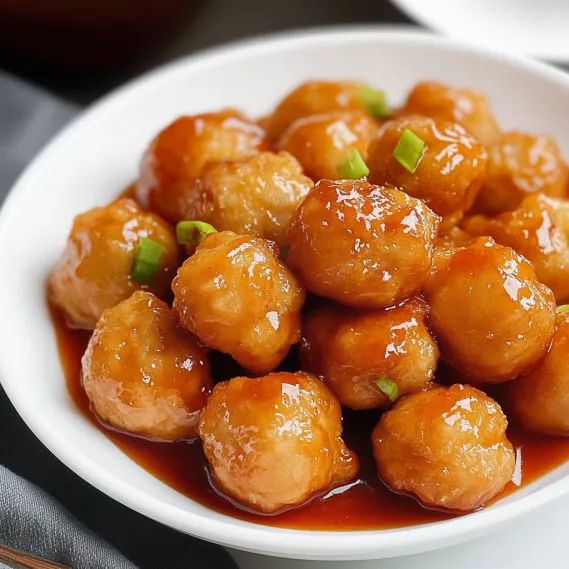
These Chinese chicken balls deliver the perfect combination of crispy, airy batter surrounding tender, juicy chicken, all paired with a homemade sweet and tangy dipping sauce. The double-frying technique creates that authentic restaurant-style crunch that stays crispy for hours, not minutes. This takeaway favorite transforms simple ingredients into irresistible bites that disappear quickly at any gathering. Best of all, making them at home means you control the quality and can enjoy them fresh from the fryer.
I first attempted to recreate these chicken balls after moving away from my favorite Chinese restaurant. After several failed attempts with soggy, heavy batter, I learned the secret techniques from a friend's father who had owned a Chinese restaurant for decades. The first time I got it right, my family couldn't believe how authentic they tasted – crispy exterior, tender chicken inside, and that perfect sweet-tangy sauce for dipping.
Essential Ingredients and Selection Tips
- Chicken Breast: Boneless, skinless chicken breast works best for a clean flavor and texture. Cut into 1-inch cubes for the perfect bite-size pieces.
- Plain Flour: The foundation of your batter, providing structure and crispiness. Use all-purpose flour for best results.
- Corn Starch: Creates that light, airy texture and helps achieve the perfect golden color. Don't substitute with regular flour.
- Baking Soda: The secret ingredient that makes the batter rise and become fluffy. Just a pinch makes all the difference.
- Ketchup & Vinegar: Forms the base of the sweet and sour sauce, balancing sweetness with tanginess.
I've discovered that the texture of your chicken makes a noticeable difference in the final result. If your chicken seems particularly moist or loose, add a tablespoon of plain breadcrumbs to the mixture to help it hold shape better during the forming and freezing process.
Detailed Cooking Instructions
- Step 1: Prepare the Perfect Marinade
- Cut 500g chicken breast into 1-inch cubes and place in a bowl. Add 1 teaspoon salt, ½ teaspoon white pepper, 1 teaspoon sesame oil, 1 teaspoon sugar, ¼ teaspoon baking soda, 1 teaspoon garlic paste, and 1 tablespoon cornstarch. Mix thoroughly with your hands, ensuring each piece is coated, then refrigerate for 30-60 minutes.
- Step 2: Create Fluffy Batter Mixture
- In a large bowl, combine 1 cup plain flour, ½ cup cornstarch, ½ teaspoon salt, and ½ teaspoon baking soda. Gradually whisk in 1 cup cold water until you achieve a medium-thick batter that coats the back of a spoon. Let the batter rest for 5 minutes while heating your oil.
- Step 3: Master the Double-Fry Technique
- Heat oil to 340-350°F in a deep pan or wok. Dip marinated chicken pieces in cornstarch, then into batter, and carefully drop into hot oil. Fry in small batches for 3 minutes until light golden, remove and drain. After all pieces complete the first fry, increase oil temperature slightly and fry again for 1-2 minutes until golden brown and crispy.
- Step 4: Make Authentic Sweet-Sour Sauce
- In a saucepan, combine ¼ cup ketchup, 2 tablespoons tomato puree, ¼ cup sugar, 1 tablespoon white vinegar, and ¼ cup water. Simmer over low heat for 2-3 minutes until slightly thickened. Remove from heat and stir in 1 tablespoon cornstarch dissolved in 2 tablespoons water until smooth.
- Step 5: Serve for Maximum Enjoyment
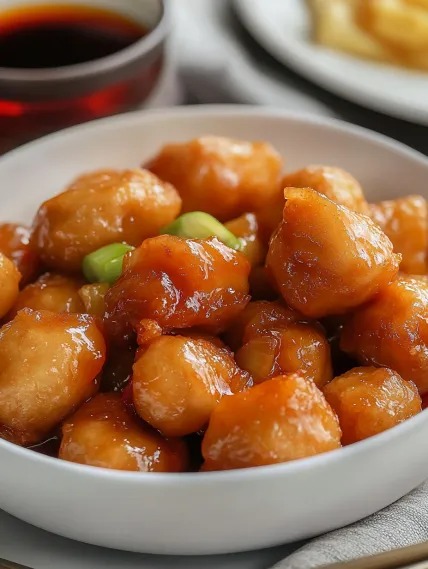
- Transfer crispy chicken balls to a serving plate lined with paper towels to absorb any excess oil. Serve immediately with sweet and sour sauce on the side for dipping, or toss the chicken balls in the sauce for a fully coated version.
The first time I attempted this recipe, I was intimidated by the double-frying process. After several lopsided attempts, I realized that simple pleats work just as well as perfect ones - the flavor remains delicious regardless. Now my children help with the folding, creating their own unique styles that have become part of our family tradition.
The Secret to Perfect Texture
The magic of these chicken balls lies in their contrasting textures - crispy bottoms and tender tops. I've found that the key to achieving this is controlling moisture at every stage. First, properly squeezing the salted cabbage removes excess water that would otherwise make the filling soggy. Second, the cornstarch not only binds the filling but also absorbs any remaining moisture. Finally, the cooking technique - first frying, then steaming, then frying again - creates that signature crisp bottom while ensuring the filling cooks through perfectly.

Make-Ahead Magic for Entertaining
One of the greatest advantages of this recipe is its make-ahead flexibility. I often prepare this in stages when hosting: shape and freeze the balls up to a month in advance, bread them the day before (storing them covered in the refrigerator), and then simply bake them before guests arrive. The aroma of these baking fills the house with an irresistible scent that sets the tone for a delicious gathering. For larger parties, I make double batches, keeping the second batch warm in a low oven until needed.
Transforming Leftovers Into New Meals
If you somehow end up with leftover chicken balls (though this rarely happens in my house!), they can be transformed into entirely new dishes. Crumble them into scrambled eggs for a Chinese-inspired breakfast hash, or slice them and add to a simple green salad with a spicy vinaigrette for a light lunch. My favorite repurposing trick is to nestle halved leftover chicken balls atop a bowl of creamy grits, creating a satisfying breakfast that carries the flavors into the next day.

Chef's Helpful Tips
- Allow the balls to rest for 5 minutes after baking before serving – this helps set the interior for the perfect bite
- For extra flavor dimension, add a teaspoon of smoked paprika to your panko mixture
- If you have trouble finding chicken thighs locally, order them online from authentic suppliers like Bourgeois Meat Market or The Best Stop
- Serve with multiple dipping options – a spicy remoulade and cool ranch alongside the sweet and sour sauce
- For a festive presentation, arrange the balls on a platter with alternating sprinkles of chopped parsley, purple cabbage, and yellow bell pepper to represent the traditional green, purple, and gold
Recipe FAQs
- → Can I make these chicken balls ahead of time?
- Yes! You can prepare and do the first fry ahead of time, then refrigerate. Just before serving, do the second fry for 2-3 minutes until golden and crispy. This is great for parties when you want fresh, hot appetizers without all the last-minute preparation.
- → Is there a way to make these without deep frying?
- While deep frying gives the best results, you can shallow fry them first until light brown, then finish in a preheated oven or air fryer until golden and crispy. The texture won't be exactly the same, but they'll still be delicious.
- → Why do you fry the chicken balls twice?
- Double-frying is a technique that creates extra-crispy results. The first fry cooks the chicken through and sets the batter, while the second fry at high heat creates that perfect golden, crunchy exterior that stays crispy longer.
- → Can I adjust the sweet and sour sauce to my taste?
- Absolutely! If you prefer a sweeter sauce, add more sugar. For more tang, increase the vinegar. You can also add a dash of sriracha or chili flakes if you want some heat in your sauce.
- → What can I serve with these chicken balls?
- These chicken balls work great as an appetizer on their own, but you can also serve them as part of a Chinese-inspired meal with fried rice, stir-fried vegetables, or noodles. They're also perfect for party platters alongside spring rolls or dumplings.
- → How long will the sweet and sour sauce keep?
- The sauce can be stored in an airtight container in the refrigerator for up to a week. It's versatile and works well with other dishes like spring rolls, wontons, or even as a dipping sauce for fries.