 Pin
Pin
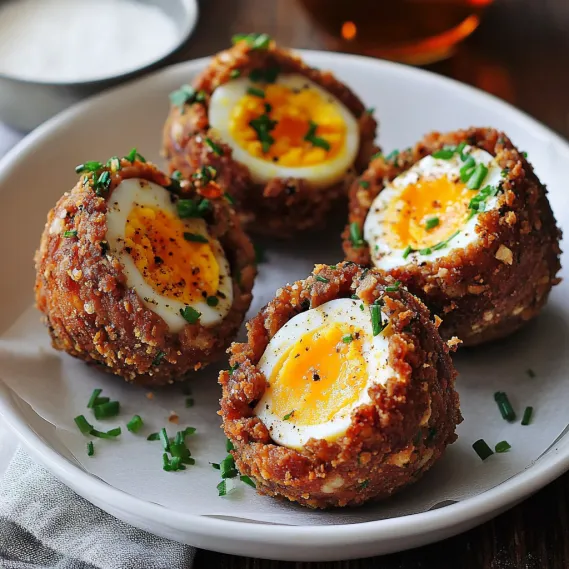
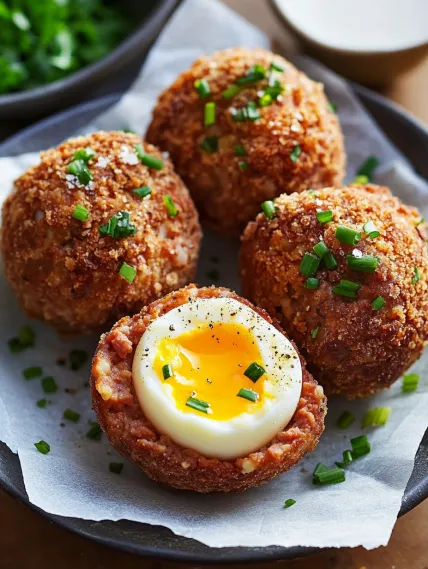
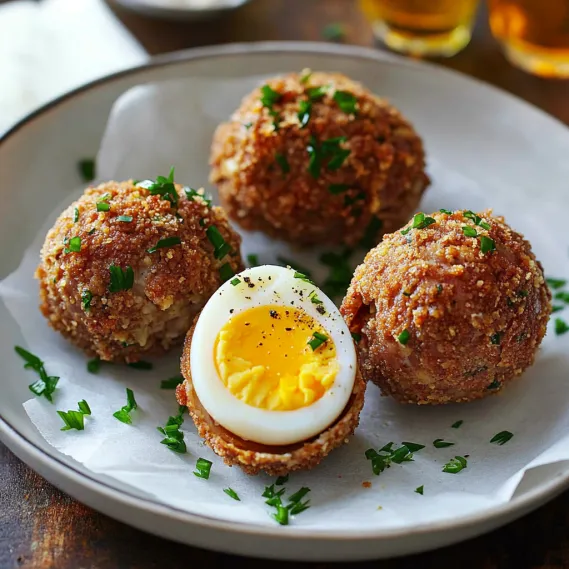
The moment you bite into a freshly made Scotch Egg, you experience a perfect harmony of textures – the satisfying crunch of golden panko giving way to a layer of savory, herb-flecked sausage, finally revealing the treasure at its center: a perfectly cooked egg with that coveted jammy yolk.
Last month, I made these for a family gathering, and my food-skeptical nephew, who typically subsists on chicken nuggets alone, devoured two in quick succession. The secret? Taking care with each component, especially achieving that perfect soft-boiled egg that creates the 'wow' moment when you cut into it.
Essential Ingredients and Selection Tips
- Eggs: Choose large, fresh eggs for the best results. Eggs that are about a week old are actually easier to peel after boiling than extremely fresh ones.
- Breakfast Sausage: Look for high-quality pork breakfast sausage with visible herbs and a good fat content for the most flavorful result.
- Panko Breadcrumbs: These Japanese-style breadcrumbs create a lighter, airier coating than traditional breadcrumbs for the perfect crunch.
- Fresh Herbs: Don't skip the fresh chives and parsley – they brighten the sausage mixture considerably and add a layer of flavor complexity.
- English Mustard: Provides a subtle heat and depth to the sausage mixture. Dijon makes a good substitute if English mustard isn't available.
I've discovered that the quality of your sausage makes an enormous difference in the final result. Whenever possible, I source mine from a local butcher where I can ensure it has the right balance of meat, fat, and seasoning for that perfect flavor and texture.
Detailed Cooking Instructions
- Step 1: Prepare the Perfect Soft-Boiled Eggs
- Fill a medium saucepan with enough cold water to cover 4 large eggs by about an inch. Bring the water to a rolling boil, reduce heat slightly, and set a timer for exactly 6 minutes for jammy yolks or 7 minutes for slightly firmer centers. Immediately transfer eggs to an ice bath for 10 minutes to stop the cooking process, then peel carefully under running water.
- Step 2: Create the Flavorful Sausage Mixture
- In a medium bowl, combine 1 pound of breakfast sausage with 2 tablespoons each of finely chopped fresh chives and parsley. Add 1 tablespoon of English mustard, ¼ teaspoon of freshly grated nutmeg, ½ teaspoon of salt, and ¼ teaspoon of black pepper. Mix thoroughly but gently with your hands until all ingredients are evenly distributed.
- Step 3: Set Up Your Breading Station
- Prepare three separate shallow dishes: the first with ½ cup all-purpose flour seasoned with a pinch of salt; the second with 2 eggs beaten with 1 tablespoon of water; and the third with 2 cups of panko breadcrumbs. Keep one hand 'dry' for flour and breadcrumbs and one hand 'wet' for the egg wash to avoid creating a sticky mess.
- Step 4: Master the Wrapping Technique
- Divide the sausage mixture into 4 equal portions. With slightly damp hands, flatten each portion into an oval about ¼-inch thick. Place a peeled egg in the center of each oval, then gently wrap the sausage around it, sealing all seams by smoothing and pinching together.
- Step 5: Apply the Double Coating
- Working with one sausage-wrapped egg at a time, roll it first in the seasoned flour, tapping off excess, then dip into beaten egg, allowing excess to drip off, and finally roll in panko breadcrumbs, pressing gently to adhere.

The first time I attempted this recipe, I was intimidated by the assembly process. After several lopsided attempts, I realized that simple pleats work just as well as perfect ones - the flavor remains delicious regardless. Now my children help with the folding, creating their own unique styles that have become part of our family tradition.
The Secret to Perfect Texture
The magic of these cookies lies in their contrasting textures - crispy bottoms and tender, flavorful fillings. I've found that the key to achieving this is controlling moisture at every stage. First, properly squeezing the salted cabbage removes excess water that would otherwise make the filling soggy. Second, the cornstarch not only binds the filling but also absorbs any remaining moisture. Finally, the cooking technique - first frying, then steaming, then frying again - creates that signature crispy bottom while ensuring the filling cooks through perfectly.

Make-Ahead Magic for Entertaining
One of the greatest advantages of this recipe is its make-ahead flexibility. I often prepare this in stages when hosting: shape and freeze the balls up to a month in advance, bread them the day before (storing them covered in the refrigerator), and then simply bake them before guests arrive. The aroma of these baking fills the house with an irresistible scent that sets the tone for a delicious gathering. For larger parties, I make double batches, keeping the second batch warm in a low oven until needed.
Transforming Leftovers Into New Meals
If you somehow end up with leftover Scotch eggs (though this rarely happens in my house!), they can be transformed into entirely new dishes. Crumble them into scrambled eggs for a French-inspired breakfast hash, or slice them and add to a simple green salad with a spicy vinaigrette for a light lunch. My favorite repurposing trick is to nestle halved Scotch eggs atop a bowl of creamy grits, creating a satisfying breakfast that carries the flavors into the next day.

Chef's Helpful Tips
- Allow the balls to rest for 5 minutes after baking before serving – this helps set the interior for the perfect bite
- For extra flavor dimension, add a teaspoon of smoked paprika to your panko mixture
- If you have trouble finding Scotch eggs locally, order them online from authentic suppliers like Bourgeois Meat Market or The Best Stop
- Serve with multiple dipping options – a spicy remoulade and cool ranch alongside the Louisiana dipping sauce
- For a festive presentation, arrange the balls on a platter with alternating sprinkles of chopped parsley, purple cabbage, and yellow bell pepper to represent the traditional green, purple, and gold
Recipe FAQs
- → Can I bake these Scotch eggs instead of frying them?
- Yes, you can bake Scotch eggs, though the exterior won't be quite as crispy as the fried version. To bake, preheat your oven to 400°F (200°C), place the prepared eggs on a parchment-lined baking sheet, and lightly spray or brush with oil. Bake for about 25-30 minutes until the sausage is fully cooked (internal temperature of 145°F) and the outside is golden brown, turning halfway through.
- → What type of sausage works best for Scotch eggs?
- Traditional British Scotch eggs use plain pork sausage meat, but breakfast sausage works very well because it's already seasoned. You can use any ground sausage meat you prefer - Italian, chorizo, or even turkey sausage for a leaner option. Just adjust the additional seasonings based on how flavored your sausage already is.
- → Can I make these ahead of time for a party?
- Absolutely! Scotch eggs can be made up to 2 days ahead and stored in the refrigerator. You can serve them cold (traditional for picnics), or reheat them in a 350°F (175°C) oven for about 10-15 minutes until warmed through. Just be careful not to overheat, as this could dry out the eggs.
- → How do I achieve that perfect jammy egg yolk?
- For that ideal jammy yolk texture, precision timing is key. Start with eggs straight from the refrigerator, place them in cold water, and once the water comes to a boil, cook exactly 4 minutes. Most importantly, transfer immediately to an ice bath to stop the cooking process. The outer white will be set while the yolk maintains that beautiful, soft center.
- → What can I serve with Scotch eggs?
- Scotch eggs pair wonderfully with a variety of accompaniments. Traditional options include a good quality mustard, piccalilli (British pickled vegetable relish), or HP sauce. For a meal, serve with a crisp green salad, pickled vegetables, or chips (fries). They're also excellent as part of a ploughman's lunch with cheese, crusty bread, and pickles.
- → Why is my sausage layer splitting during cooking?
- If your sausage layer splits during cooking, a few factors might be at work: 1) The layer may be too thin in spots - aim for an even thickness all around, 2) The seams might not be properly sealed - really pinch them together, 3) The oil temperature might be too high - keep it at a steady 325°F, or 4) You might be turning the eggs too early - let them form a crust before handling them too much in the oil.
