
 Pin
Pin
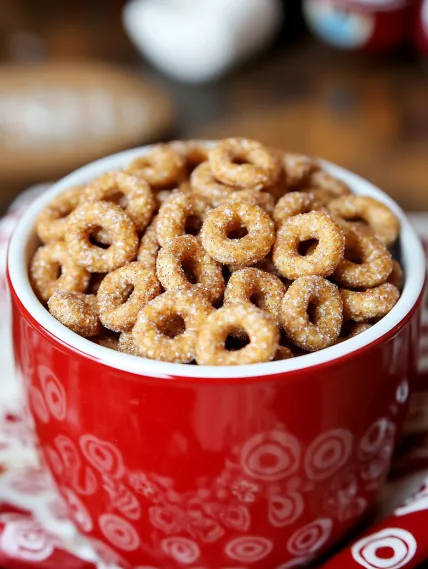
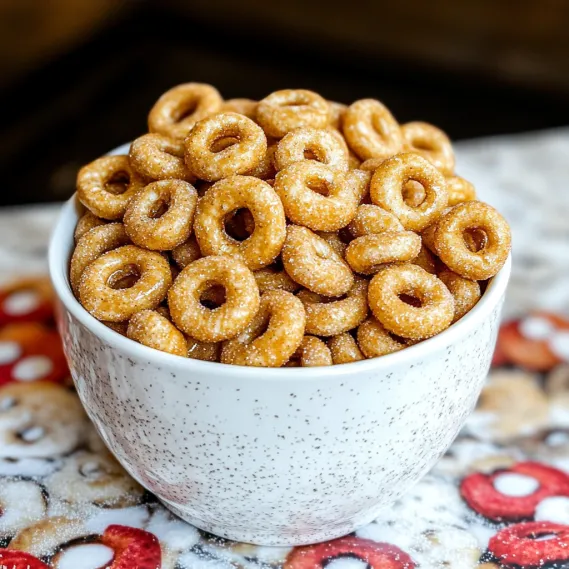
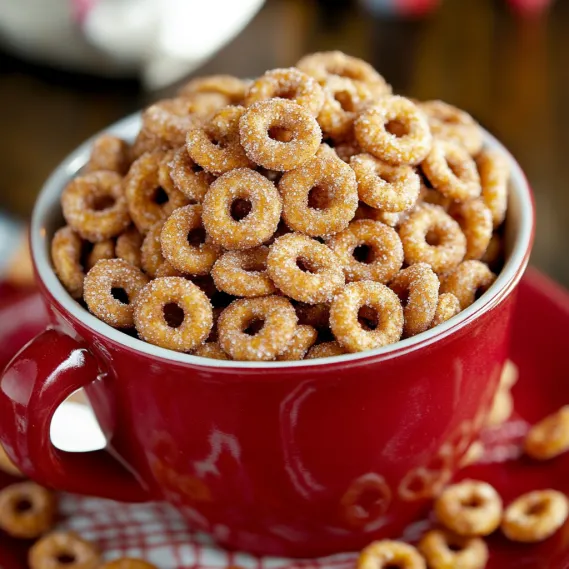
These Mini Doughnut Hot Buttered Toasted Cheerios transform a simple breakfast cereal into an irresistible sweet treat that captures the nostalgic flavor of fresh mini doughnuts. The magic happens when ordinary Cheerios are gently toasted in butter and vanilla, then tossed in a perfect blend of cinnamon and sugar. The result is a crunchy, aromatic snack with caramelized notes and warm spice that's impossible to stop eating by the handful. Perfect for movie nights, afternoon snacking, or packaging as homemade gifts, this five-ingredient wonder proves that sometimes the simplest recipes create the most addictive treats.
I first discovered toasted Cheerios after marrying my husband, who grew up enjoying them as a family snack. When I received a package of Cinnamon Cheerios with this recipe card, I decided to give it a try, expecting a simple treat. What I didn't expect was how transformative the process would be – turning an everyday breakfast cereal into something that disappeared from the bowl within minutes. The buttery, vanilla-infused Cheerios with their cinnamon-sugar coating reminded me of those mini doughnuts you get at fairs and carnivals, but with the satisfying crunch that keeps you reaching for just one more handful.
Essential Ingredients and Selection Tips
- Cheerios: Original or Cinnamon Cheerios work perfectly. The plain variety allows the added flavors to shine, while Cinnamon Cheerios intensify the final cinnamon-sugar coating.
- Butter: Use real butter, not margarine, for the richest flavor. Salted butter creates a delicious sweet-salty contrast.
- Vanilla Extract: Pure vanilla extract (not imitation) adds depth and warmth that complements the cinnamon beautifully.
- Cinnamon: Fresh, aromatic cinnamon makes all the difference. If your cinnamon has been in the pantry for more than six months, consider replacing it.
- Sugar: Regular white granulated sugar works perfectly, though you can experiment with turbinado or light brown sugar for different flavor notes.
I've found that the key to this recipe's success lies in using fresh ingredients and proper technique. When I made these with older cinnamon that had lost its potency, they were good but didn't have that same irresistible aroma that makes them so special.
Detailed Cooking Instructions
- Step 1: Prepare The Buttery Foundation
- In a large skillet, melt 3 tablespoons of butter over low heat, being careful not to brown it. Once melted, stir in 1 teaspoon of vanilla extract, which will immediately fill your kitchen with a warm, inviting aroma. Keep the heat low – this prevents burning and allows the Cheerios to toast gradually and evenly.
- Step 2: Toast With Patience And Care
- Add 4 cups of Cheerios (original or cinnamon flavor) to the skillet with the melted butter and vanilla. Gently stir to coat every piece with the butter mixture. Continue cooking and stirring constantly for about 5 minutes until the Cheerios turn a slightly deeper golden color and become noticeably more fragrant. Be vigilant during this step – the difference between perfectly toasted and burnt happens quickly.
- Step 3: Create The Perfect Coating
- While the Cheerios are still warm, transfer them to a large bowl. Immediately sprinkle with a mixture of 1/4 cup white sugar and 1 teaspoon ground cinnamon. Toss thoroughly to ensure each piece is evenly coated with the cinnamon-sugar mixture. The residual heat and butter from the toasting process will help the sweet coating adhere perfectly to each Cheerio.
- Step 4: Cool For Optimal Crunch
- Spread the coated Cheerios in a single layer on a baking sheet lined with parchment paper. Allow them to cool completely, which takes about 15-20 minutes. This cooling period is crucial as it allows the coating to set and the Cheerios to regain their signature crunch. Once cooled, they're ready to enjoy immediately or store for later snacking.
- Step 5: Store For Extended Enjoyment
- Once completely cooled, transfer the toasted Cheerios to an airtight container. They'll maintain their perfect texture and flavor for up to a week, though in my house they rarely last more than a day or two before being devoured. For gift-giving, portion into decorative cellophane bags tied with ribbon or fill small mason jars for a charming presentation.
The first time I made these, I stepped away from the stove for just a minute and returned to slightly burnt Cheerios. Now I know that undivided attention during the toasting process is non-negotiable – but the five minutes of vigilance is absolutely worth the delicious result.
Perfect Flavor Variations To Try
While the classic cinnamon-sugar version is irresistible, I've experimented with several variations that have become family favorites. For a chocolate lover's dream, try adding a tablespoon of cocoa powder to the sugar mixture and a handful of mini chocolate chips while the Cheerios are still warm (they'll melt slightly, creating delicious chocolate-coated bites). During the holidays, I add a pinch of nutmeg and ground cloves to the cinnamon-sugar for a festive twist that tastes like Christmas cookies. For a more grown-up version, a tiny pinch of cayenne in the sugar mixture creates a surprising sweet heat that's addictive. My children's favorite variation includes a half cup of mini marshmallows tossed in while the Cheerios are still warm from the pan – they partially melt, creating gooey, s'mores-like clusters throughout.
Creative Serving And Gifting Ideas
These toasted Cheerios have become my go-to for both casual snacking and thoughtful homemade gifts. For movie nights, I serve them in paper cones made from decorative scrapbook paper – reminiscent of the paper bags mini doughnuts come in at the fair. They make perfect additions to lunch boxes, tucked into small containers as a sweet surprise. For holiday gifting, I fill clear ornaments with the mixture to create edible decorations that can be hung on the tree, then opened and enjoyed. When hosting brunch, I've used them as a topping for yogurt parfaits, where they add the perfect sweet crunch. My most popular presentation has been in mason jars with handwritten tags for teacher appreciation gifts – simple but always met with enthusiasm and requests for the recipe.
Kid-Friendly Cooking Project
One of the unexpected benefits of this recipe has been its role as a perfect cooking project to do with children. My kids love helping with each step, from measuring ingredients to the exciting stirring of the Cheerios in the pan (with supervision, of course). I've found it to be an excellent introduction to cooking for little ones – it teaches them about careful observation during the toasting process, the magic of how ingredients transform, and the satisfaction of creating something delicious from simple components. For very young helpers, I let them handle the mixing of the cinnamon and sugar and the final tossing of the coated Cheerios, keeping them away from the stove. The quick preparation and almost immediate gratification make it perfect for short attention spans.
The Perfect Portable Snack
One reason these toasted Cheerios have become a staple in our house is their incredible portability. Unlike many sweet treats that melt, crumble, or require refrigeration, these hold up beautifully in any environment. I regularly pack them for road trips, hiking excursions, and days at the beach or park. They're substantially less messy than many children's snacks, with no sticky fingers or crumbly residue to clean up. I've started keeping a container in my car for those moments when hunger strikes during errands or after-school activities. The combination of the whole grain Cheerios with the sweet coating provides a more sustaining snack than candy or cookies, making them perfect for busy days when you need a little energy boost.
This simple recipe has become much more than just a snack in our family – it's now a tradition associated with movie nights, road trips, and homemade holiday gifts. There's something magical about transforming an everyday cereal into something so special with just a few minutes and ingredients. The comforting aroma of butter, vanilla, and cinnamon that fills the kitchen as they toast announces to everyone that something delicious is on the way. And the fact that they disappear so quickly every time I make them is perhaps the best testament to just how irresistible they truly are.
Recipe FAQs
- → Can I use other cereals instead of Cheerios?
- Yes! This technique works well with many plain cereals. Try it with Chex, Corn Flakes, or Rice Krispies. Each will give a slightly different texture, but the same delicious cinnamon-sugar coating. Just watch different cereals carefully while toasting as they may brown at different rates.
- → How long will these cinnamon sugar Cheerios stay fresh?
- When stored in an airtight container at room temperature, these Mini Doughnut Hot Buttered Cheerios will stay fresh for up to 5 days. Make sure they're completely cooled before storing to prevent sogginess. If they lose some crispness over time, you can refresh them with a quick 1-2 minute toast in the oven.
- → Can I make this recipe without butter for a dairy-free version?
- Yes, you can substitute the butter with coconut oil or a plant-based butter alternative to make this recipe dairy-free. The flavor will be slightly different but still delicious. Just make sure to use the same amount (1/4 cup) to properly coat all the cereal.
- → What can I add to this recipe to make it more exciting?
- There are many fun variations you can try! Add 1/4 cup of chopped nuts like pecans or almonds when toasting the cereal. Mix in some mini chocolate chips after the cereal has cooled. Add 1/4 teaspoon of nutmeg or cardamom along with the cinnamon for more complex flavor. You can even drizzle with white chocolate after cooling for extra sweetness.
- → Why did my cereal burn while toasting?
- Cereal can burn quickly if the heat is too high or if it's not stirred frequently enough. Always use low heat as directed and stir constantly during the 5-minute toasting period. If your stove runs hot, you might even reduce the heat further or shorten the cooking time slightly. Keep a close eye on the cereal as it toasts – it should become fragrant and just slightly deeper in color.
- → Can I use brown sugar instead of white sugar?
- Absolutely! Brown sugar works wonderfully in this recipe and adds a deeper, more caramel-like flavor to the coating. You can substitute the same amount (1/4 cup) of packed brown sugar for the white sugar. You might even try a mixture of both sugars for a more complex sweetness.