
 Pin
Pin
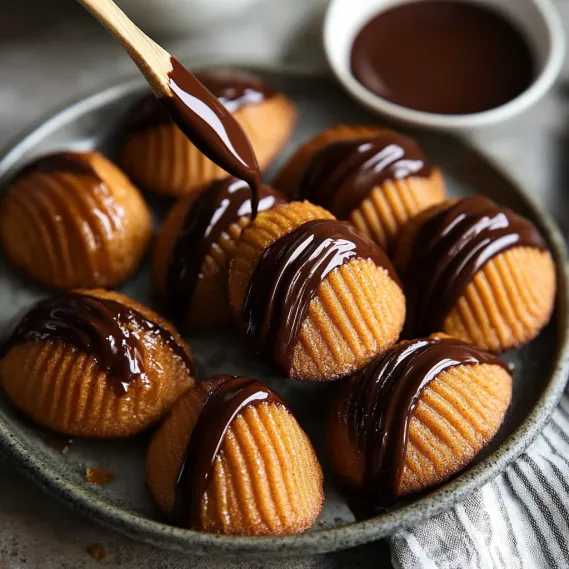
This chocolate dipped brown butter pumpkin madeleine recipe transforms the classic French cookie into a fall-inspired treat. The combination of browned butter, warm spices, and pumpkin creates a delicate shell-shaped delicacy with that signature bump, all enhanced with a bourbon glaze and rich chocolate dip for the perfect seasonal indulgence.
I first made these madeleines when searching for something beyond basic pumpkin bread last autumn. The moment I pulled that first batch from the oven, watching steam rise from those perfect little shells, I knew these would become my signature fall treat.
Ingredients
- Unsalted butter: Adds richness and when browned develops a nutty aroma that elevates these delicate cookies
- Granulated sugar: Provides just enough sweetness without overpowering the subtle pumpkin flavor
- Room temperature eggs: Ensure proper emulsion and help create that signature madeleine bump
- All purpose flour: Creates the perfect tender structure when measured properly
- Baking powder: Gives just enough lift for that characteristic dome
- Cinnamon, nutmeg, and cloves: Form the perfect warming spice blend essential for fall baking
- Sea salt: Balances the sweetness and enhances the pumpkin notes
- Whole milk: Adds moisture without thinning the batter too much
- Canned pumpkin: Brings vibrant color and subtle flavor, use pure pumpkin not pie filling
- Bourbon: Adds complexity to the glaze with caramel undertones
- Dark chocolate: Provides rich contrast to the delicate cookies, look for 70% cocoa for best results
How To Make Chocolate Dipped Brown Butter Pumpkin Madeleines
- Brown the butter:
- Place the butter in a medium saucepan over medium heat. Watch carefully as it melts then begins to foam. Continue heating until you see tiny amber bits forming at the bottom of the pan and smell a nutty aroma. Immediately transfer to a bowl to prevent burning. This process takes about 5 to 7 minutes and develops incredible depth of flavor.
- Mix the wet ingredients:
- In your stand mixer with the whisk attachment combine eggs and sugar on medium speed for about 2 minutes until the mixture becomes pale and slightly thickened. This creates the base structure for your madeleines. The proper aeration at this stage helps achieve that signature bump.
- Add dry ingredients:
- Add flour, baking powder, spices, salt, cooled browned butter, and milk to the egg mixture. Mix on low speed just until combined with no visible flour streaks. Overmixing will develop gluten and result in tough madeleines. Fold in the pumpkin with a gentle hand until evenly distributed throughout the batter.
- Chill the batter:
- Cover the bowl with plastic wrap and refrigerate for at least 3 hours or preferably overnight. This resting period is crucial as it allows the flour to hydrate properly and the butter to solidify which helps create that distinctive bump when baking. Do not skip this step.
- Prepare the molds:
- Preheat your oven to 400°F. Brush the madeleine molds thoroughly with melted butter ensuring every ridge is coated. This creates a beautiful golden exterior and ensures easy release after baking. A silicone pastry brush works perfectly for reaching all the shell grooves.
- Fill and chill again:
- Spoon approximately 1½ tablespoons of chilled batter into each prepared mold filling each about three quarters full. Smooth the top slightly but do not press down firmly. Place the filled pan back in the refrigerator for 10 minutes which further helps develop that classic madeleine bump during baking.
- Bake to perfection:
- Place the chilled pan directly into the preheated oven and bake for 8 to 10 minutes. Watch closely as they bake; the edges should turn golden brown and the center should spring back when lightly touched. The characteristic bump will rise prominently on top when properly baked.
- Cool and glaze:
- Immediately remove madeleines from the pan by gently tapping it against the counter then sliding them onto a cooling rack. Make the bourbon glaze by combining sugar and water in a small saucepan, bringing to a boil until sugar dissolves completely. Remove from heat, stir in bourbon, and brush over cooled madeleines for a subtle sheen and flavor boost.
- Chocolate dipping:
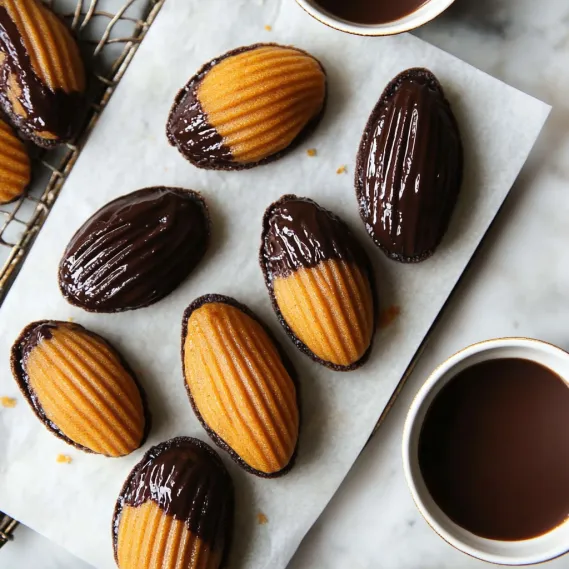
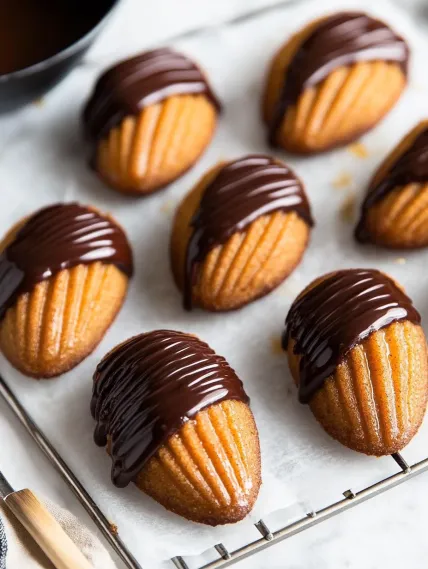
- Melt chocolate over a double boiler or in 30-second microwave intervals stirring between each until smooth. Dip one end of each madeleine into the melted chocolate allowing excess to drip off. Place on parchment paper and allow chocolate to set completely before serving around 30 minutes at room temperature.
My absolute favorite moment with these madeleines is the first taste test after all the steps are complete. The contrast between the tender pumpkin spiced cookie and the snap of the chocolate coating creates this magical texture experience that somehow feels both fancy and comforting at the same time. Last fall I brought a batch to a dinner party and watched as usually reserved friends closed their eyes in appreciation with the first bite.
Storage Tips
Madeleines are notoriously finicky when it comes to storage as they tend to lose their delicate texture quickly. For best results, enjoy these treats the same day they are made. If you must store them, place them in a single layer in an airtight container at room temperature for up to two days. Avoid refrigeration as this accelerates staling. The chocolate coating actually helps preserve moisture making these last slightly longer than traditional madeleines.
Make Ahead Options
While the finished madeleines are best enjoyed fresh, you can prepare the batter up to 3 days in advance and keep it refrigerated. In fact, an extended chill often improves the bump formation and overall texture. You can also freeze the baked unglazed and undipped madeleines in an airtight container for up to one month. Thaw at room temperature, then refresh in a 325°F oven for 3 minutes before glazing and dipping in chocolate.
Serving Suggestions
These chocolate dipped treats shine when served alongside a proper beverage pairing. For morning enjoyment, try a robust cup of dark roast coffee or chai tea, which complements the warming spices beautifully. For afternoon tea, they pair wonderfully with Earl Grey or a spiced apple cider. When serving as dessert, consider a small glass of bourbon cream liqueur or dessert wine like Sauternes. Arrange them on a tiered serving tray, alternating chocolate dipped ends for visual appeal.
The History Behind Madeleines
The classic French madeleine dates back to the 18th century and was made famous by Marcel Proust in his novel "In Search of Lost Time" where a single bite of a madeleine triggered a flood of childhood memories. Traditional madeleines contain no leavening and rely solely on egg aeration for their characteristic bump. This pumpkin variation honors the delicate texture of the original while incorporating seasonal American flavors. The addition of chocolate dipping is a modern twist that bridges French elegance with cozy comfort food.
Recipe FAQs
- → What is the best way to brown butter for madeleines?
To brown butter, melt it in a saucepan over medium heat, stirring periodically. As it begins to foam, keep an eye on the color. When amber bits form at the bottom and it gives off a nutty aroma, remove it from heat immediately to avoid burning.
- → How do I ensure the madeleine batter is the right consistency?
To achieve the proper consistency, mix the ingredients until just combined and avoid overmixing. The batter should be glossy but thick enough to hold its shape when scooped.
- → Why refrigerate the madeleine batter before baking?
Chilling the batter allows the gluten to relax and the butter to firm up, resulting in the classic hump shape and tender texture when baked.
- → Can I replace bourbon in the glaze with something else?
If you prefer a non-alcoholic option, you can replace bourbon with vanilla extract or maple syrup. Adjust the amount slightly to avoid overly thinning the glaze.
- → How should I melt chocolate for dipping?
Melt chocolate over a double boiler for the best results, ensuring even melting without overheating. Alternatively, microwave in 30-second intervals, stirring in between to prevent burning.