
 Pin
Pin
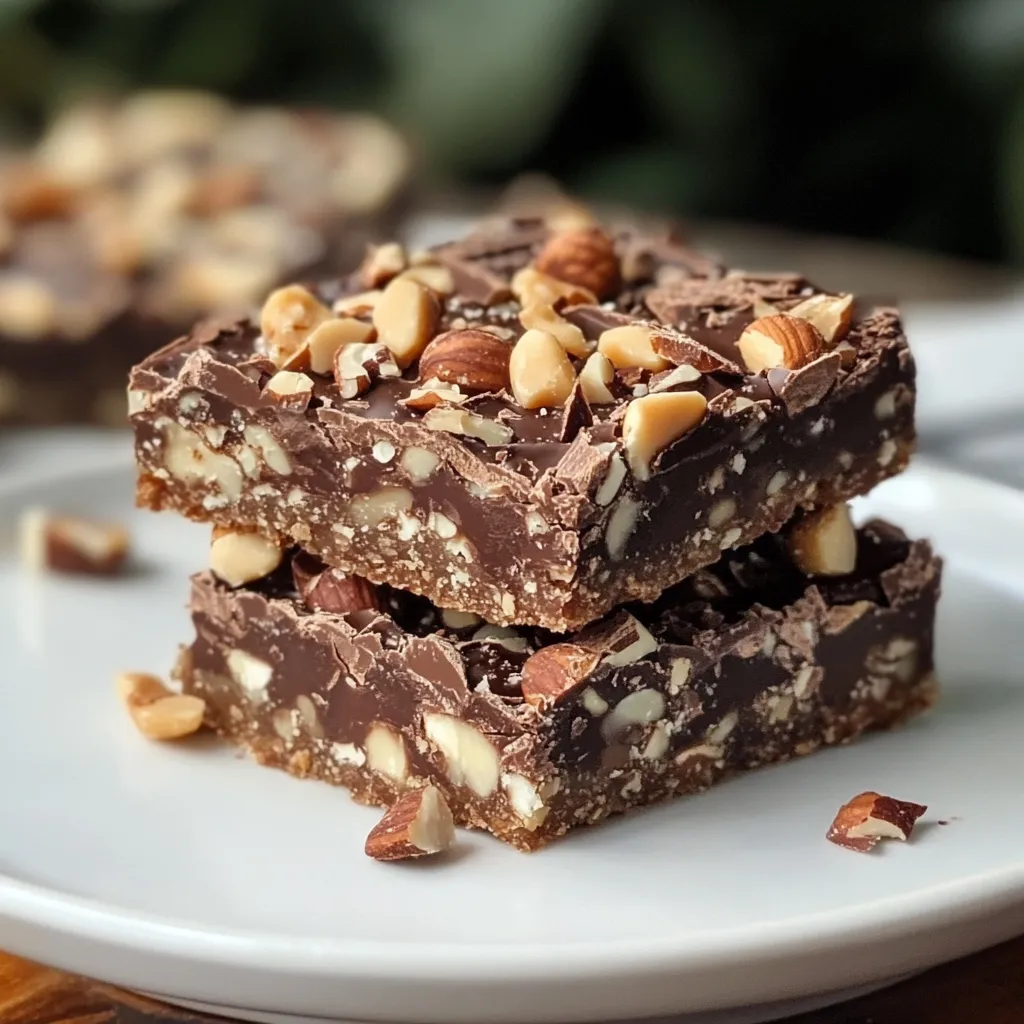
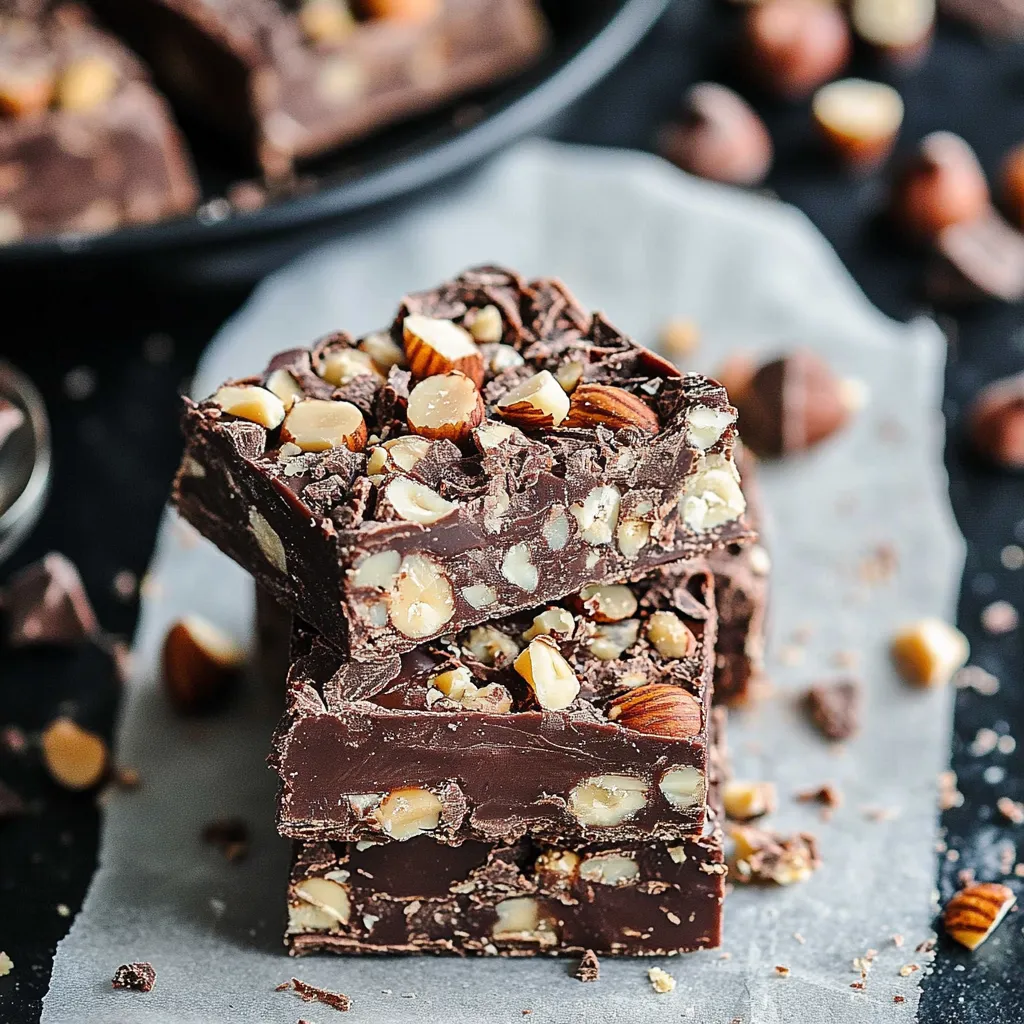
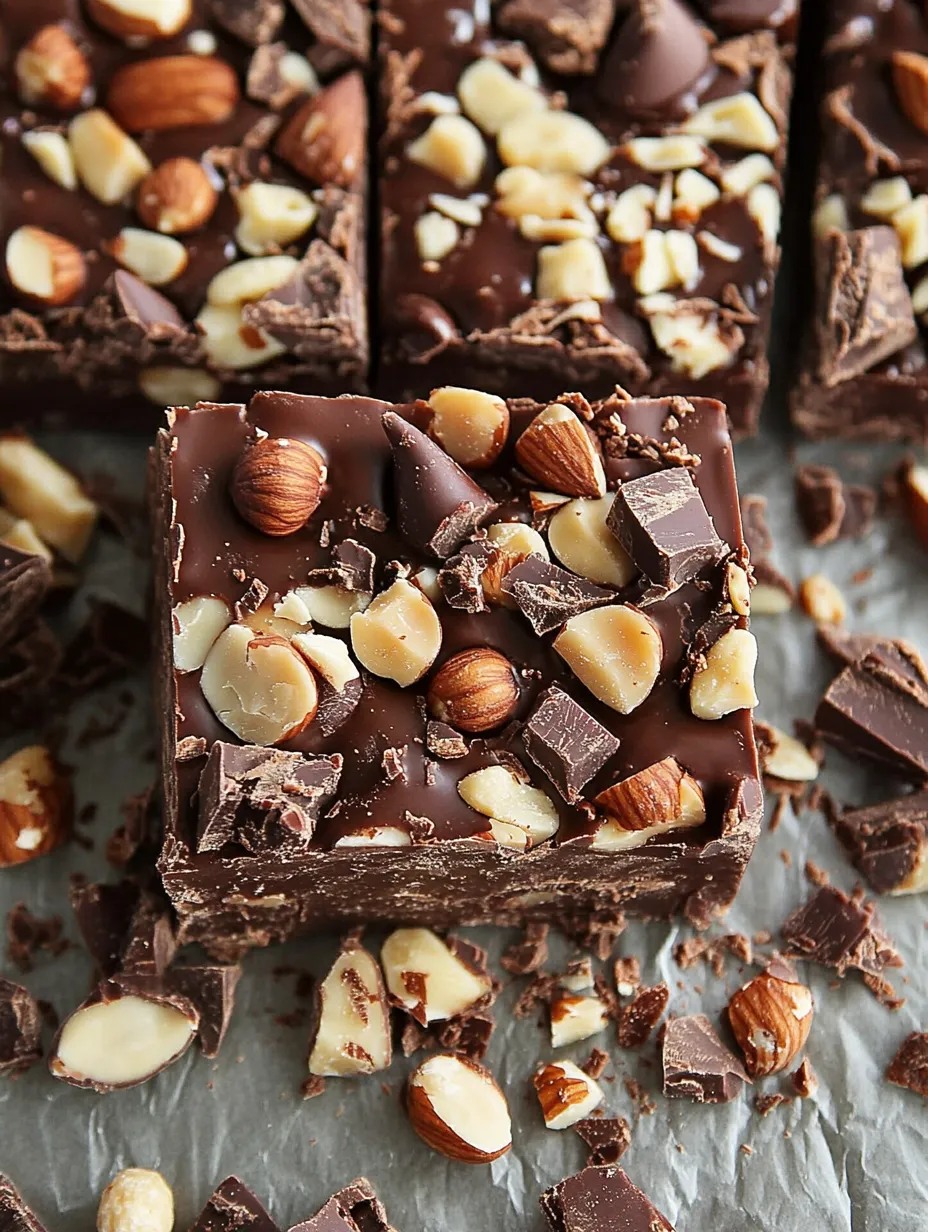
When the beloved classic magic bars encounter the refined essence of chocolate and hazelnut, a truly enchanting creation emerges. These Chocolate Hazelnut Dream Bars artfully combine a flavorful, nutty hazelnut flour base with a luscious Nutella center and are topped with a delightful mix of chocolate, coconut, and roasted hazelnuts. In my own culinary adventures, they have become the preferred indulgence, demonstrating that gluten-free baking can be both sophisticated and utterly delicious.
Essential Ingredients and Selection Tips
- Hazelnut Flour: Use fresh, finely milled flour for optimal texture
- Nutella: Ensure it is at room temperature for effortless application
- Condensed Milk: Opt for full-fat variety for the richest outcome
- Dark Chocolate: Select high-quality baking chips or roughly chop a bar
- Coconut: Unsweetened flakes provide a counterpoint to the sweetness
- Hazelnuts: Roast them before chopping to enhance their inherent flavor
- Butter: Choose unsalted butter, melt it gently but do not overheat
Detailed Instructions
- The Perfect Setup:
- Commence by heating your oven to the correct temperature and preparing your baking pan with care. Ensure the parchment paper extends beyond the edges for easy lifting. A light spritz of cooking spray guarantees nothing adheres. Position your oven rack at the center to promote uniform baking.
- The Foundation Layer:
- Form your base by mixing together the hazelnut flour and melted butter until the mixture resembles damp sand. Press this mixture firmly and uniformly into the prepared pan – the base of a measuring cup with a flat bottom is ideal for this task. This initial baking stage is critical for achieving a pleasantly crisp crust.
- The Gooey Middle:
- Combine the Nutella and condensed milk using a whisk until they are perfectly smooth. Dedicate sufficient time to this step – thorough blending ensures even flavor distribution. Gently pour this smooth mixture over your pre-baked crust, making certain it spreads into every corner.
- The Crowning Glory:
- Distribute your toppings thoughtfully in layers – first the chocolate chips, followed by the coconut, and finally the hazelnuts. Press all components down gently but firmly; this helps the condensed milk blend to integrate all elements as it bakes.
- The Baking Process:
- Bake in the preheated oven until you observe subtle browning around the perimeters and the coconut adopts a golden shade. Be careful not to overbake – the bars will continue to firm up as they cool.
Presentation and Gifting Excellence
These dessert bars truly excel in terms of visual appeal and gift-giving suitability. For a refined dessert arrangement, present them in alternating orientations, creating an aesthetically engaging design. Sprinkle a blend of unsweetened cocoa and powdered sugar on top, employing a delicate paper doily as a template for an expert-level touch. When preparing them as gifts, think about individually wrapping each bar in baking parchment and arranging them inside small decorative boxes lined with shimmering gold or silver paper. Include a personalized card providing serving ideas and storage guidelines. For festive holiday celebrations, compose an impressive dessert display featuring these bars as the central focus, complemented by fresh mixed berries, chocolate-enrobed hazelnuts, and perhaps a scattering of coffee beans as accents. The deep, rich hues and varied consistencies contribute to a visually striking presentation that is as attractive as it is delectable.
Variations and Creative Twists
Through extensive recipe testing, I've uncovered some particularly delightful adaptations. Experiment with incorporating different types of nuts such as macadamia nuts or pecans for a twist. Add a light dusting of sea salt crystals over the top surface to introduce a pleasing flavor contrast. Occasionally, I like to drizzle additional melted dark chocolate over the finished, cooled bars for extra decadence. Consider combining semi-sweet and milk chocolate chips in the topping for a more complex chocolate flavor profile.
Temperature and Timing Mastery
Achieving success largely depends on understanding the nuances of your specific oven. Monitor for the edges turning a light golden shade and the coconut becoming lightly browned. Be mindful not to overbake – the bars will firm up further as they cool down. Allow them to fully reach room temperature before placing them in the refrigerator if you wish to chill them.
Final Serving Suggestions
Slice into generous portions and arrange elegantly on a decorative serving dish. Consider incorporating fresh assorted berries to introduce vibrant color. For more formal occasions, sprinkle lightly with cocoa powder or accompany with scoops of gourmet coffee ice cream. These bars are particularly well-received as homemade presents when individually wrapped in parchment paper and secured with a decorative ribbon.

Recipe FAQs
- → Can I halve the recipe?
- Yes, use an 8x8 pan instead of 9x13.
- → Is this gluten-free?
- Yes, when using pure hazelnut flour.
- → How should I store these?
- Cover and store at room temperature.
- → Can I use other nuts?
- Yes, though hazelnuts complement the chocolate-hazelnut spread best.
- → Why press down the toppings?
- Helps layers stick together and prevents crumbling.