
 Pin
Pin
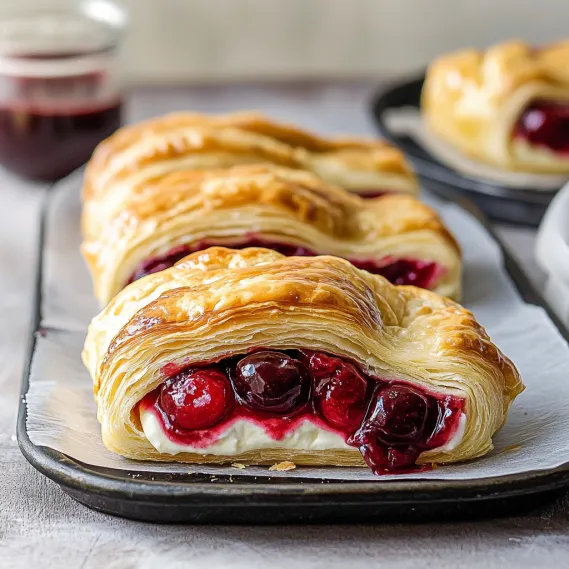
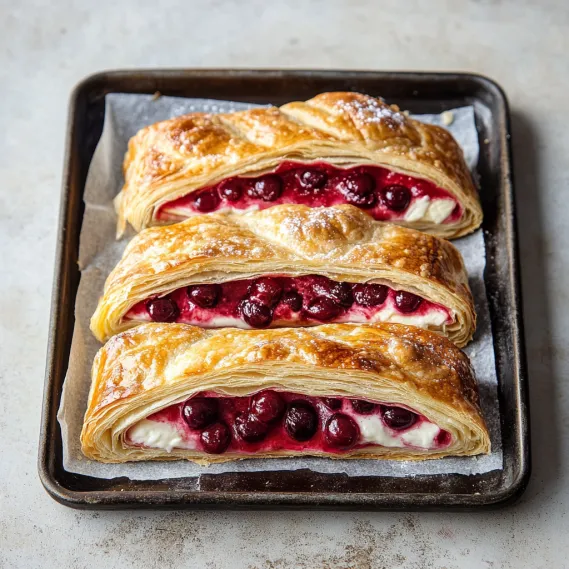
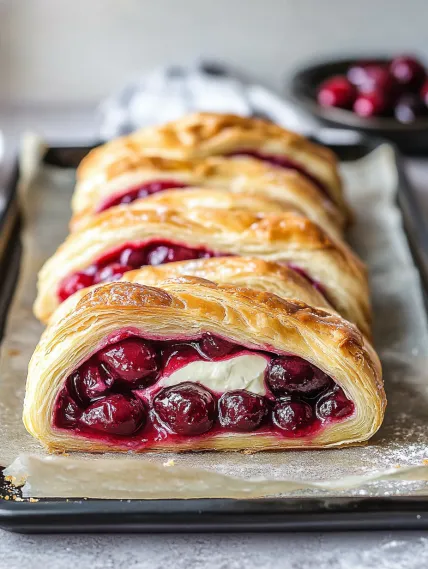
This cherry danish recipe transforms simple ingredients into a bakery-worthy treat that will impress your family and friends. The flaky puff pastry cradles a creamy cheese filling topped with sweet cherries, creating the perfect balance of textures and flavors in every bite.
I first made this cherry danish for a Sunday brunch with my in-laws, and it quickly became my signature pastry. The way the kitchen fills with that buttery, sweet aroma while it bakes never fails to bring everyone to the table with eager anticipation.
- Puff pastry sheet: From freezer section gives you bakery results without the work of making laminated dough
- Cream cheese: Creates a rich tangy base that balances the sweetness perfectly
- Sugar: Sweetens the filling just enough without becoming cloying
- Egg yolk: Adds richness and helps bind the cream cheese filling
- Vanilla extract: Provides warm aromatic notes that complement both cherries and pastry
- Lemon juice: Brightens the cream cheese and enhances the fruit flavor
- Salt: Small but crucial for balancing sweetness and highlighting other flavors
- Canned cherries: Offer convenience and consistent results year round
- Egg yolk: For brushing gives the pastry that professional golden shine
- Powdered sugar and milk: Create the perfect sweet glaze that sets beautifully
Step-by-Step Instructions
- Thaw the Pastry:
- Allow frozen puff pastry to sit at room temperature for exactly 30 minutes until pliable but still cool to touch. Keep it folded during thawing to prevent cracking along seams. This timing is crucial for optimal handling.
- Prepare the Filling:
- Beat cream cheese and sugar together at low speed until completely smooth with no lumps. Add egg yolk, vanilla, lemon juice and salt, continuing to mix until silky and well incorporated. The filling should have a spreadable but not runny consistency.
- Roll the Pastry:
- Place thawed puff pastry on parchment lined tray and lightly dust with flour. Gently roll to smooth out creases and slightly enlarge the rectangle. Work carefully to maintain an even thickness throughout the dough.
- Assemble the Danish:
- Spread cream cheese mixture down the center third of pastry creating a neat 3 inch wide strip. The filling should be about half an inch thick. Distribute drained cherries evenly over the cream cheese layer, slightly pressing them into the filling.
- Create the Braid:
- Using pizza cutter or scissors, cut one inch strips along both sides of the pastry, stopping one inch from the filling. Fold strips alternately over filling from each side, creating a braided appearance with cherry filling visible between strips. Tuck end pieces under for a neat finish.
- Finish and Bake:
- Brush entire surface thoroughly with beaten egg yolk for golden color. Bake in preheated 400°F oven for 25 minutes until deeply golden and pastry is fully puffed with visible layers. Look for caramelization at edges as sign of doneness.
- Make the Glaze:
- Whisk powdered sugar and milk until completely smooth with no lumps. Adjust consistency if needed by adding tiny amounts of additional milk or sugar until it drizzles easily but isn't watery.
- Cool and Glaze:
- Allow danish to cool completely on rack before drizzling with glaze. The cooling period allows pastry to set properly so glaze doesn't melt away instantly.
The cherries truly make this recipe special for me. I discovered this particular combination when trying to recreate a pastry I enjoyed at a small European bakery during college. The first time I served it to my grandmother, she closed her eyes and said it reminded her of the pastries from her hometown bakery.
Storage Tips
This danish stays fresh at room temperature for up to two days when stored in an airtight container. The key is allowing it to cool completely before storing to prevent condensation that would soften the pastry. For longer storage, refrigerate for up to five days, though the pastry will lose some of its crispness. To refresh, warm in a 300°F oven for 5 minutes before serving.
Seasonal Variations
While cherry filling is classic, this versatile recipe works beautifully with whatever fruits are in season. In summer, try fresh blueberries or sliced peaches that have been lightly macerated with sugar. Fall brings opportunities for thinly sliced apples tossed with cinnamon. Winter is perfect for using preserved fruits like the cherry filling in the original recipe. Each variation brings its own character while maintaining the cream cheese base.
Serving Suggestions
Serve this danish slightly warm or at room temperature for the best flavor experience. For an extra special presentation, dust with additional powdered sugar just before serving or add a side of lightly sweetened whipped cream. This pastry pairs beautifully with coffee for breakfast or brunch, but also makes a lovely dessert when served with a scoop of vanilla ice cream.
The History of Danish Pastry
What we call danish pastry actually originated in Vienna, Austria, before being brought to Denmark by Austrian bakers in the 1850s. The Danish bakers modified the recipe over time, creating their own version called wienerbrød or Vienna bread. The pastry gained international popularity when Danish immigrants brought these recipes to America in the early 20th century. Our simplified version using puff pastry maintains the spirit of these traditional pastries while making them accessible for home bakers.
Recipe FAQs
- → Can I use a different fruit for the filling?
Yes, you can substitute the cherries with other fruits like blueberries, apples, or even Nutella for a unique twist.
- → How do I prevent the puff pastry from breaking?
Allow the frozen pastry to thaw on the counter for about 30 minutes without unfolding it. This makes it pliable and easier to work with.
- → Can I make this danish ahead of time?
Yes, you can prepare it a few hours in advance. Store it in a closed container or wrap it securely to maintain freshness.
- → What can I use instead of cream cheese?
For a different flavor, you can use ricotta, mascarpone, or even a vegan cream cheese alternative.
- → How do I get the glaze to the right consistency?
Mix powdered sugar with milk gradually until you achieve a smooth, drizzling consistency. You can adjust with more milk or powdered sugar as needed.