 Pin
Pin
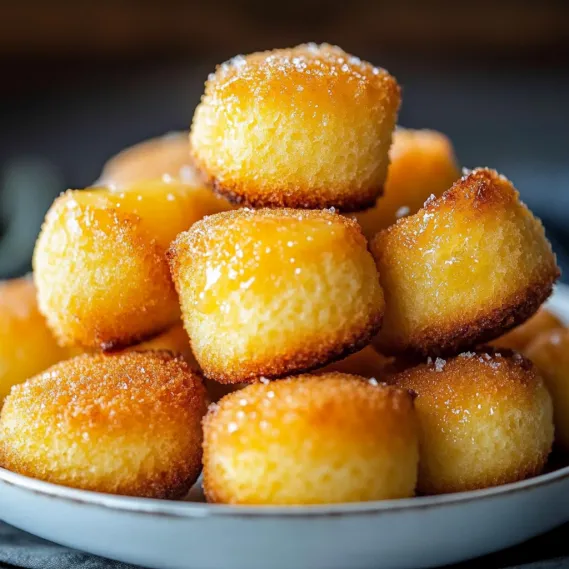
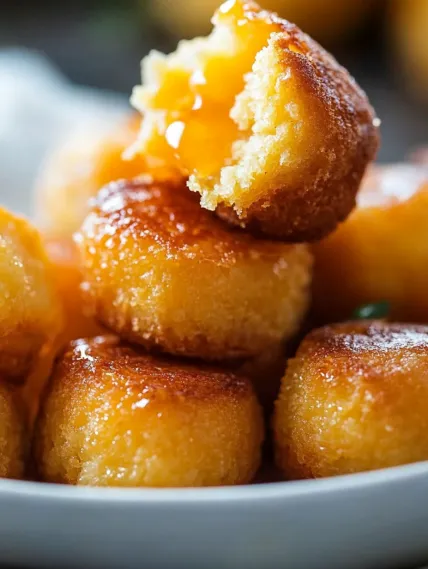
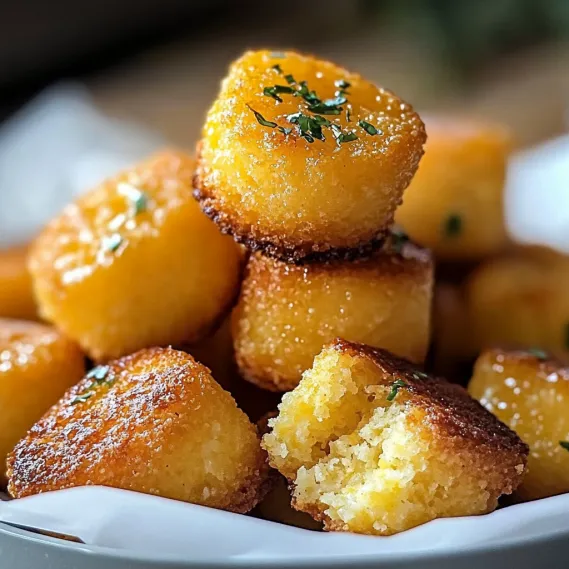
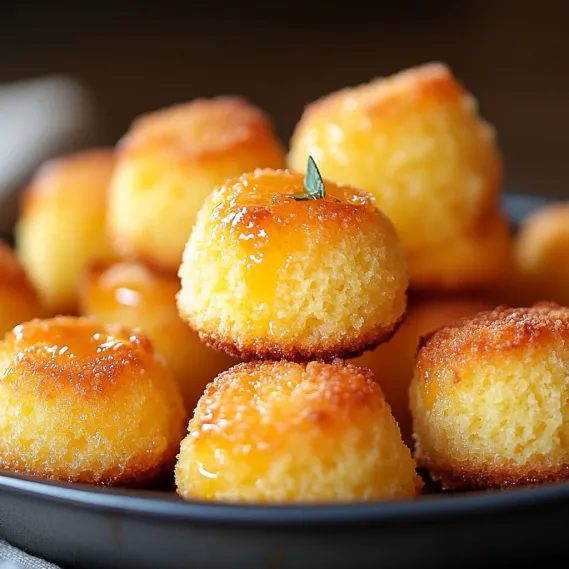
Golden, tender mini cornbread muffins brushed with warm honey butter create an irresistible bite-sized treat that combines the best of Southern comfort food in a perfectly poppable package. These cornbread poppers offer just the right balance of sweet and savory flavors, with slightly crisp edges giving way to a moist, tender interior. The magic happens when the honey butter glaze is brushed onto the warm poppers, creating a glistening finish that adds a touch of sweetness while enhancing the cornmeal's natural flavor. Whether served alongside a hearty bowl of chili, presented as an appetizer, or enjoyed as a sweet snack, these little bites of cornbread perfection will have everyone reaching for "just one more."
I discovered these poppers by happy accident when preparing for a family gathering and realized I had run out of regular muffin tins. Using my mini muffin pan instead led to these perfectly poppable bites that disappeared so quickly they've become my most requested contribution to gatherings. Last Thanksgiving, my cousin actually hid a few in her napkin to take home because they vanished from the table so quickly!
Essential Ingredients and Selection Tips
- Yellow Cornmeal: Choose medium-ground cornmeal for the ideal texture. Too fine becomes pasty, while too coarse creates a gritty texture. Stone-ground varieties offer the most authentic flavor.
- Buttermilk: The acidity creates exceptional tenderness and adds a subtle tang that balances the sweetness perfectly. Fresh buttermilk makes a noticeable difference in both texture and flavor.
- Honey: Use local honey if possible for the most complex flavor in your glaze. Different varieties like clover or wildflower will each impart their unique characteristics.
- Unsalted Butter: Select high-quality butter for the glaze since it's a prominent flavor component. European-style butter with higher fat content creates an especially luxurious finish.
The quality of your ingredients makes a significant difference in these simple poppers. The first time I made them with stone-ground cornmeal and local honey, the improvement in flavor was remarkable - earthy cornmeal notes complemented by the floral sweetness of good honey created something truly special.
Detailed Cooking Instructions
- Step 1: Perfect Your Preparation
- Begin by preheating your oven to 400°F (200°C), allowing plenty of time for it to reach temperature. This ensures even baking and proper rising. Generously grease a 24-cup mini muffin tin, making sure to coat the corners and sides of each cup thoroughly to prevent sticking. Alternatively, use silicone molds placed on a baking sheet for easy release. Have all ingredients measured and ready before starting to make the assembly process quick and efficient.
- Step 2: Master the Mixing
- In a large bowl, whisk together cornmeal, all-purpose flour, sugar, baking powder, and salt until thoroughly combined. This distributes the leavening agents evenly for consistent rising. In a separate bowl, whisk buttermilk, melted butter, and egg until smooth and well-blended. Pour the wet ingredients into the dry ingredients and fold together using gentle, sweeping motions until just combined. Some small lumps are perfectly fine – overmixing will create tough poppers.
- Step 3: Fill with Precision
- Using a small cookie scoop or tablespoon, fill each mini muffin cup about 3/4 full with batter. This gives them room to rise without overflowing. For extra precision, a piping bag (or zip-top bag with corner snipped) works beautifully. Gently tap the filled muffin tin on the counter a few times to release any air bubbles and help the batter settle evenly. If any cups are unevenly filled, use a small spoon to redistribute the batter for uniform baking.
- Step 4: Bake to Golden Perfection
- Place the muffin tin in the preheated oven and bake for 10-12 minutes. Rotate the pan halfway through baking for even browning. Watch carefully during the final minutes – the poppers should be lightly golden around the edges and spring back when lightly touched. A toothpick inserted into the center should come out clean or with just a few moist crumbs attached. Avoid overbaking, which can dry out these small bites quickly.
- Step 5: Glaze While Warm
- While the poppers bake, prepare the honey butter glaze by whisking together melted unsalted butter and honey until well combined. Keep the mixture warm. As soon as the poppers come out of the oven, let them cool in the pan for just 2-3 minutes, then brush each one generously with the warm honey butter glaze. The warm poppers will absorb some of the glaze, creating incredible moisture and flavor. Just before serving, apply a second light coating for an extra touch of sweetness and a beautiful shine.

My first attempt at these poppers taught me a valuable lesson about patience with the glaze. I rushed and only applied one coating, missing out on the full honey butter experience. Now I always do two applications – one right after baking to infuse moisture and flavor, and another just before serving for that perfect glistening finish.
Perfect Make-Ahead Tips
These poppers work beautifully for make-ahead preparation. You can mix the dry ingredients and store them in an airtight container up to a week in advance. The wet ingredients can be mixed separately and refrigerated for up to 24 hours. When ready to bake, simply combine them, giving the batter a gentle stir before filling your muffin tin. Alternatively, bake the poppers up to two days ahead (without glazing) and store in an airtight container at room temperature. Reheat in a 350°F oven for 5-7 minutes until warmed through, then apply fresh glaze just before serving.

Customization Success
Once you've mastered the basic recipe, try these delicious variations: fold in 1/4 cup finely diced jalapeños (seeds removed) for a spicy kick that contrasts beautifully with the sweet glaze; add 1/2 cup shredded sharp cheddar for savory richness; or incorporate 1/3 cup fresh corn kernels for added texture and sweetness. For special occasions, mix 1/4 cup cooked, crumbled bacon into the batter and add a pinch of black pepper to the glaze for an irresistible sweet-savory combination.
Storage Solutions
Store unglazed poppers in an airtight container at room temperature for up to two days, or freeze for up to three months. Thaw frozen poppers at room temperature, then reheat in a 350°F oven until warmed through, about 5-7 minutes. Always apply fresh glaze after reheating for the best flavor and presentation. If you must store glazed leftovers, keep them at room temperature in an airtight container for no more than a day, as refrigeration can dry them out.

These Southern-Style Honey Butter Cornbread Poppers have become more than just a recipe in my household – they're a tradition. There's something about these little bites that brings people together, whether gathering around as they come out of the oven or passing the basket around the dinner table. They represent the heart of Southern cooking: simple ingredients transformed through care and attention into something truly special that creates memorable moments around the table.
Recipe FAQs
- → Can I make these cornbread poppers ahead of time?
- Yes, you can make these poppers 1-2 days ahead of time. Store them in an airtight container at room temperature. For the best flavor and texture, warm them in a 300°F oven for about 5 minutes before serving. You can also prepare the batter up to 24 hours in advance and refrigerate it in a covered container; just let it come to room temperature for about 15 minutes before filling the muffin tins and baking.
- → What can I substitute for buttermilk?
- If you don't have buttermilk on hand, you can easily make a substitute. Add 1 tablespoon of white vinegar or lemon juice to a liquid measuring cup, then fill with regular milk to the 1 cup line. Stir and let it sit for 5 minutes until slightly thickened. Alternatively, you can use an equal amount of plain yogurt or sour cream thinned with a bit of milk to reach a pourable consistency.
- → Can I freeze these cornbread poppers?
- Yes, these freeze beautifully! Let them cool completely, then place them in a single layer on a baking sheet and freeze until solid (about 1-2 hours). Transfer the frozen poppers to a freezer-safe bag or container and store for up to 3 months. Thaw at room temperature or reheat from frozen in a 350°F oven for 8-10 minutes. For best results, add fresh honey butter glaze after reheating rather than freezing them already glazed.
- → Can I make these cornbread poppers in a regular muffin tin?
- Absolutely! If you don't have a mini muffin tin, you can use a standard muffin tin instead. Fill each cup about 2/3 full and increase the baking time to 15-18 minutes, or until a toothpick inserted in the center comes out clean. This will yield approximately 10-12 regular-sized muffins instead of 24 mini poppers. The honey butter glaze quantities remain the same.
- → How can I make these cornbread poppers gluten-free?
- To make these gluten-free, substitute the all-purpose flour with a 1:1 gluten-free flour blend designed for baking. Make sure your cornmeal is also certified gluten-free, as some brands may be processed in facilities that also handle wheat products. The rest of the ingredients are naturally gluten-free. The texture may be slightly different, but they'll still be delicious. You might want to add 1/4 teaspoon of xanthan gum if your gluten-free flour blend doesn't already include it.
- → What meals pair well with these cornbread poppers?
- These sweet cornbread poppers are versatile and pair wonderfully with many dishes! They're perfect alongside hearty soups and stews, especially chili, beef stew, or bean soups. They complement barbecue dishes beautifully, from pulled pork to brisket. They're also excellent with Southern classics like fried chicken, collard greens, black-eyed peas, or jambalaya. For a lighter meal, serve them with a vegetable-packed salad where their sweetness provides a nice contrast.
