
 Pin
Pin
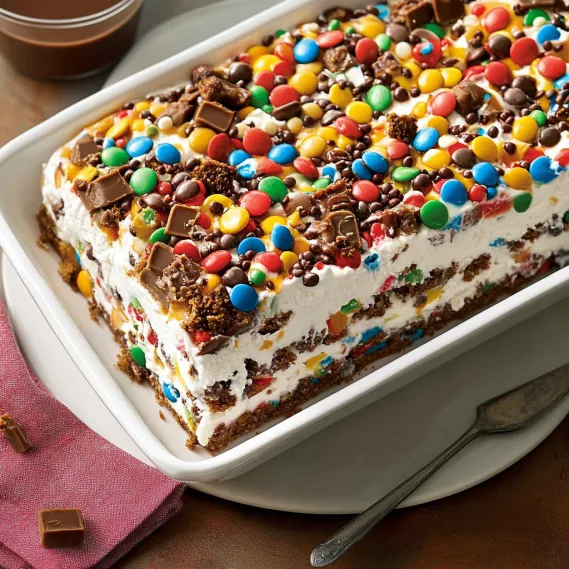
This Ice Cream Sandwich Cake has become my emergency dessert solution for last-minute gatherings and summer celebrations. Perfect for when you need something impressive without turning on the oven, this layered treat combines store-bought favorites into a showstopping dessert that tastes like you spent hours in the kitchen.
I first made this cake for my daughter's birthday when our oven unexpectedly died the day before her party. What started as a desperate solution has now become the most requested dessert at our summer gatherings, with guests always asking for the "complicated" recipe.
Ingredients
- Ice cream sandwiches: These form the foundation of our cake providing a perfect balance of chocolate and vanilla in every bite. Choose a quality brand as they'll hold their shape better when sliced.
- Cool Whip: The light whipped texture creates the perfect creamy layer between sandwiches. Make sure it's fully defrosted for easy spreading.
- Caramel sauce: Adds a rich sweet dimension that elevates this from simple to spectacular. Room temperature sauce drizzles best.
- Symphony chocolate bars: The toffee bits and almonds in these bars add wonderful texture contrast. Chop them small for even distribution.
- Mini M&Ms: These colorful candies make the cake visually exciting while adding chocolate crunch. The mini size works better than regular for easier slicing.
- Sprinkles: Choose colorful varieties to match your occasion for a festive touch that makes everyone smile.
How To Make Ice Cream Sandwich Cake
- Base Layer:
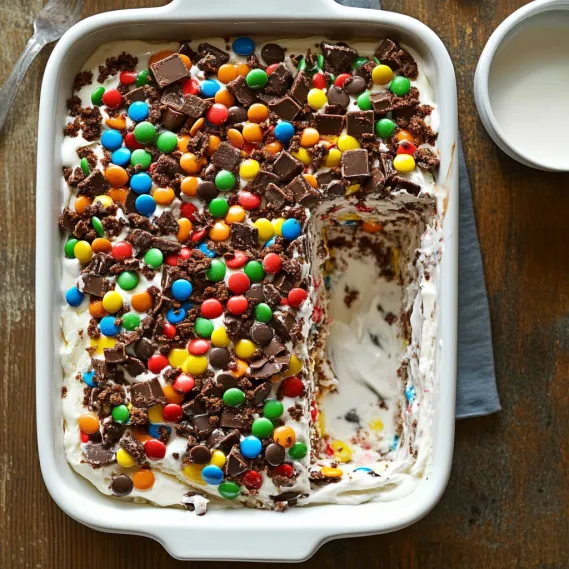
- Arrange ice cream sandwiches in a single layer at the bottom of your 9×13 casserole dish. You'll need to cut some sandwiches to fill the edges completely. Pack them tightly together to create a solid foundation without gaps.
- First Cream Layer:
- Spread half of your defrosted Cool Whip over the ice cream sandwich base using an offset spatula for even coverage. Work gently to avoid lifting the sandwiches. Drizzle half the jar of caramel sauce in a zigzag pattern across the entire surface.
- Second Sandwich Layer:
- Add another complete layer of ice cream sandwiches over the Cool Whip and caramel, again cutting pieces to fit the edges perfectly. Press down slightly to compact the layers.
- Topping Layer:
- Spread the remaining Cool Whip evenly over the second sandwich layer. Drizzle with remaining caramel sauce, then immediately sprinkle with chopped Symphony bars, mini M&Ms, and colorful sprinkles before the caramel sets.
- Freezing:
- Cover the entire dish carefully with plastic wrap without touching the toppings. Freeze for at least two hours or until completely firm, preferably overnight for clean slices.
My favorite moment with this dessert was watching my son's eyes light up when I first cut into it at his baseball team celebration. The colorful layers drew audible gasps from his teammates, and not a single crumb was left. The combination of caramel with the crunchy Symphony bar pieces creates a magical flavor profile that reminds me of the sundaes my grandmother used to make.
Make It Your Own
This cake welcomes customization based on your preferences or what you have on hand. Try using mint chocolate chip ice cream sandwiches for a refreshing twist, or substitute cookie dough ice cream sandwiches for an extra indulgent version. The toppings can be adjusted to match holidays or special occasions use red and green M&Ms for Christmas, or orange and black sprinkles for Halloween gatherings.
Storage Tips
The fully assembled cake can be stored in the freezer for up to one week. Cover tightly with plastic wrap and then foil to prevent freezer burn. For longer storage, I recommend adding the candy toppings just before serving as they can lose their vibrant colors over time in the freezer. The basic cake without toppings will keep well for up to one month.

Serving Suggestions
This versatile dessert works beautifully for both casual and formal occasions. For everyday serving, simply cut into squares and place on dessert plates. For more elegant presentations, try cutting thin slices and placing them on their sides to showcase the beautiful layers. Drizzle with additional warm caramel or hot fudge sauce just before serving for an extra special touch. A small scoop of vanilla ice cream alongside makes this an even more decadent treat.
Recipe FAQs
- → Can I use different candy toppings?
Absolutely! Feel free to replace M&Ms and sprinkles with your favorite candies, nuts, or even fresh fruit for a twist.
- → How long should I freeze it before serving?
You should freeze the cake for at least 2 hours, but for best results and a firmer texture, leave it in the freezer for 4–6 hours or overnight.
- → Can I make it ahead of time?
Yes, this dessert can be prepared a day or two in advance and kept in the freezer until ready to serve. Just ensure it’s covered to avoid freezer burn.
- → What size dish should I use?
A 9x13 casserole dish works perfectly for this recipe as it provides ample space for the layers to fit evenly.
- → Can I substitute cool whip with whipped cream?
Yes, you can use freshly whipped cream instead of cool whip, but keep in mind that cool whip holds up better in the freezer.