
 Pin
Pin
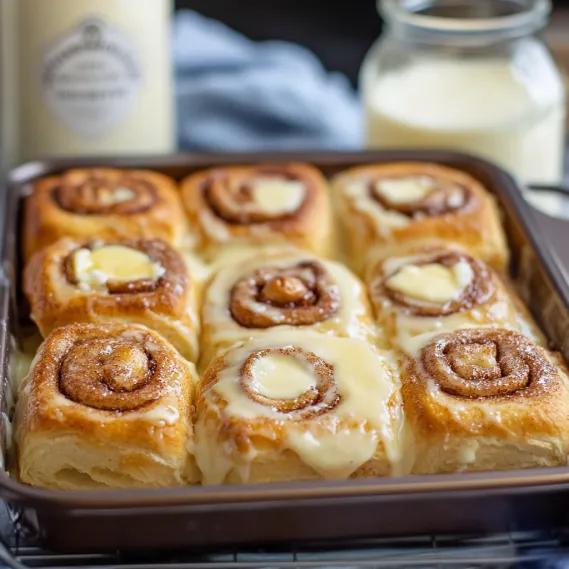
This luxurious cheesecake Danish transforms ordinary King's Hawaiian rolls into a decadent breakfast treat that tastes like it came from a high-end bakery. The contrast between the pillowy sweet rolls and creamy cheesecake filling creates an irresistible texture that will have everyone reaching for seconds.
The first time I made these for a family brunch, my nephew declared them "better than the bakery" and now requests them every time he visits. What started as a quick solution when I forgot to prepare a proper dessert has become our favorite special occasion breakfast.
Ingredients
- King's Hawaiian sweet rolls: Essential base that provides perfect sweetness and texture
- Cream cheese: Full fat works best for richness and smooth consistency
- Butter: Use unsalted for better control of flavor
- Brown sugar: Dark brown provides deeper molasses notes
- Cinnamon: Freshly ground gives more pronounced flavor
- Nutmeg: Freshly grated makes a noticeable difference
- Granulated sugar: Helps balance the tanginess of cream cheese
- Egg: Acts as binder for cheesecake filling
Step-by-Step Instructions
- Prepare the baking dish:
- Melt 1 tablespoon butter and spread evenly across the bottom of a 9×13 baking dish. This creates a delicious base and prevents sticking.
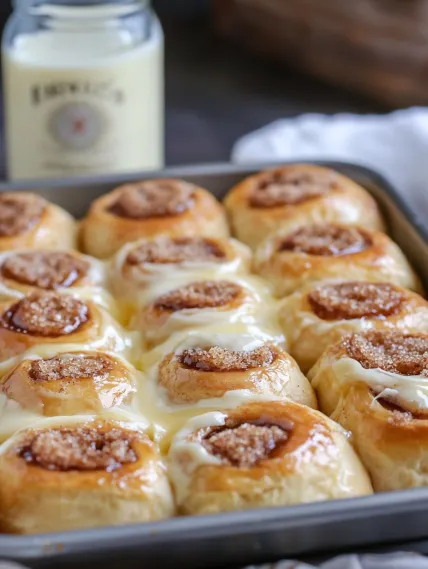
- Prepare the rolls:
- Arrange rolls over melted butter and cut an X into each roll about two thirds down without cutting through the bottom. This creates the perfect pocket for your filling while keeping everything intact.
- Create butter mixture:
- Combine melted butter, brown sugar, nutmeg and cinnamon thoroughly. Pour this mixture evenly over rolls, allowing it to seep into cuts and around sides for maximum flavor absorption.
- Make cream cheese filling:
- Beat room temperature cream cheese until completely smooth before adding sugar. Mix thoroughly then incorporate beaten egg. The texture should be silky with no lumps for the perfect filling consistency.
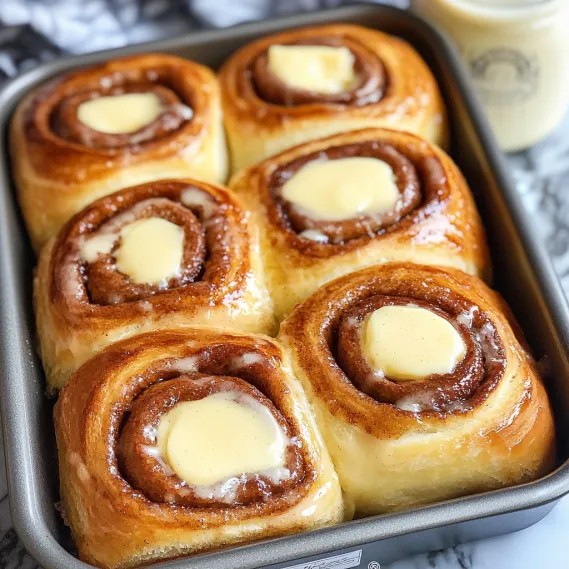
- Fill the rolls:
- Use a piping bag with large tip for easiest application. Insert tip into X cuts and fill each roll with generous amount of cream cheese mixture. Be patient with this step to ensure filling gets inside rather than just sitting on top.
- Bake to perfection:
- Bake uncovered at 375°F for exactly 12 minutes for soft, pillowy results. The filling should be set but still creamy, and rolls should maintain their softness while developing slight golden edges.
These remind me of the Danish pastries my grandmother would make from scratch every Christmas morning. While her version took hours of labor, these capture that same nostalgic flavor in a fraction of the time. The way the cream cheese filling melts slightly into the sweet roll dough creates that perfect Danish texture we all crave.
Storage Insights
These delightful treats will maintain their best quality when stored properly in an airtight container in the refrigerator for 3-4 days. For best results when enjoying leftovers, warm them gently in the microwave for about 15 seconds to restore that fresh baked texture. The cream cheese filling actually develops more complex flavor notes after a day in the refrigerator, making these possibly even more delicious the second day.
Creative Variations
The basic recipe creates a perfect classic Danish, but you can easily customize the filling to create different flavor profiles. Add a tablespoon of fruit preserves to the cream cheese mixture for fruity versions like strawberry or blueberry. For a more dessert oriented treat, incorporate mini chocolate chips or a drizzle of melted chocolate after baking. During fall months, adding pumpkin puree and pumpkin spice to the cream cheese creates a seasonal favorite that pairs perfectly with coffee.
Serving Suggestions
These cheesecake Danishes pair beautifully with fresh fruit for a balanced breakfast spread. For a special brunch, serve alongside a savory egg casserole for the perfect sweet and savory combination. Coffee is the traditional beverage pairing, but these also work wonderfully with hot tea or even a mimosa for celebratory occasions. For dessert, try serving warm with a small scoop of vanilla ice cream for an elevated treat.
Recipe FAQs
- → Can I prepare these cheesecake danishes ahead of time?
Yes! You can prepare the cream cheese filling and butter mixture ahead of time and refrigerate. Assemble and bake the rolls just before serving for the best texture and flavor.
- → Can I use a different type of roll for this recipe?
While King’s Hawaiian rolls provide the ideal sweetness and texture, you can experiment with other soft sweet rolls, though the flavor may vary slightly.
- → What can I do if I don’t have a piping bag?
If you don’t have a piping bag, simply use a zip-top bag and snip off one corner to create a makeshift piping tool. You can also spoon the mixture directly into the rolls.
- → How do I store leftovers?
Store leftover danishes in an airtight container in the refrigerator for up to 3-4 days. Reheat in the oven or microwave before serving for the best results.
- → Can I customize the filling?
Absolutely! You can jazz up the filling with lemon zest, vanilla extract, or even fruit preserves for a personalized twist.