 Pin
Pin
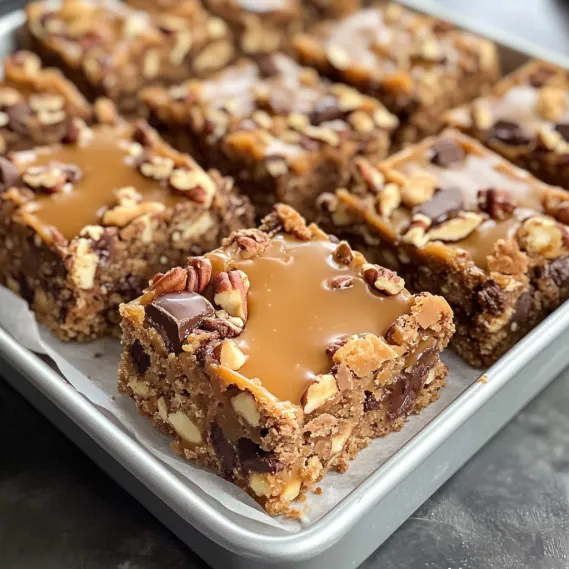
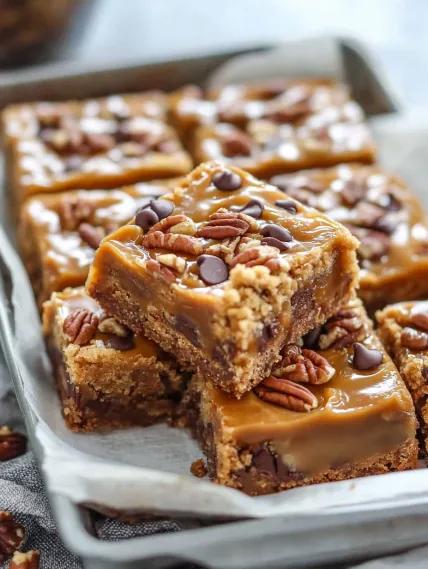
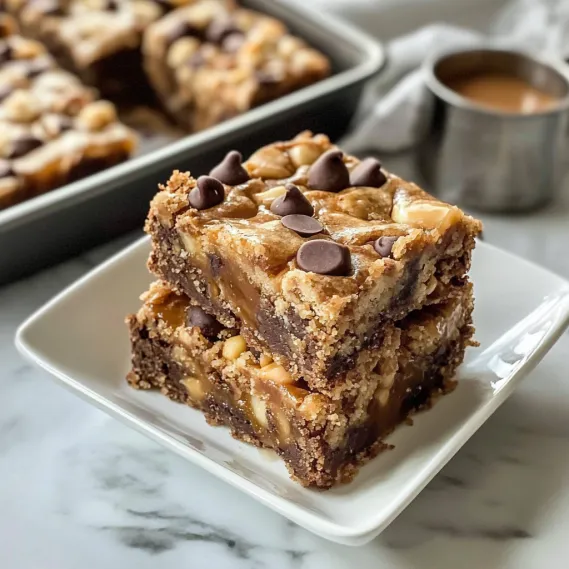
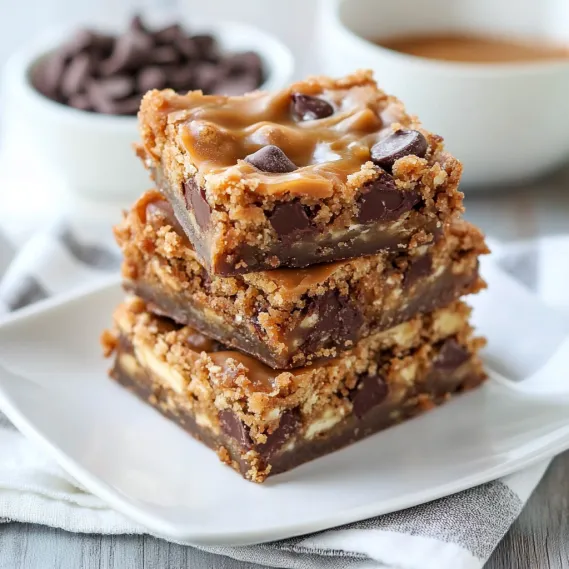
These indulgent layered bars combine a soft cookie base with gooey caramel, chocolate chips, and a hint of peanut butter for a dessert that lives up to its bold name. The perfect blend of textures and flavors creates an irresistible treat that's guaranteed to impress at any gathering. I discovered this recipe at a neighborhood potluck and immediately had to ask for the recipe after my first bite.
The first time I made these for my family, my teenage son declared them "the best thing you've ever baked" and promptly hid two bars for his lunch the next day. The combination of caramel and chocolate is truly irresistible.
Essential Ingredients and Selection Tips
- Butter - Use unsalted for better control of overall salt content
- Caramels - Individually wrapped soft caramels work best; unwrap while the base is baking
- Chocolate Chips - Semi-sweet provides the perfect balance but can be swapped for milk or dark
- Peanut Butter - Creamy works best for the caramel layer; use natural or regular based on preference
- Evaporated Milk - Creates the perfect consistency for the caramel layer
The magic happens when the warm caramel layer meets the partially baked cookie base, creating a gooey center that becomes even more delicious as it cools.
Detailed Cooking Instructions
- Step 1:
- Prepare Your Workspace Preheat oven to 375°F and thoroughly grease a 9×13 baking pan. Having your ingredients measured and ready makes the assembly process smoother.
- Step 2:
- Mix the Cookie Dough In a large bowl, beat softened butter with both sugars until light and fluffy, about 2-3 minutes. Add vanilla, then eggs one at a time, beating well after each. Combine flour, baking soda, and salt separately, then gradually add to butter mixture. Fold in chocolate chips just until distributed.
- Step 3:
- Bake the First Layer Spread half the cookie dough evenly in the prepared pan. It will be a thin layer, so use an offset spatula or the back of a spoon dipped in water to help spread it. Bake for 8-10 minutes until just set but not fully browned.
- Step 4:
- Prepare the Caramel Layer While the base is baking, unwrap caramels and place in a double boiler with evaporated milk. Melt over medium heat, stirring frequently to prevent scorching. Once smooth, stir in peanut butter until completely incorporated.
- Step 5:
- Add the Caramel to Base When the cookie base comes out of the oven, immediately pour the warm caramel mixture over it, spreading to create an even layer. Work quickly as the caramel will begin to set as it cools.
- Step 6:
- Top with Remaining Dough Drop spoonfuls of the remaining cookie dough over the caramel layer. Don't worry about covering completely - the gaps allow the caramel to peek through and create a beautiful marbled effect when baked.
- Step 7:
- Bake to Perfection Return the pan to the oven and bake for 15-20 minutes until the top is light golden brown. The center may appear slightly soft but will set as it cools.
- Step 8:
- Cool Completely Allow the bars to cool in the pan for at least 1-2 hours before cutting. For the cleanest cuts, refrigerate for 30 minutes after cooling to room temperature.
- Step 9:
- Cut Into Squares Use a sharp knife dipped in hot water and wiped clean between cuts for the neatest presentation. Cut into 24 squares for standard portions or smaller for bite-sized treats.
- Step 10:
- Serve and Store Serve at room temperature for the perfect gooey texture. Store in an airtight container with layers separated by parchment paper.

I learned the importance of properly greasing the pan after my first batch stuck terribly. Now I use both cooking spray and parchment paper with overhang for easy removal.
Perfect Make-Ahead Dessert
These bars actually improve with time as the flavors meld together. I often make them the day before serving for best results. For weekend gatherings, I prepare them Friday evening, which allows ample cooling time. The texture becomes perfectly set overnight while the caramel layer develops an even deeper flavor. This make-ahead quality makes them ideal for busy hosts who want impressive desserts without last-minute stress.
Gifting and Presentation Ideas
For holiday gift-giving, I cut these bars into smaller squares and place them in decorative tins lined with parchment paper. Alternating layers of bars with waxed paper prevents sticking. Tied with a ribbon and personalized tag, they make luxurious homemade gifts that friends request yearly. For bake sales, individually wrap in parchment paper and display stacked on a rustic wooden board for maximum appeal.

Special Occasion Variations
For festive adaptations, I add seasonal elements depending on the celebration. Valentine's Day calls for a sprinkle of pink sea salt on the caramel layer. Summer birthdays benefit from a drizzle of white chocolate over the cooled bars. During the holidays, I incorporate crushed candy canes into the top layer. For autumn gatherings, a dusting of cinnamon and pinch of nutmeg in the cookie dough creates warming seasonal notes.
Family-Friendly Modifications
When making these for gatherings with children, I sometimes substitute the peanut butter with cookie butter for allergy concerns. Mini chocolate chips create a more uniform texture for picky eaters. Creating a "bar decorating station" with various toppings like sprinkles, mini marshmallows, or crushed cookies allows children to customize their own squares, turning dessert into an interactive activity the whole family enjoys.
Chef's Essential Tips
- Line your pan with parchment paper with overhang for easy removal
- Slightly underbake the base for the perfect chewy texture
- For extra decadence, add a cup of chopped pecans to the cookie dough
- Use a double boiler for the caramel to prevent burning
- Refrigerate for 30 minutes before cutting for the cleanest edges
I've refined these tips through multiple batches, especially after discovering that the double boiler method creates a much smoother caramel than using direct heat.
These Knock You Naked Bars have become my signature contribution to potlucks and family gatherings. There's something about the combination of textures - the slight crunch of the cookie exterior giving way to gooey caramel and melted chocolate - that makes them irresistible to everyone who tries them.

Final Tips
- For a more sophisticated flavor, add a teaspoon of espresso powder to the cookie dough
- Create a marbled effect by swirling the caramel with a knife before adding the top layer
- Try different chip combinations like butterscotch or white chocolate
- Cut chilled bars with a plastic knife for surprisingly clean cuts
- Allow bars to come to room temperature before serving for the best texture
These decadent bars demonstrate that sometimes the most impressive desserts don't require complicated techniques or hard-to-find ingredients - just the perfect combination of flavors and textures layered together with care.
Recipe FAQs
- → Can I use caramel sauce instead of melted caramels?
- Store-bought caramel sauce is typically thinner than melted caramels, so the layer might not set as well. For best results, stick with unwrapped caramels.
- → How do I know when the bars are done baking?
- The top should be light golden brown and the edges will begin to pull away from the sides of the pan slightly.
- → Can I freeze these bars?
- Yes! Once completely cooled, cut into squares and store in an airtight container with parchment between layers for up to 3 months.
- → Can I substitute the peanut butter?
- Absolutely! Try almond butter or cookie butter for different flavor variations.
- → Why are they called 'Knock You Naked' bars?
- The name comes from how irresistibly delicious they are - they're said to be so good they'll 'knock your socks off'!
