
 Pin
Pin
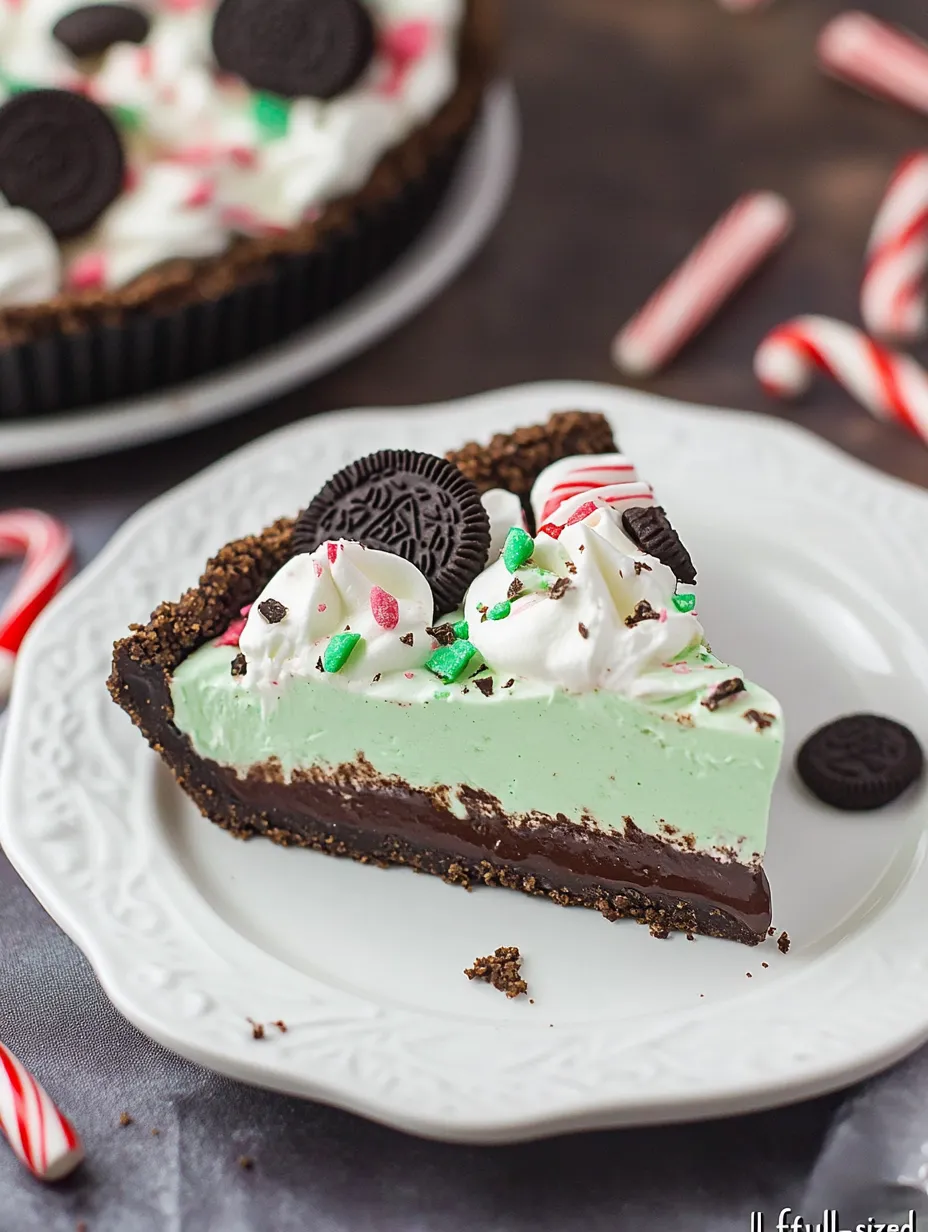
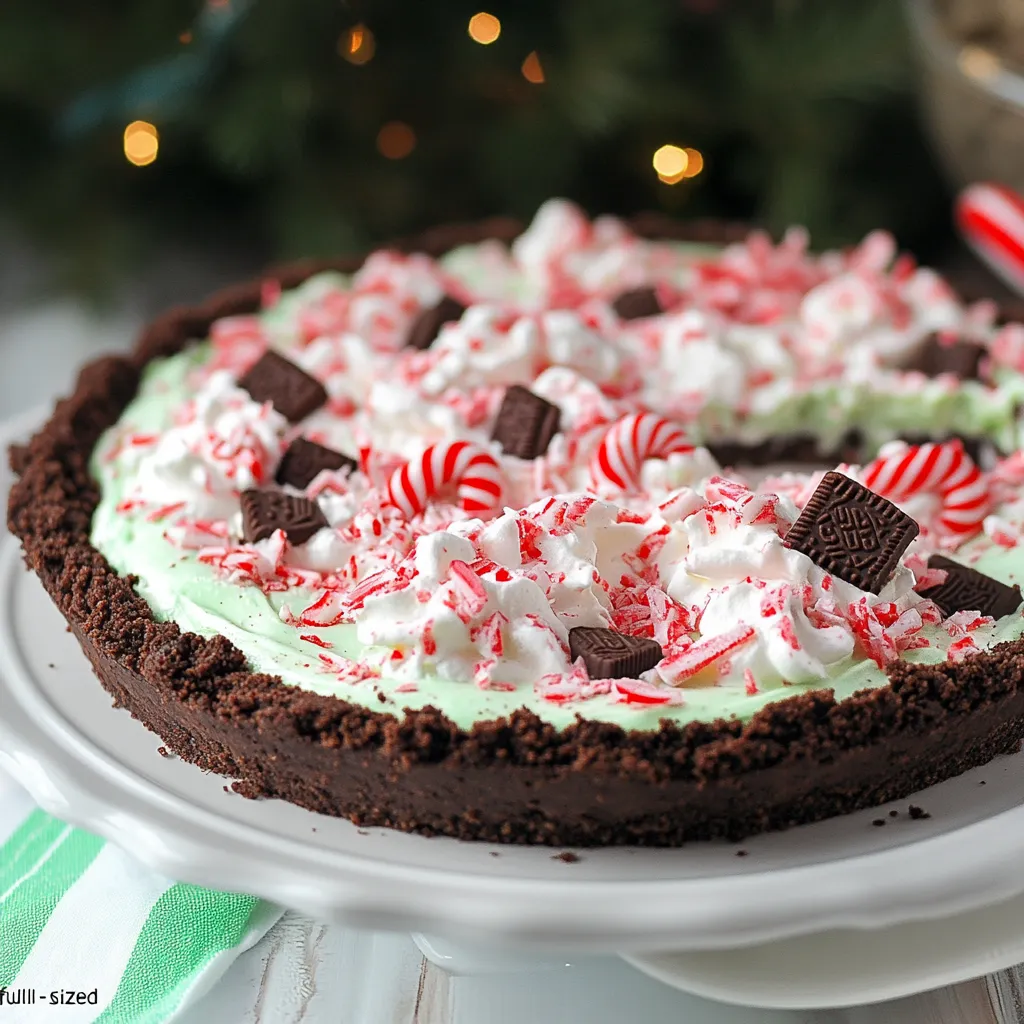
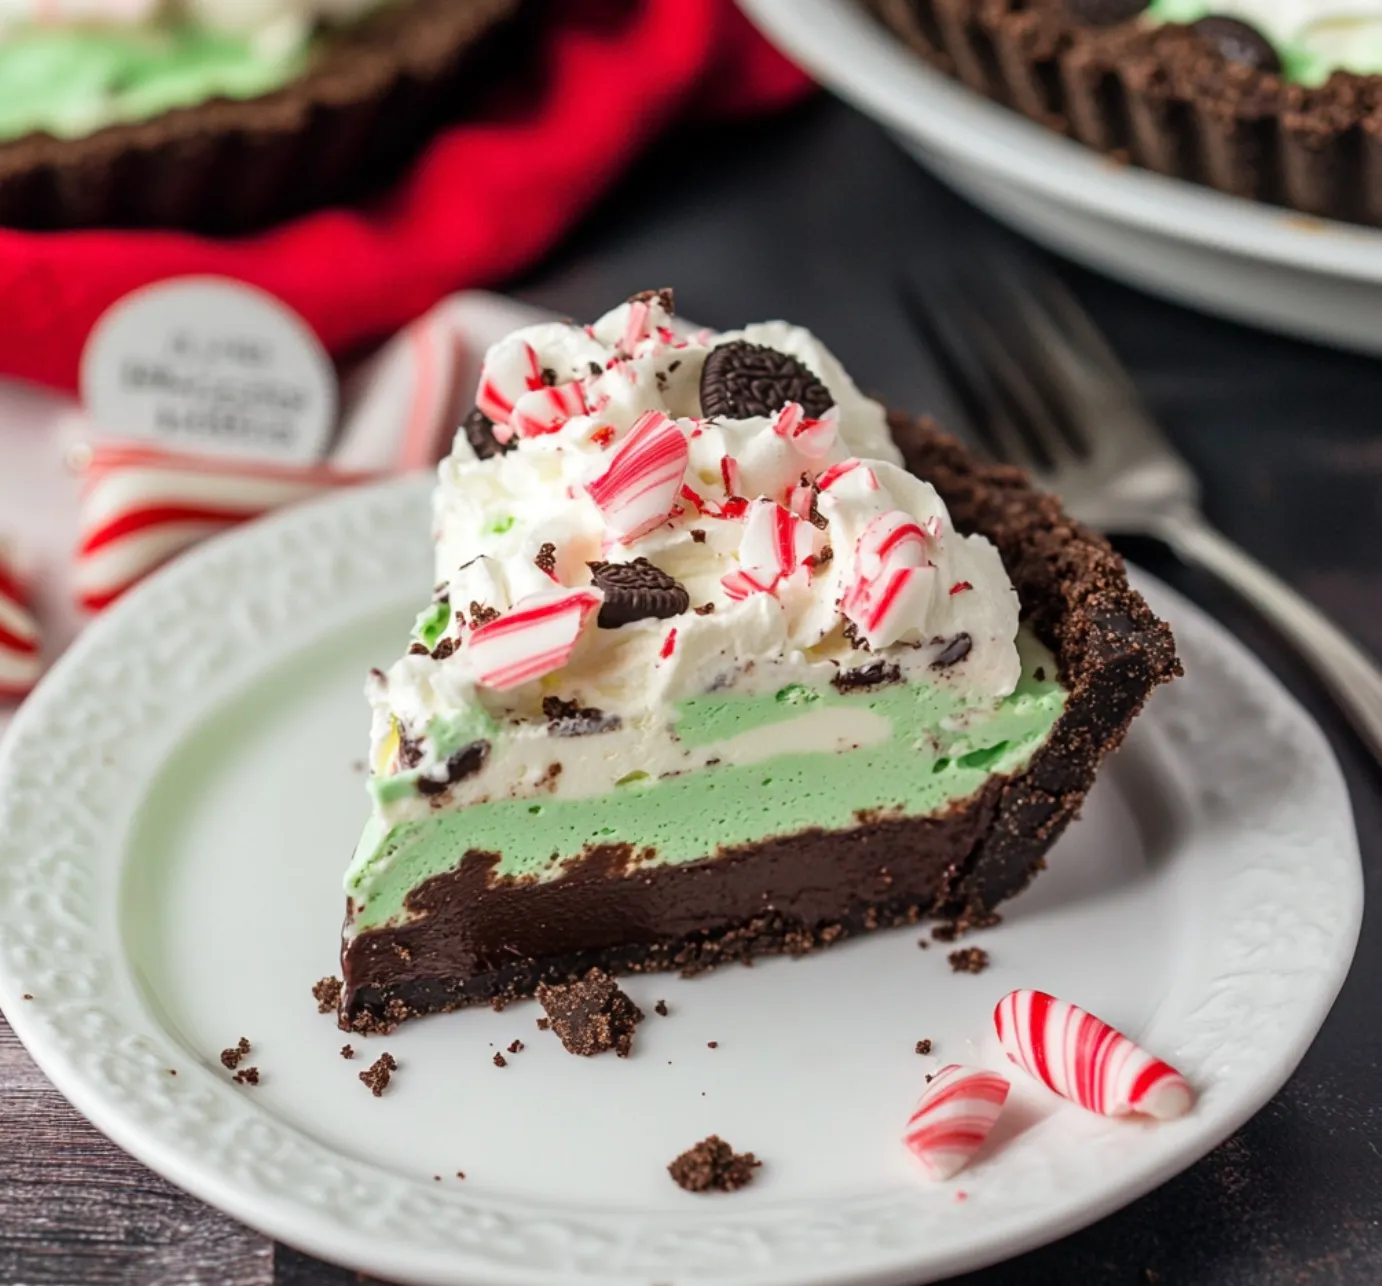
No-bake pies bring an effortless charm to holiday desserts, and this Mint Chocolate creation strikes the perfect balance between rich chocolate and cooling peppermint. The combination of smooth chocolate filling, aromatic mint layer, and crunchy Oreo crust transforms simple ingredients into an impressive dessert that requires no oven time.
During last year's holiday gatherings, this pie became an instant family favorite. My nephew, usually picky about mint desserts, asked for seconds and even requested it for his birthday celebration.
Essential Ingredients and Selection Tips
- Oreo cookies: Choose regular, not Double Stuf, for the perfect crust-to-filling ratio. The classic cookies provide the ideal chocolate base
- Frozen whipped topping: Let it thaw completely in the fridge for the smoothest texture. Quick thawing can make the filling grainy
- Hershey's chocolate bars: Their melt-point creates the perfect consistency. Dark chocolate bars work beautifully too for a richer flavor
- Peppermint extract: Pure extract, not artificial flavoring, gives the cleanest mint taste without any chemical aftertaste
- Candy canes: Look for traditional peppermint ones rather than flavored varieties for the most authentic mint kick
Detailed Instructions
- Crushing Oreos:
- Begin by crushing the Oreos into fine crumbs. Place them in a zip-top bag and crush with a rolling pin, working from the center outward to prevent the bag from splitting. You want evenly sized crumbs for a cohesive crust.
- Making the Crust:
- Mix the Oreo crumbs with melted butter until they resemble wet sand. Press firmly into your pie dish, making sure to get an even layer up the sides. The back of a measuring cup works perfectly for this.
- Creating the Chocolate Layer:
- For the chocolate layer, gently melt the Hershey's bars in 30-second intervals in the microwave, stirring between each interval. Let it cool for 5 minutes - this prevents the whipped topping from deflating when mixed.
- Making the Mint Layer:
- Divide the thawed whipped topping between two bowls. Fold the melted chocolate into one half using gentle, sweeping motions to maintain the light texture. Over-mixing will deflate your filling. In the second bowl, add peppermint extract and optional green food coloring to the remaining whipped topping. Start with less extract than you think you need - you can always add more.
My grandmother always said mint aids digestion, which might explain why this pie feels less heavy than other holiday desserts. Growing up, she would serve thin slices of mint chocolate desserts after big meals, claiming it was "good for the stomach."
Beyond the Basics
The beauty of this pie lies in its adaptability. The Oreo crust provides a fantastic foundation for experimenting with different chocolate varieties. I've tried it with dark chocolate for a more sophisticated flavor profile, and white chocolate for a striking color contrast with the mint layer.
The texture develops beautifully over time, with the crust softening slightly while maintaining its structure. This creates an almost truffle-like consistency that makes each bite more satisfying than the last.
For special occasions, I've decorated the top with chocolate curls made by running a vegetable peeler along a slightly warm chocolate bar. The elegant touch elevates the presentation without adding complexity.
After countless variations and family gatherings, this pie has earned its place as a holiday tradition. Its simplicity belies its impact - it's the kind of dessert that makes people pause their conversations to ask for the recipe.
The Perfect Pairing Experience
Store-bought hot chocolate might seem like an obvious choice with this pie, but I've discovered that a robust cup of dark roast coffee creates an outstanding flavor combination. The coffee's bitterness perfectly balances the pie's sweetness while enhancing the chocolate notes. When entertaining, I love setting up a small coffee bar alongside this dessert.
Texture Transformation Tips
One fascinating aspect of this pie is how its texture evolves during storage. The initial creamy layers gradually meld with the crust, creating an almost ganache-like consistency around the edges. This transformation adds another dimension to the eating experience, making leftover slices just as enjoyable as the first cut.
Make-Ahead Magic
The convenience of this recipe extends beyond its no-bake nature. I've found that making it a day ahead actually improves the overall flavor profile. The mint has time to fully infuse through the layers, and the filling sets to the perfect slicing consistency. This makes it an ideal choice for busy holiday entertaining.
Seasonal Adaptations
While this pie shines during the winter holidays, it can be easily adapted for any season:
- Replace candy canes with chocolate curls for spring
- Add fresh mint leaves as garnish during summer
- Swap in seasonal Oreo varieties for fall festivities
- Drizzle with white chocolate for winter wonderland effect
Your first bite might remind you of those precious after-dinner mints, but elevated to a whole new level. The combination of smooth, creamy layers with the crunch of the crust and toppings creates a textural journey that keeps you coming back for more.
Freezing Guidelines
When freezing individual slices, wrap each piece separately in plastic wrap, then aluminum foil. This double-wrapping prevents freezer burn and keeps the delicate flavors intact. Let frozen slices thaw overnight in the refrigerator for the best texture restoration.
This no-bake mint chocolate pie has become more than just a recipe in my collection - it's a reliable crowd-pleaser that brings together the nostalgic flavors of childhood with an elegant presentation worthy of any holiday table. Whether you're an experienced baker or just starting your culinary journey, this dessert proves that sometimes the simplest recipes create the most memorable moments.
Creative Serving Suggestions
Transform this pie into an interactive dessert experience by setting up a toppings bar. Offer bowls of crushed candy canes, chocolate shavings, whipped cream, and mint leaves. Let guests customize their slices, adding an element of fun to your dessert course. During family gatherings, this approach always sparks conversation and creates memorable moments around the dessert table.
Temperature Matters
The beauty of this pie lies in its temperature sensitivity. While it needs to be stored in the refrigerator, serving it at just the right temperature makes a significant difference. I've found that 12-15 minutes at room temperature allows the flavors to bloom fully. The chocolate becomes slightly softer, the mint more pronounced, and the texturesmeld together perfectly.
Alternative Crust Options
While the Oreo crust is classic, don't hesitate to experiment:
- Graham cracker crust with a hint of cocoa powder mixed in
- Chocolate wafer cookies for an intensely dark base
- Mint Oreos for an extra layer of flavor
- Chocolate graham crackers for a lighter touch
Each variation brings its own character to the dessert while maintaining the essential mint-chocolate harmony.
Troubleshooting Common Issues
Understanding potential pitfalls helps ensure success every time:
- If your filling looks grainy, the chocolate was likely too hot when mixed
- Soft filling usually means it needs more chilling time
- Crumbly crust indicates too little butter in the mixture
- Uneven layers can be fixed by gentle smoothing with an offset spatula
My journey with this recipe started during a holiday baking mishap when my oven stopped working mid-December. What began as a backup dessert has evolved into a cherished recipe that friends and family now expect at gatherings. The simplicity of preparation combined with the sophisticated presentation makes it a reliable go-to for both casual family dinners and formal holiday celebrations.
This no-bake mint chocolate pie embodies what I love most about cooking - how simple ingredients, treated with care and attention, can create something truly special. It's proof that sometimes the most memorable desserts don't require complex techniques or special equipment, just a good recipe and a little patience.
These insights come from countless times making this pie, each one teaching me something new about perfecting this deceptively simple dessert. Remember, the best recipes are those that become your own through experience and small adaptations.
Recipe FAQs
- → Can I make this pie ahead of time?
- Yes, you can make it up to 2 days ahead and store it covered in the refrigerator.
- → Can I freeze this mint chocolate pie?
- Yes, you can freeze it for up to 2 months. Thaw overnight in the fridge before serving.
- → What if I can't find candy canes?
- You can use crushed peppermint candies or skip them entirely for a year-round dessert.
- → Can I use dark chocolate instead of milk chocolate?
- Yes, feel free to substitute with dark chocolate bars for a richer taste.
- → How long does this pie last in the fridge?
- This pie will stay fresh for up to 5 days when stored covered in the refrigerator.