
 Pin
Pin
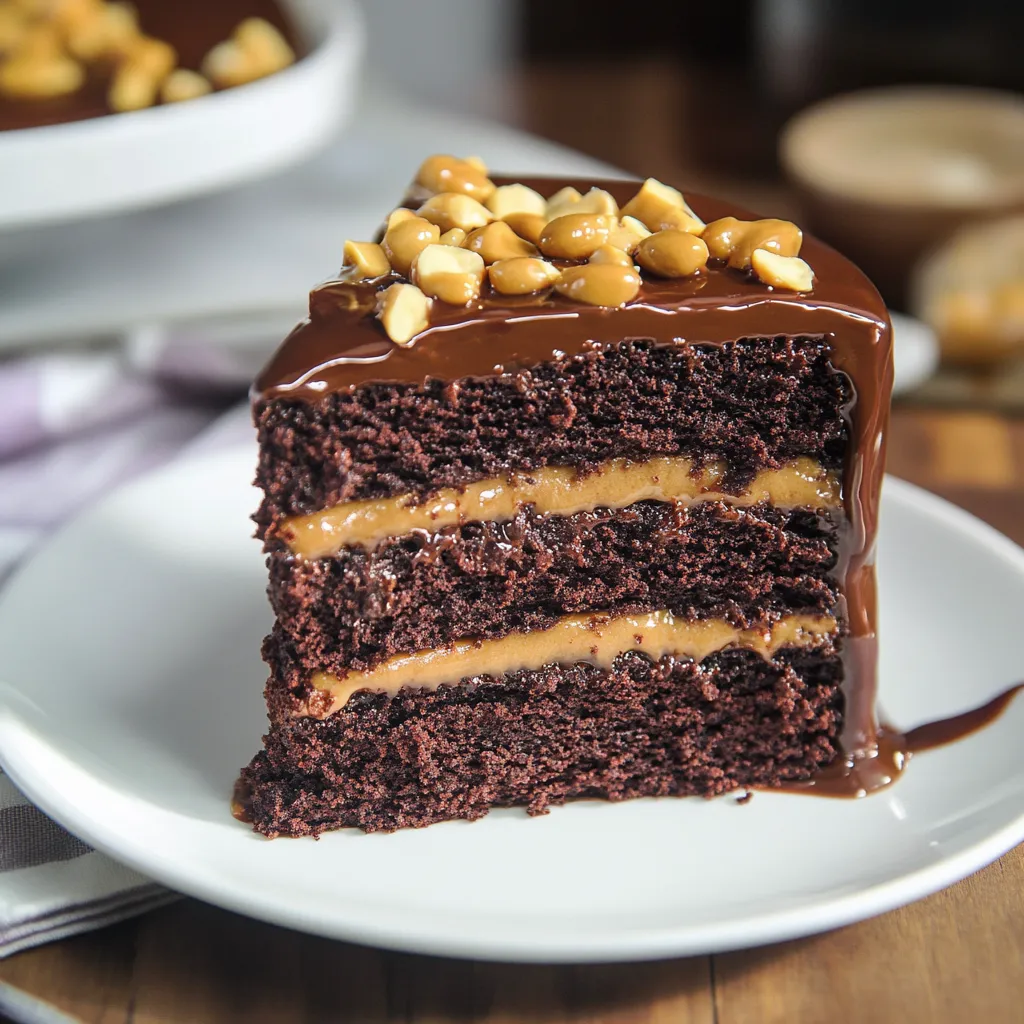
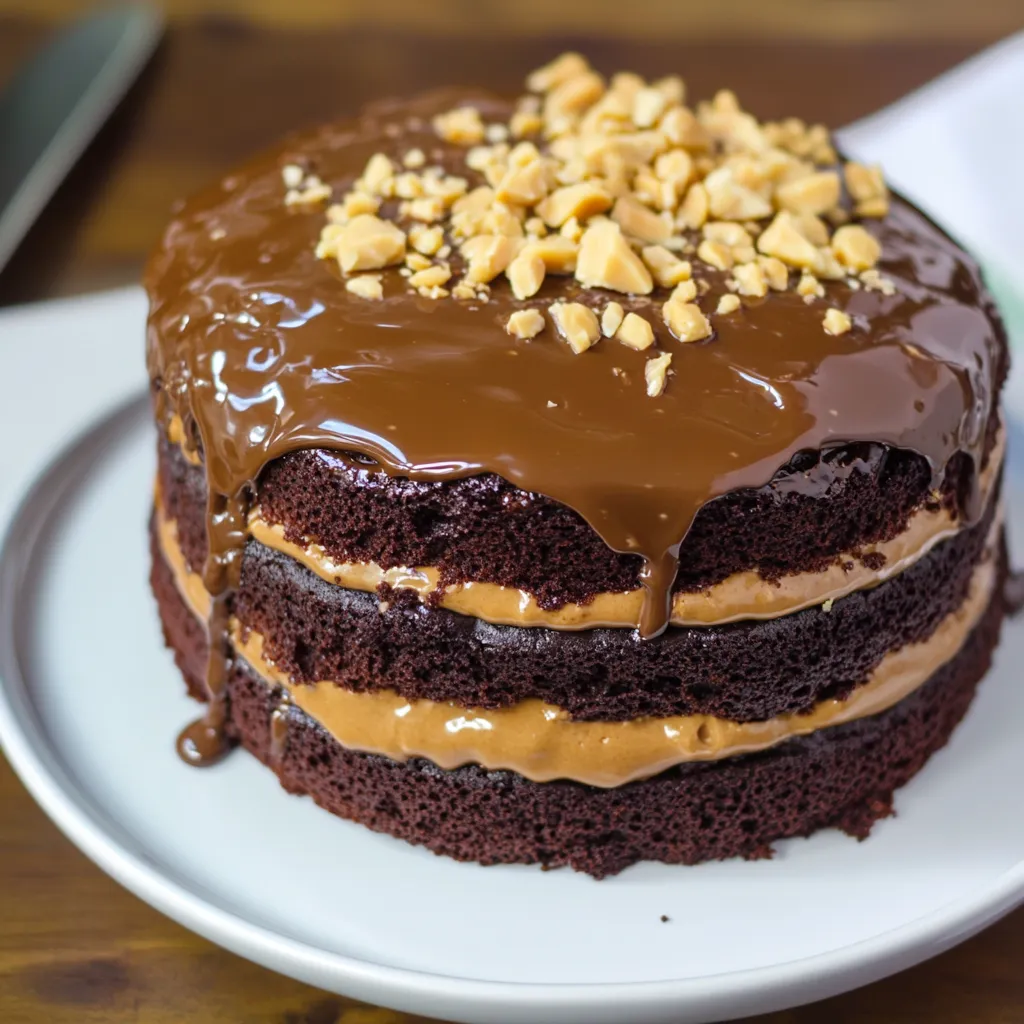
A truly decadent chocolate cake layered with silky ganache and homemade salted peanut caramel - this is the kind of dessert that creates lasting memories. The deep chocolate flavors combined with gooey caramel and crunchy peanuts transform a classic cake into something extraordinarily special. When I first developed this recipe, I wanted to create something that would be worthy of life's biggest celebrations while still being achievable in a home kitchen.
I've made this cake countless times for family birthdays and celebrations. What keeps me coming back is how the faces of my guests light up when they taste that first perfect bite with all the layers together.
Essential Ingredients Selection:
- Cocoa Powder: Choose Dutch-processed cocoa for its deeper, richer chocolate flavor and darker color
- Sour Cream: Full-fat sour cream is crucial - it adds moisture and helps activate the baking soda
- Milk Chocolate: Select high-quality chocolate bars rather than chips for the smoothest ganache
- Heavy Cream: Look for cream with at least 36% fat content for the best caramel and ganache texture
- Roasted Peanuts: The salted variety adds the perfect crunch and enhances the caramel's flavor
Detailed Preparation Steps:
- 1. Preparing Your Workspace
- - Take all ingredients out 30 minutes before starting to ensure they're at room temperature
- Line your cake pans with parchment circles and grease the sides thoroughly
- Position your oven rack in the center position for even baking - 2. Making the Perfect Cake Batter
- - Whisk the cocoa and boiling water until completely smooth - this blooms the cocoa, intensifying its flavor
- Combine dry ingredients thoroughly to prevent clumping
- Add wet ingredients gradually, ensuring each addition is fully incorporated
- Pour batter evenly between pans, weighing them if possible for perfect layers - 3. The Art of Ganache Making
- - Chop chocolate into uniform pieces for even melting
- Heat cream just until bubbles form around the edges
- Let mixture sit undisturbed for 3 minutes before stirring
- Stir from the center outward until silky smooth - 4. Mastering Caramel Sauce
- - Keep a close eye on the color change - it happens quickly
- Swirl the pan gently instead of stirring to prevent crystallization
- Have cream measured and ready before starting
- Stand back when adding cream to prevent steam burns - 5. Perfect Assembly Technique
- - Level each cake layer with a serrated knife for professional appearance
- Chill layers for 20 minutes before stacking for easier handling
- Use a rotating cake stand if available for smooth ganache application
- Keep a clean, warm knife nearby for smooth caramel drizzling
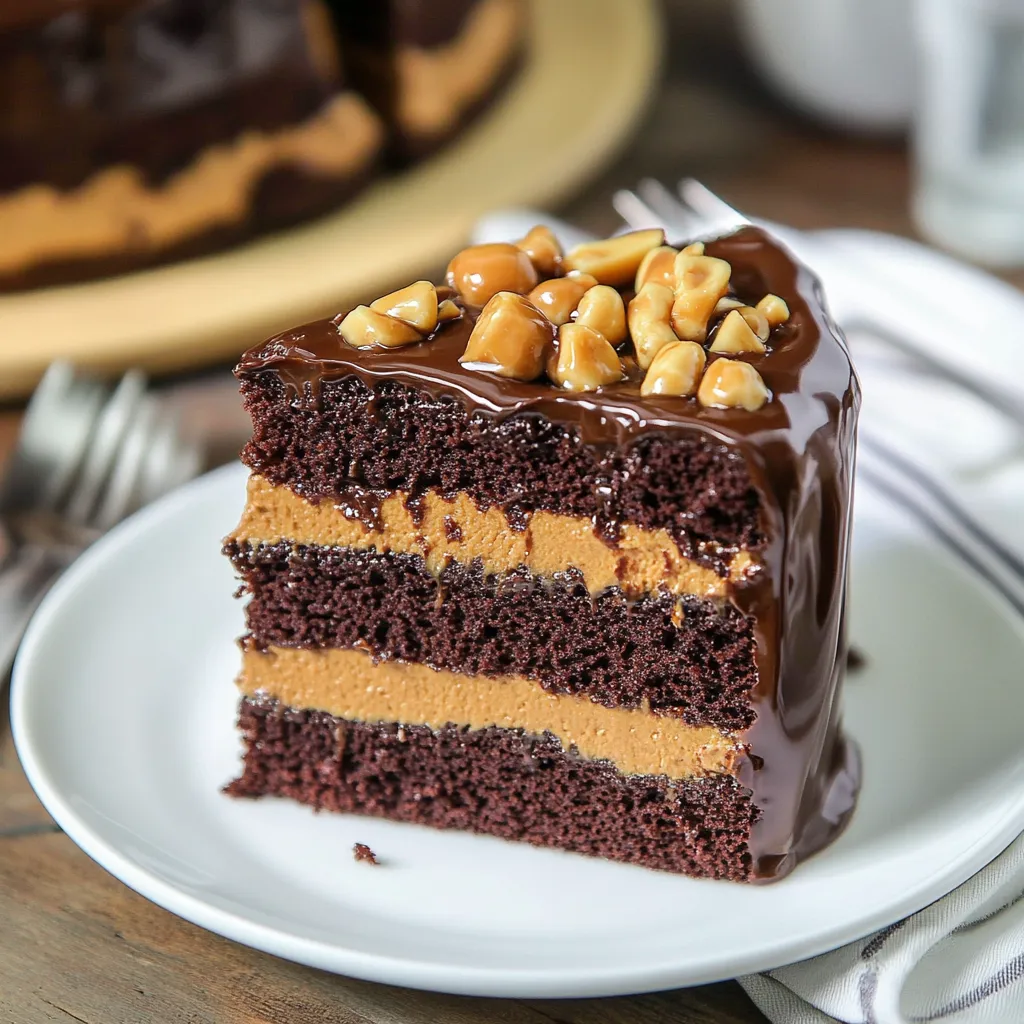
My family particularly loves the caramel sauce - we often make extra just to have on hand for ice cream sundaes. The sweet-salty combination brings back memories of making caramel apples with my grandmother.
The Magic of Moisture Control:
The key to keeping this cake moist lies in proper ingredient ratios. The combination of oil and sour cream creates a tender crumb that stays fresh for days. I've discovered through countless iterations that this particular ratio yields the perfect texture - dense enough to hold up to the ganache but still incredibly tender.
The Perfect Slice:
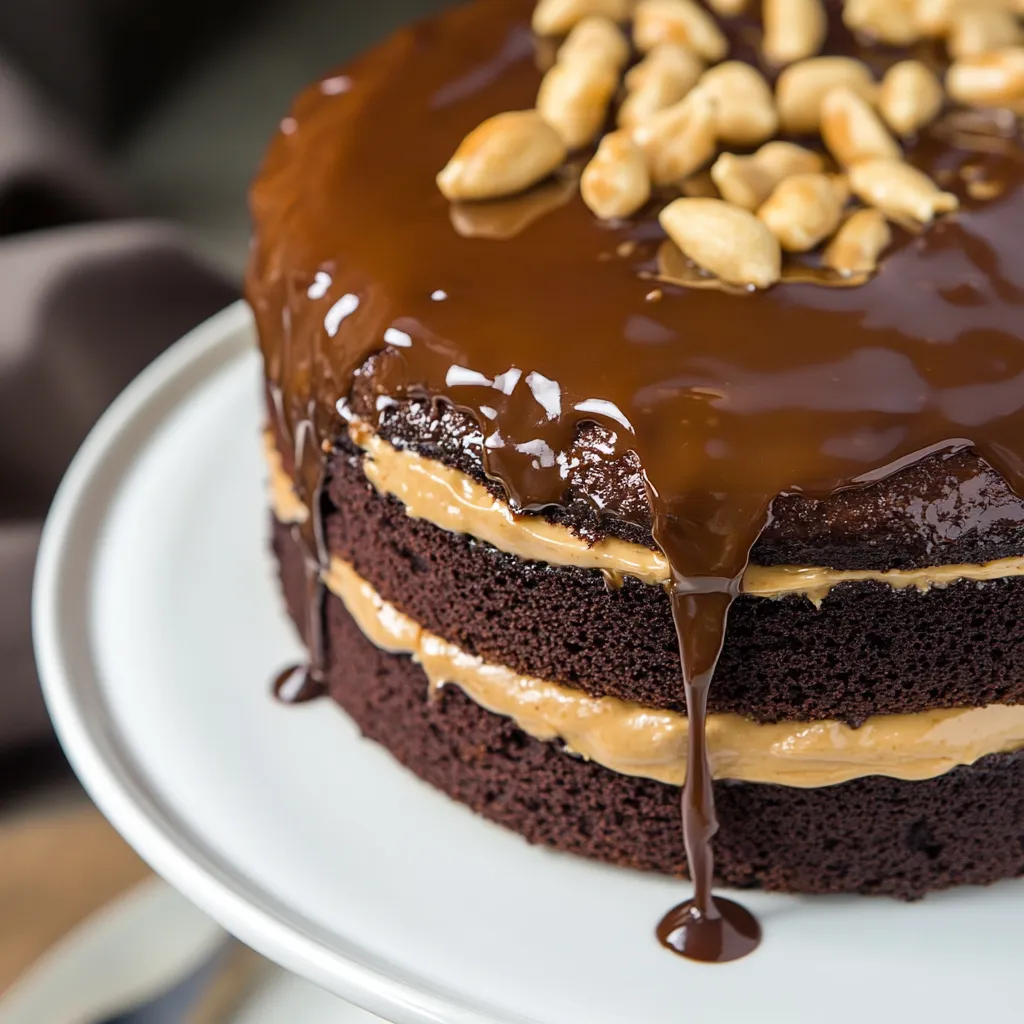
Nothing beats cutting into this cake and watching the caramel slowly drip down the layers. For clean slices, I've learned to dip my knife in hot water and wipe it clean between each cut. This simple technique ensures picture-perfect portions every time.
Flavor Evolution:
One of the most fascinating aspects of this cake is how the flavors develop over time. While delicious on day one, the cake reaches its peak on day two when the caramel has had time to slightly permeate the layers and the ganache has fully set.
Chef's Helpful Tips:
- Make the caramel sauce first - if it crystallizes, you can start over without wasting other ingredients
- Freeze the assembled cake for 15 minutes before the final ganache coating for sharper edges
- Store leftover cake slices vertically in a tall container to preserve the layers' integrity
After years of baking, this recipe remains one of my proudest achievements. It strikes that perfect balance between impressive and approachable, making it suitable for both special occasions and those moments when only chocolate and caramel will do. The combination of textures and flavors creates something truly memorable - a cake that's as much fun to make as it is to eat.
The Art of Chocolate Selection:
Every great chocolate cake starts with choosing the right chocolate. For this recipe, I've experimented with various chocolate brands and percentages. While premium chocolate brands yield excellent results, mid-range chocolate works beautifully too. The key is using chocolate you enjoy eating on its own. I've found that combining different chocolate percentages - like using 60% dark cocoa powder in the cake and milk chocolate in the ganache - creates fascinating depth of flavor.
Temperature and Timing Mastery:
One aspect of this recipe that took me years to perfect was understanding how temperature affects each component. The cake layers need to be completely cool before assembly - even slightly warm layers can melt the ganache. However, the ganache itself needs to be at the perfect temperature - too warm and it runs, too cool and it won't spread smoothly. I've learned to make the ganache while the cakes are cooling, letting both components reach their ideal temperature simultaneously.
The Science of Sugar:
Through countless batches, I've discovered that the combination of granulated and brown sugar isn't just about sweetness - it's about moisture retention and flavor complexity. The molasses in brown sugar adds subtle caramel notes that enhance the salted caramel sauce, while also helping keep the cake moist. This is why I never substitute all granulated sugar, even when I'm running low on brown sugar.
Creating the Perfect Crumb:
The texture of this cake is something I'm particularly proud of. The crumb is tight enough to hold up to the weight of the ganache and caramel, but still tender and moist. This is achieved through careful mixing - overmixing can lead to a tough cake, while undermixing can result in uneven texture. I've found that counting my strokes while mixing helps maintain consistency between batches.
Altitude Adjustments and Adaptations:
Living at different elevations throughout my baking journey has taught me the importance of adapting recipes. At higher altitudes, reducing the leavening agents slightly and increasing the liquid helps maintain the cake's structure. I've successfully made this cake from sea level to 5,000 feet elevation, adjusting ingredients accordingly.
Storage Solutions:
Proper storage is crucial for maintaining the cake's quality. While it stays fresh at room temperature for several days, I've developed a method for longer storage. Individual slices can be frozen with parchment paper between them, then thawed overnight in the refrigerator. The ganache and caramel maintain their texture surprisingly well using this method.
Seasonal Variations:
Throughout the year, I adapt this cake to suit the season. In summer, I might add a layer of fresh raspberries between the cake layers. During fall, I've been known to spike the caramel with bourbon and add toasted pecans instead of peanuts. Winter holidays call for a hint of peppermint in the ganache, while spring might see the addition of orange zest to brighten the chocolate flavor.
Troubleshooting Common Issues:
Over years of teaching this recipe to others, I've encountered nearly every possible challenge. Caramel that crystallizes can be saved by adding a splash of hot water and reheating gently. If the ganache splits, warming it gently while whisking vigorously usually brings it back together. Even sunken cake centers can be salvaged by turning them into a trifle with the same ganache and caramel components.
The Joy of Sharing:
Perhaps what makes this cake most special is its ability to bring people together. I've taught this recipe in countless baking classes, and the look of achievement on students' faces when they successfully complete their first caramel sauce is priceless. This cake has become a requested favorite at family gatherings, with relatives calling dibs on corner pieces weeks before celebrations.
Equipment Essentials:
While fancy equipment isn't necessary, certain tools make the process smoother. A good set of cake pans that conduct heat evenly is crucial. I've found that light-colored aluminum pans work best, as dark pans can cause the edges to brown too quickly. A reliable candy thermometer takes the guesswork out of caramel making, though I've taught many bakers to make it by color alone.
The Importance of Mise en Place:
One lesson I learned early in my baking journey was the value of proper preparation. Having all ingredients measured and ready before starting makes the process smoother and more enjoyable. This is especially important when making the caramel sauce, as the timing is crucial and there's no opportunity to measure ingredients once the sugar starts caramelizing.
Making It Your Own:
While this recipe is perfected as written, I always encourage bakers to make it their own. Some of my students have added espresso powder to deepen the chocolate flavor, while others have experimented with different nuts in the caramel. These personalizations make the recipe more special and meaningful to each baker who tries it.
A Legacy Recipe:
This cake has become more than just a recipe in my collection - it's become a legacy piece that I've passed down to my children and countless students. It represents the perfect balance of technique and creativity, precision and flexibility. Each time I make it, I'm reminded of all the celebrations it's been part of and all the joy it's brought to those who've tasted it.
Recipe FAQs
- → Can I make this cake in advance?
- Yes, you can make the cake layers a day ahead and assemble before serving.
- → Why does the caramel sauce thicken?
- The caramel naturally thickens as it cools. Gentle reheating will make it fluid again.
- → Can I skip the peanuts?
- Yes, you can omit the peanuts for a classic salted caramel sauce.
- → How should I store this cake?
- Store covered in the refrigerator for up to 5 days. Bring to room temperature before serving.
- → Can I use dark chocolate instead of milk chocolate?
- Yes, you can substitute dark chocolate for a more intense chocolate flavor.