
 Pin
Pin
The perfect autumn morning deserves something special, and these pumpkin scones - tender, spiced, and crowned with maple glaze - transform ordinary moments into magic. Through years of perfecting scones, I've discovered that creating these seasonal treasures is about understanding the delicate dance between temperature, technique, and timing. Each batch teaches something new about the art of pastry making.
Last weekend, I served these at a fall brunch, watching faces light up at first bite. The secret? Understanding how cold butter and gentle handling create those perfect, flaky layers.
Essential Ingredients and Selection Tips
- Pumpkin Purée: Choose pure pumpkin purée, not pie filling, for better moisture and flavor control.
- Butter: Use high-quality butter with a high-fat content for flakier results.
- Eggs: Use cold eggs straight from the refrigerator to maintain dough temperature.
- Spices: Replace pumpkin pie spice if it's been open for more than six months for maximum flavor.
Step-by-Step Creation
- Prepare the butter:
- Cut butter into half-inch cubes and freeze while gathering other ingredients.
- Mix dry ingredients:
- Whisk flour, sugar, spices, and leavening agents thoroughly, ensuring even distribution and aeration.
- Cut in butter:
- Add frozen butter to dry ingredients, using a pastry blender or fingertips to create a mixture resembling coarse sand with pea-sized butter pieces.
- Combine wet ingredients:
- Whisk pumpkin purée and cold eggs until smooth. Gradually fold into the dry mixture with a spatula, stopping when the dough just starts to come together.
Shaping with Purpose
Turn the dough onto a lightly floured surface. Press gently into an 8-inch circle about 1½ inches thick. Cut into eight wedges with a sharp knife, making straight-down cuts for clean edges. Transfer to a parchment-lined baking sheet, spacing wedges at least an inch apart.
The Importance of Chilling
Freeze shaped scones for 20 minutes before baking. This allows gluten to relax and butter to chill completely, ensuring flaky layers and even rising. Preheat your oven to 425°F during this time.
The Art of Baking
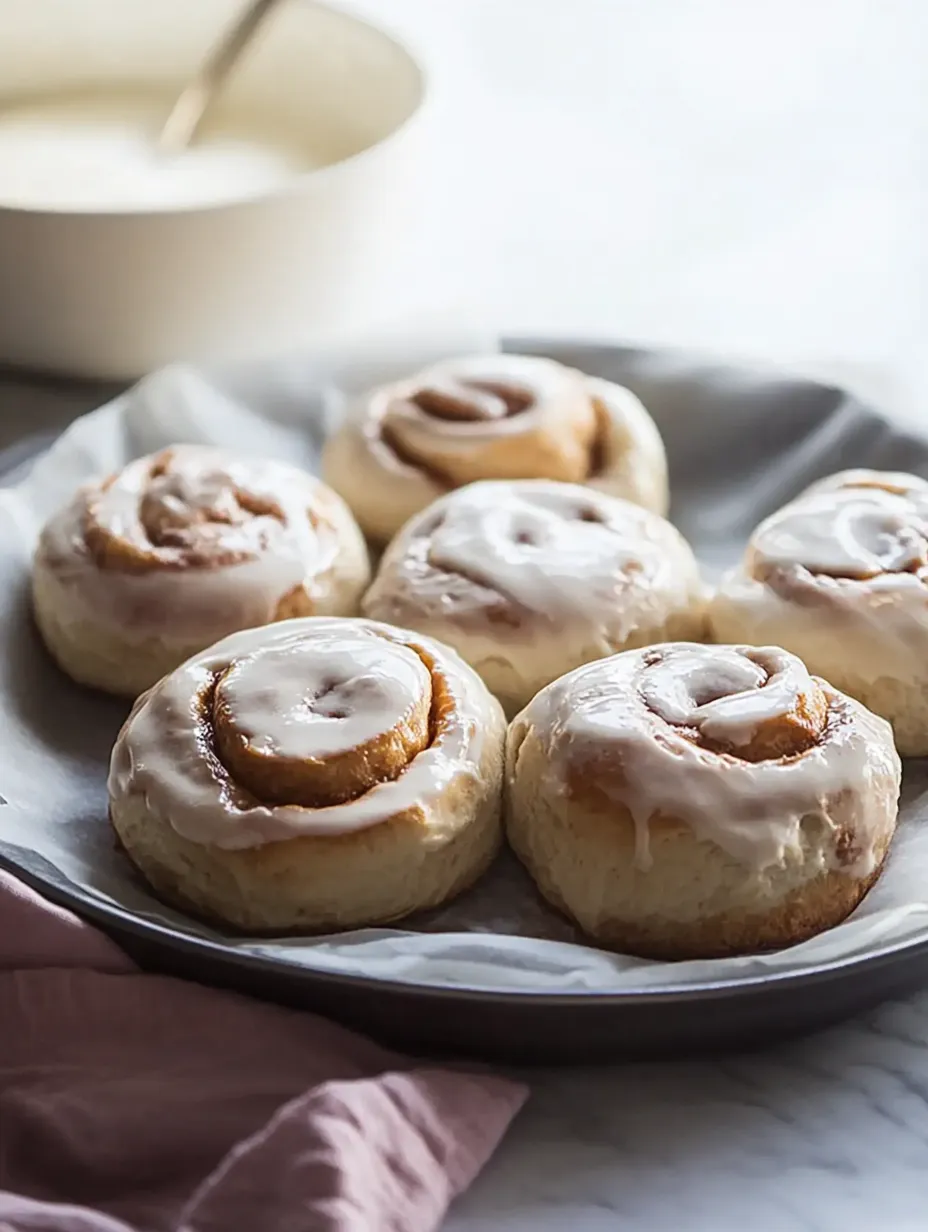
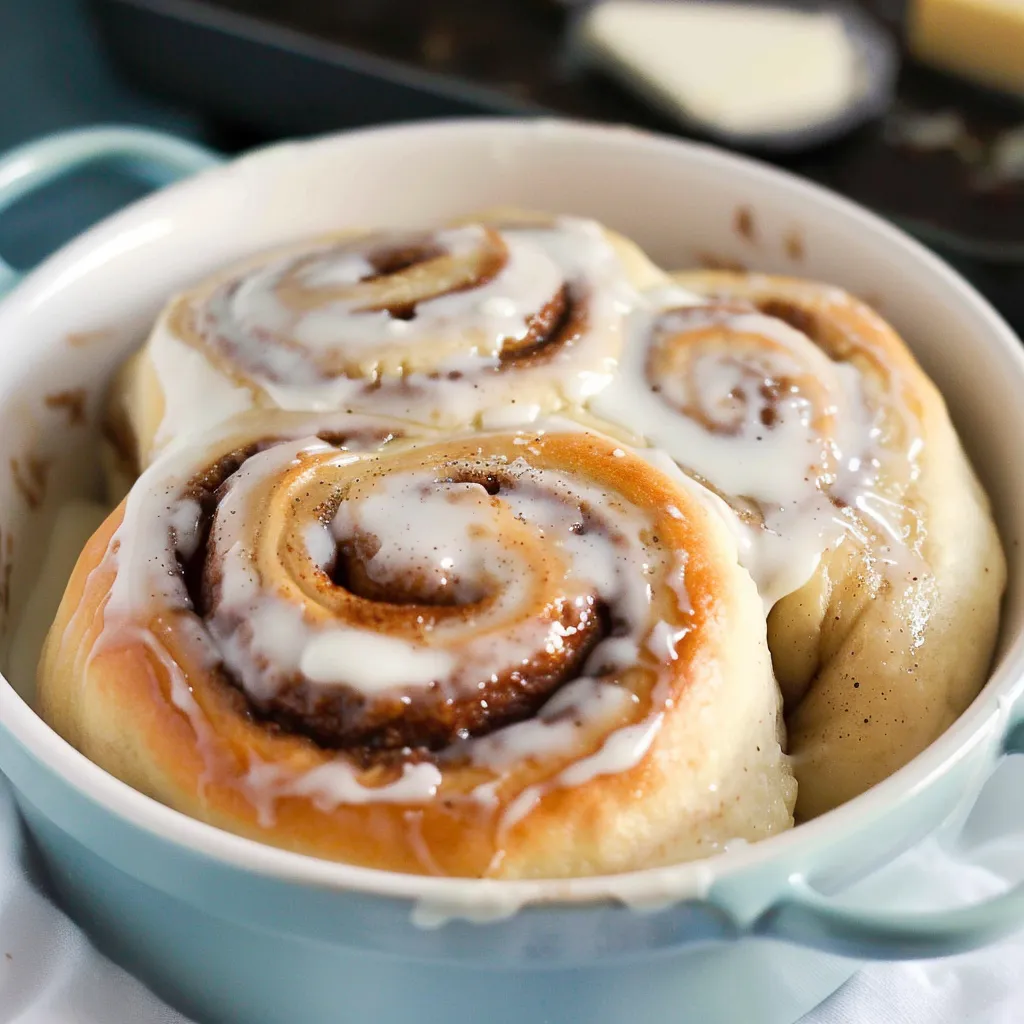
Brush scones with milk and sprinkle with turbinado sugar for crunch and golden browning. Bake for 17-22 minutes, checking at 15. Look for golden brown edges and tops that spring back when touched. Cool for exactly 10 minutes before glazing.
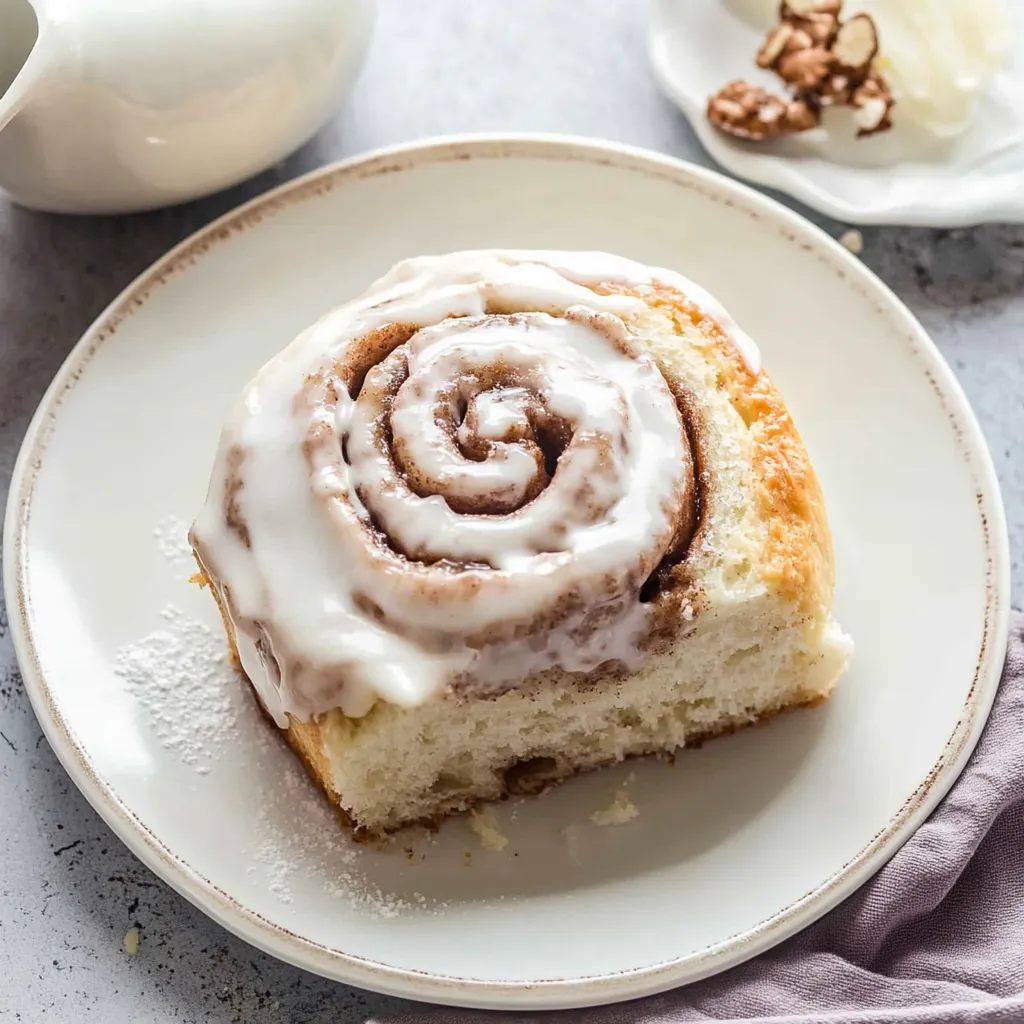
Perfecting the Maple Glaze
- Prepare the glaze:
- Whisk real maple syrup with powdered sugar until smooth and slightly thick. Adjust consistency as needed for a slow, cascading drizzle.
- Apply glaze:
- Drizzle over scones, letting it cascade naturally down the sides.
Cultural Context
While scones originated in Scotland as simple quick breads, this pumpkin variation celebrates distinctly American autumn flavors. It's a perfect example of how traditional recipes evolve to embrace seasonal ingredients while maintaining their soul-satisfying essence.
Seasonal Adaptations and Variations
- Early Autumn: Add fresh diced apple to the dough.
- Thanksgiving: Fold in crushed pecans or a swirl of maple butter.
- Winter Holidays: Incorporate crystallized ginger for warmth and sparkle.
Storage and Make-Ahead Strategies
- Freeze unbaked shaped scones for up to two months.
- Store baked scones in an airtight container for up to two days.
- Refresh day-old scones in a warm oven for 5 minutes.
- Keep glaze separate until serving if making ahead.
Perfect Pairings
- Tea: Strong black tea with milk pairs beautifully with these spiced scones.
- Chai: The warm spices of chai complement the pumpkin flavor.
- Coffee: A rich cup of coffee balances the sweetness of the glaze.
- Apple Cider: Hot apple cider enhances the autumnal experience.
Creating Beautiful Presentations
- Arrange on a rustic wooden board for casual gatherings.
- Use a tiered stand for an elegant brunch display.
- Add fresh herbs or edible flowers for color and contrast.
- Serve extra maple glaze in a small pitcher for added indulgence.
Equipment and Tools for Success
- A large, wide bowl allows room for proper mixing.
- A bench scraper helps handle soft dough and clean your work surface.
- Heavy-duty baking sheets ensure even baking and prevent scorching.
- A pastry brush ensures even milk application for golden tops.
- A cooling rack promotes proper texture by preventing condensation.
Building Your Baking Confidence

Each batch of scones teaches something new about the art of pastry making. Whether you're an experienced baker or just starting out, these skills transfer to many other recipes. The confidence you gain in handling dough, recognizing proper consistency, and achieving perfect texture becomes part of your culinary foundation.
Professional Kitchen Insights
- The sound of butter cutting into flour changes as it reaches the right consistency.
- The weight of the dough in your hands tells you about proper moisture content.
- Visual cues during baking are more reliable than strict timing.
- The aroma changes subtly when scones are perfectly baked.
Temperature Mastery
- On warm days, work quickly and chill more frequently.
- Cold marble or granite counters help keep butter firm during shaping.
- Check your oven's accuracy with a thermometer for precise baking.
- Watch how quickly your glaze sets - room temperature affects consistency.
Extended Final Thoughts
Creating perfect pumpkin scones is about understanding how ingredients work together. Through countless batches in my kitchen, I've discovered that success lies not just in the recipe but in developing an intuition for dough, understanding temperature's role, and respecting the process.
Each batch connects us to the traditions of baking while allowing for creativity and innovation. These scones bring warmth and satisfaction, whether served for a holiday brunch or enjoyed quietly with morning coffee.
Recipe FAQs
- → What is tangzhong and why use it?
- Tangzhong is a cooked flour paste that makes bread extra soft and fluffy, helping it stay fresh longer.
- → Can I make these without overnight refrigeration?
- The overnight rest develops better flavor, but you can make them same-day with a 2-hour room temperature rise.
- → Why use dental floss to cut the rolls?
- Floss cuts cleanly through the dough without squishing it like a knife might.
- → Can I freeze these rolls?
- Yes, freeze unfrosted rolls for up to 2 months. Thaw overnight and warm before glazing.
- → Can I make the glaze ahead?
- Yes, prepare glaze up to 2 days ahead and store in the refrigerator. Bring to room temperature before using.