
 Pin
Pin
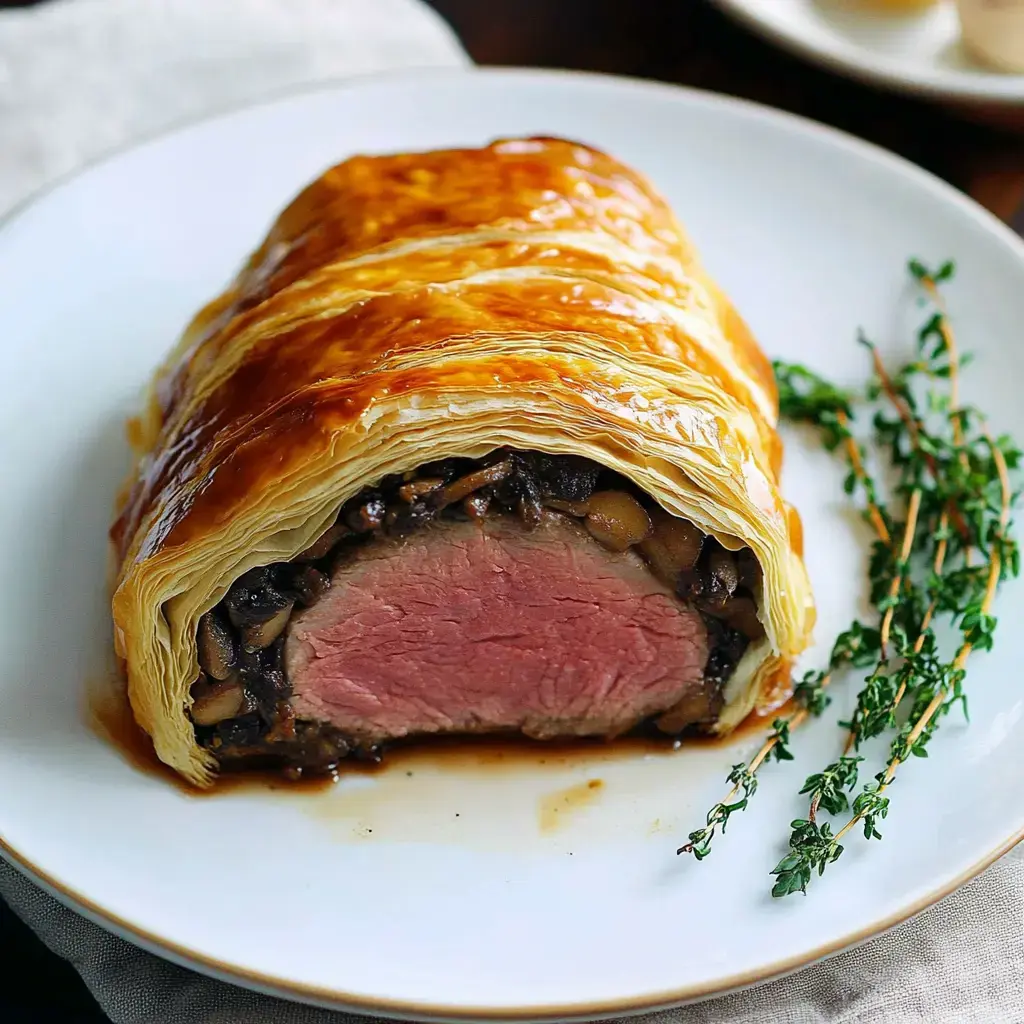
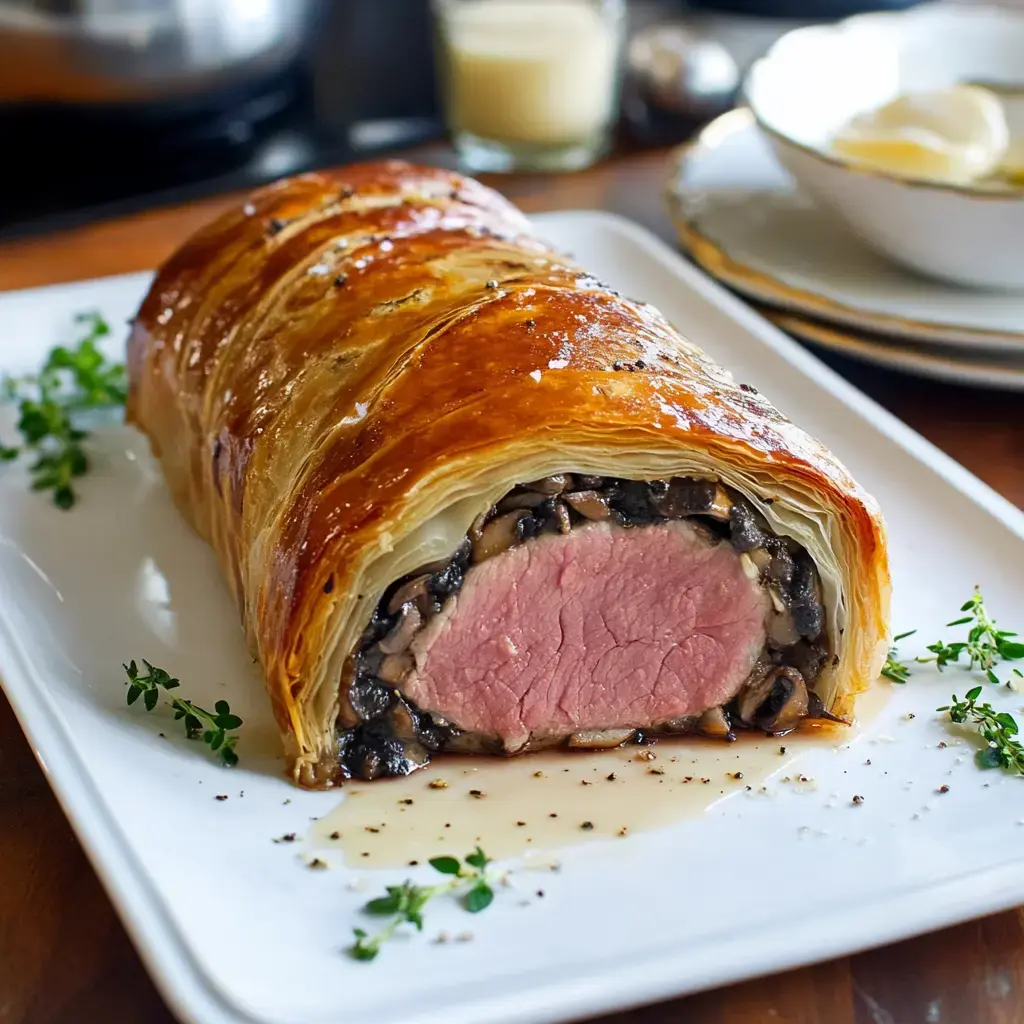
Ever wonder about beef wellington? It's basically a fancy dish where juicy beef gets bundled up in mushrooms, ham, and buttery pastry. This take draws inspiration from Gordon Ramsay's popular method, making it doable but still wow-worthy.
An Elegant Dinner Tradition
Going all the way back to the 1800s, beef wellingtons have shown up on fancy dinner tables for centuries. It's just right for special occasions, turning ordinary beef into something extraordinary. Don't worry though - store-bought pastry makes this way easier than it looks.
What You'll Need
- Beef Tenderloin: Go for a nice quality cut - this makes all the difference
- Pepper and Salt: Just the basics work best
- Olive Oil: Needed for a good sear
- Mustard: Gives a nice zip
- Mushrooms: Brings depth to the dish
- Prosciutto or Ham: Adds that extra savory kick
- Puff Pastry: Creates the flaky exterior
- Egg Yolks: Makes everything shiny
- Flaky Salt: Finishes it off nicely
How To Make Beef Wellington
- Oven Prep:
- First thing, get your oven hot at 400°F. This helps everything cook right and gives you that beautiful golden outside.
- Add Seasoning:
- Cover your tenderloin completely with pepper and salt. Don't hold back - proper seasoning makes everything taste better.
- Brown the Meat:
- Get a pan super hot and quickly brown your beef all around until it's dark and crusty, roughly 2-3 minutes per side. This keeps all the good juices inside.
- Spread Mustard:
- After the beef cools a bit, paint it with mustard. This adds great flavor and works like glue for the next layers.
- Handle Mushrooms:
- Throw your mushrooms in a food processor and pulse until they're tiny but not totally mush. You want small pieces that still have some texture.
- Dry Mushrooms:
- Cook those chopped mushrooms in a pan without oil until they're completely dry, around 10-15 minutes. Keep stirring - this step stops your pastry from getting soggy later.
- Build Layers:
- Spread out ham pieces, cover with your mushroom mix, then put your mustard-covered beef in the middle. Each part adds flavor and helps keep everything crispy.
- Roll It Up:
- Use plastic wrap to bundle everything up tight, tucking the ends in. Let it chill for 30 minutes to get firm - this makes everything easier.
- Pastry Wrap:
- Gently cover your chilled beef package with puff pastry, making sure to seal all the edges. Take it slow - good wrapping means no leaks during baking.
- Last Touches:
- Brush beaten egg all over the pastry for shine, then cut diagonal lines on top. These slits let steam escape and give it that classic look.
- Cook It:
- Stick it in your hot oven until the outside turns a deep gold color and gets crispy, about 40-45 minutes for pink in the middle.
- Let It Sit:
- Don't cut it right away! Let your Wellington sit for 10-15 minutes first. This keeps all the juices in the meat when you slice it, giving you perfect pieces.
Historical Background
Small beef wellington appetizers got big in the 1960s, but the original goes back much earlier. They named it after the Duke of Wellington, and it mixes French cooking skills with British tradition to create something totally unique.
Simplifying The Process
When you first check out beef wellington recipes, they can seem pretty scary. But if you break it down step by step, it's really not that hard. The secret is not rushing through the layers. Even first-timers can nail this if they follow along carefully.
Prep Work Tips
Want to serve beef wellington bites at your next get-together? Fix the mushrooms and beef a day early. This cuts down your work when it's cooking time, whether you're doing the big version or tiny ones for snacking.
Selecting The Right Cut
To figure out what beef for wellington works best, just ask the meat counter person. They'll point you to the right tenderloin piece, so your dish comes out tender and tasty. Good meat really is the foundation of this classic meal.
Ideal Accompaniments
While your wellington's in the oven, you can fix some easy sides like crispy potatoes or fresh green beans. These traditional pairings don't steal the spotlight but round out your fancy dinner perfectly. Just remember, the right sides can take your meal to another level.
Summary
Love this? Try meat pie next. Or make rich pork pastry. Both wrap good meat in flaky crust.
Recipe FAQs
- → When's meat done?
Stick meat tool in. Want bout 125-130. Pink middle's good. Let rest bit after. Watch it don't get hot.
- → Make it early?
Roll up to pastry. Keep cold wrapped good. Bake just before eat. Let meat warm bit. Fresh is best.
- → Pastry too soft?
Pop in cold box. Wait till firm up. Don't work warm stuff. Keeps layers good. Worth the wait.
- → Need mushrooms ready?
Make two days early. Keep cold wrapped. Saves lots time. Chop real fine though. Cook till real dry.
- → What wine's good?
Red wine works best. Dark rich kinds good. Cab or pinot nice. Match meat taste. Not too light.
- → Getting too brown?
Cover with foil loose. Lower heat some. Move pan down. Check temp more. Watch it close.
- → Taking it places?
Hard to move hot. Best bake there. Take stuff ready. Heat oven first. Worth the work.
- → Need it faster?
Have stuff ready. Meat room warm first. Quick sear helps. Watch times good. Still need patience.
- → Making big one?
Need more time cook. Watch middle done. Might need foil. Test temp lots. Don't rush it.
- → Want more flavor?
More herbs help lots. Good mustard works. Season each part. Even wine helps. Don't hide meat taste.
- → Pastry not flaking?
Keep stuff cold. Score top good. Egg wash light. Oven real hot. Steam helps lots.
- → Meat too done?
Take out sooner. Rest it longer. Watch temp close. Trust meat tool. Better bit rare.