
 Pin
Pin
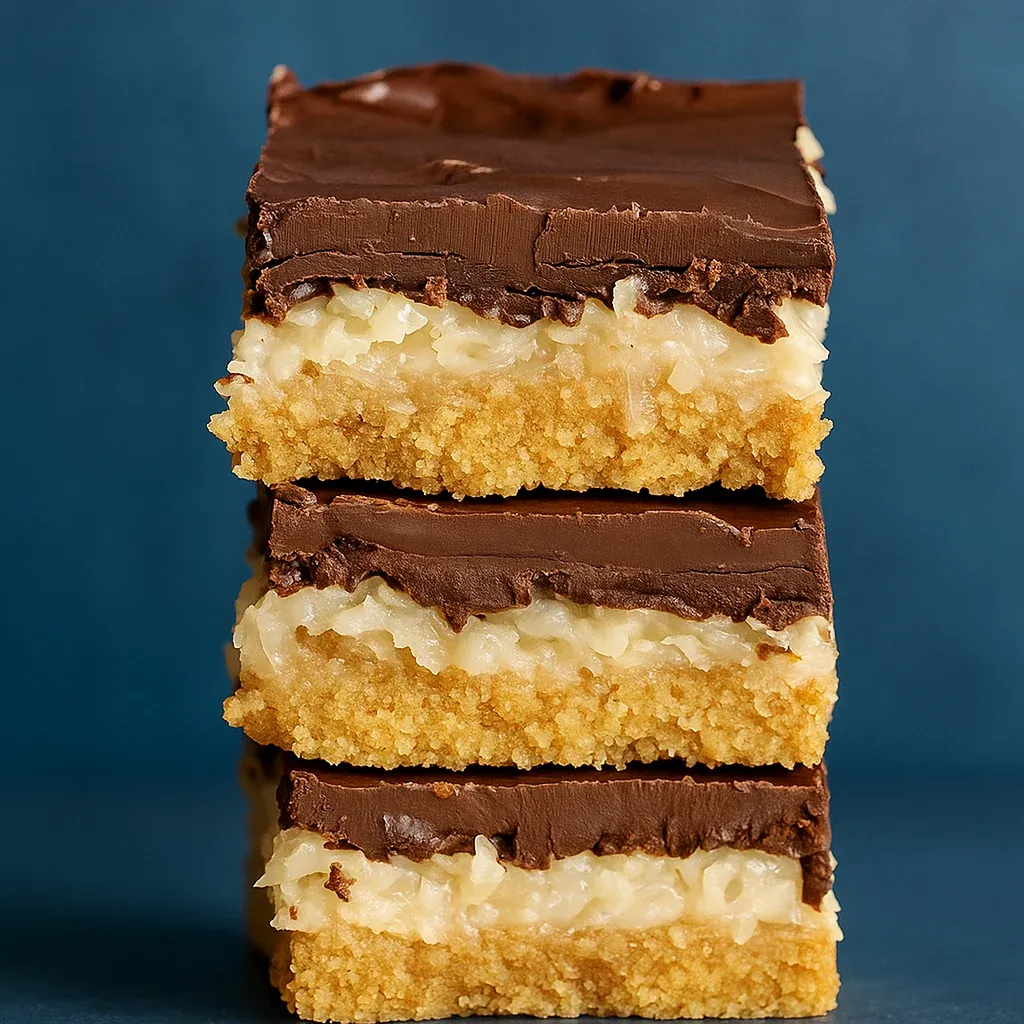
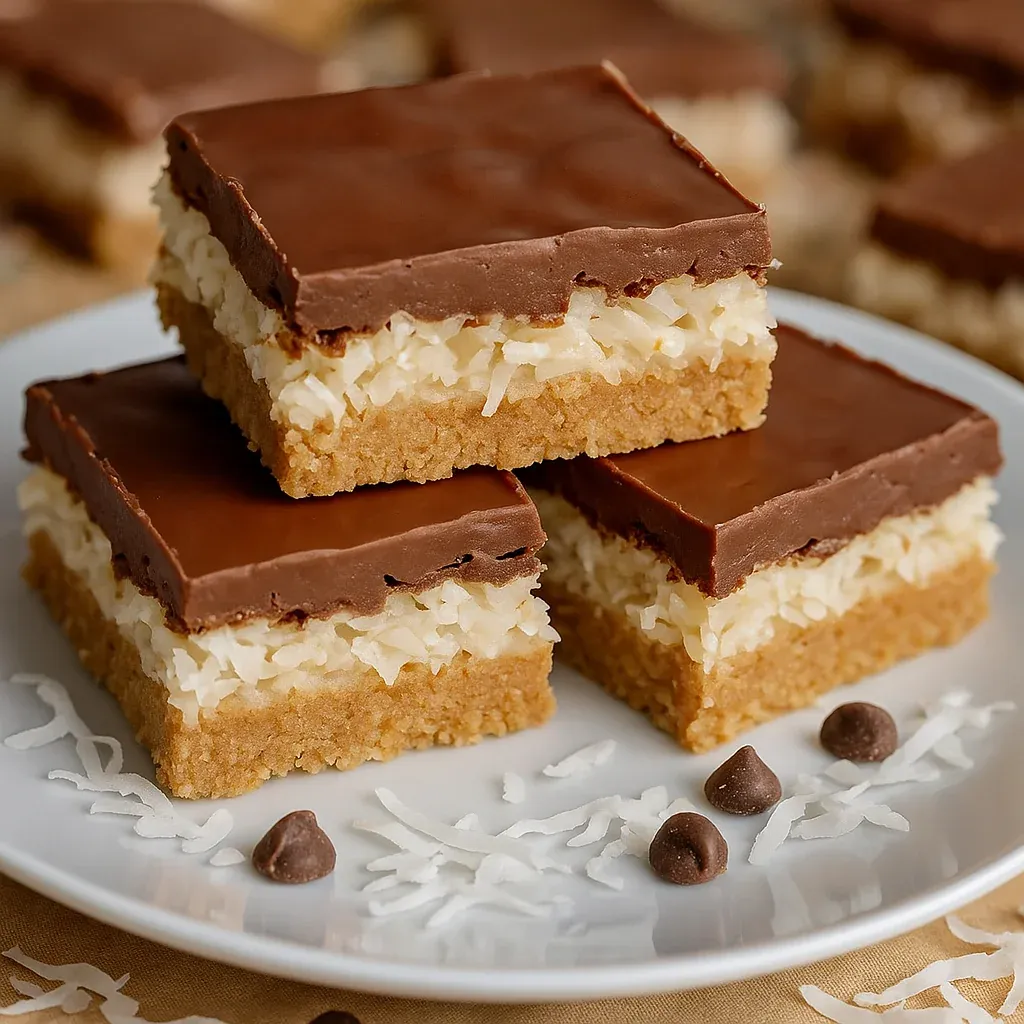
This buttery chocolate coconut bar recipe transforms simple ingredients into an irresistible treat that rivals your favorite candy bar. The combination of a graham cracker crust, sweet coconut filling, and rich chocolate topping creates squares that disappear faster than I can make them in my kitchen.
I first created these bars when looking for something simpler than traditional seven-layer magic bars but with that same nostalgic flavor. Now they're requested at every family gathering, and my nieces have dubbed them "better than candy bars."
Ingredients
- Graham crackers: Form the buttery base that provides perfect texture contrast
- Melted butter: Binds the crust and adds rich flavor throughout
- Granulated sugar: Enhances the sweetness of the crust without overpowering
- Sweetened flaked coconut: Creates that classic chewy texture in every bite
- Sweetened condensed milk: Transforms into a caramel-like layer that holds everything together
- Chocolate chips: Provide the perfect topping; look for high-quality semisweet for best results
- Vegetable oil: Helps create a smooth chocolate layer that slices cleanly without cracking
Step-by-Step Instructions
- Prepare the Graham Crust:
- Process graham crackers in a food processor until finely ground. Add sugar and melted butter, pulsing until the mixture resembles wet sand and clumps when pressed together. This texture ensures your crust will hold together properly after baking.
- Create the Base Layer:
- Press the graham mixture firmly into a foil or parchment-lined 8×8 baking pan, creating an even layer across the bottom. Use the flat bottom of a measuring cup to compress the crust, which prevents a crumbly base. Bake at 350°F for 15 minutes until the edges begin turning golden brown.
- Add the Coconut Layer:
- Sprinkle the flaked coconut evenly over the hot crust, ensuring complete coverage. Pour sweetened condensed milk slowly over the coconut, tilting the pan gently if needed to create an even distribution. The milk should coat all the coconut without pooling excessively in any area.
- Second Bake:
- Return the pan to the oven for another 15 minutes. During this time, the condensed milk will bubble slightly and begin to caramelize, while the coconut toasts to a light golden color. The filling should be set but still slightly soft when removed from the oven.
- Create the Chocolate Topping:
- Combine chocolate chips and vegetable oil in a microwave-safe bowl. Heat in 30-second intervals, stirring thoroughly between each until completely smooth. The oil prevents the chocolate from setting too hard, making the bars easier to slice later.
- Finish and Cool:
- Pour the melted chocolate over the still-warm coconut layer, spreading quickly to create an even top layer. Allow the bars to cool completely at room temperature for the shiniest finish, though refrigerating will speed up the process if you're short on time.
- Slice and Serve:
- Once fully cooled, lift the entire dessert out using the foil edges and transfer to a cutting board. With a sharp knife, cut into 16 even squares, wiping the blade clean between cuts for the neatest presentation.
My favorite part of making these bars is watching the coconut layer transform in the oven. The aroma fills my kitchen with that unmistakable toasted coconut scent that reminds me of summer vacations in Florida where my grandmother would make similar treats. Even coconut skeptics have been converted by these squares.
Storage Tips
These chocolate coconut bars keep remarkably well. Store them in an airtight container with parchment between layers to prevent sticking. They'll remain fresh at room temperature for up to 5 days, though I find the texture is best within the first 3 days. For longer storage, refrigerate for up to 2 weeks – the chilled bars take on an almost fudge-like quality that many of my friends actually prefer to room temperature.
Variation Ideas
Transform these classic bars by adding just a few ingredients. For an Almond Joy experience, sprinkle toasted sliced almonds over the coconut before adding the condensed milk. Create a salted version by sprinkling flaky sea salt over the chocolate while still warm. For a tropical twist, add 1 teaspoon of lime zest to the coconut layer and a tablespoon of rum to the chocolate for a piña colada inspired treat that's perfect for summer gatherings.

Serving Suggestions
These decadent bars shine on their own, but pairing them with the right accompaniments elevates them to dessert-table stardom. Serve slightly warmed with a scoop of vanilla ice cream for an upgraded sundae experience. Include them on dessert platters alongside fresh berries for color contrast and flavor balance. For coffee gatherings, cut them into smaller bite-sized squares and pair with a strong espresso or cappuccino, as the bitter coffee notes complement the sweet coconut and chocolate perfectly.
Recipe FAQs
- → Can I use unsweetened coconut instead of sweetened coconut?
Yes, you can use unsweetened coconut, but the bars may be less sweet. Adjust the sugar in the crust or use sweetened condensed milk to balance the flavor.
- → Can these bars be made ahead of time?
Absolutely! These bars store well in an airtight container at room temperature for up to 3 days or in the refrigerator for up to a week.
- → Can I substitute the graham crackers with another base?
Yes, you can try crushed digestive biscuits, shortbread cookies, or even chocolate cookies for a different flavor profile.
- → How can I make the chocolate topping shinier?
Allow the melted chocolate to cool completely at room temperature. Refrigeration can speed up the cooling but might dull the shine.
- → Are there nut-free options for this dessert?
Yes, simply omit the almonds or walnuts for a nut-free version. The bars will still be delicious without them.