
 Pin
Pin
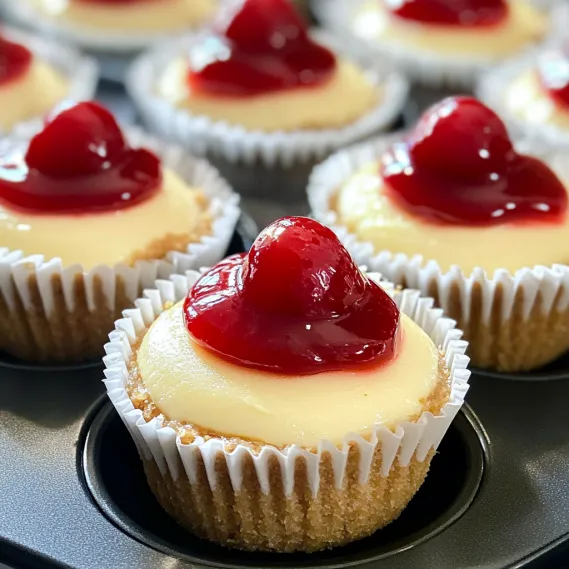
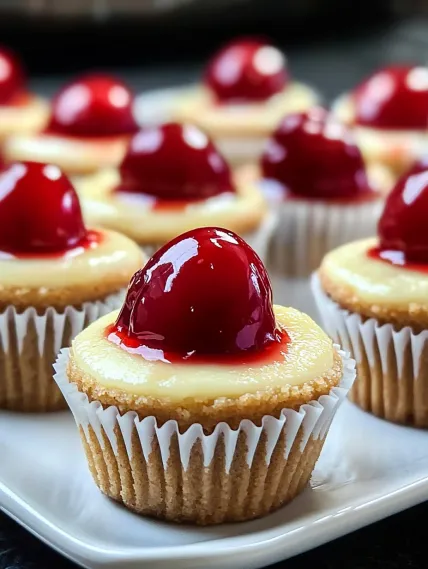
These mini cheesecakes transform simple ingredients into elegant individual desserts with minimal effort. The genius of this recipe lies in using vanilla wafers as ready-made crusts – no crushing, mixing, or pressing required. The creamy cheesecake filling bakes to perfection in about 20 minutes, creating a dessert that looks like you spent hours in the kitchen when it actually takes less time than running to the bakery. Topped with cherry pie filling, these little beauties offer all the flavor of traditional cheesecake in perfect single-serving portions that are guaranteed to impress.
I stumbled across this recipe years ago when I needed a last-minute dessert for book club. These mini cheesecakes have saved me countless times since then when I need something that looks fancy but takes basically no effort. My nephew, who claims he hates cheesecake, ate three of them when nobody was looking. The empty cupcake liners in the trash gave him away.
Essential Ingredients and Selection Tips
- Vanilla Wafer Cookies: Creates an instant crust without any work. Each muffin cup gets one cookie as the perfect single-bite foundation.
- Cream Cheese: Full-fat is non-negotiable for proper texture and flavor. Make sure it's completely softened to avoid lumps.
- Sugar: Regular granulated sugar works best. Powdered sugar can make the filling too sweet and change the texture.
- Eggs: Provides structure and that classic cheesecake consistency. Room temperature eggs incorporate much better than cold ones.
- Vanilla Extract: Pure vanilla extract enhances the flavor beautifully. Vanilla bean paste is a luxury upgrade that adds lovely specks.
I've tried using reduced-fat cream cheese to lighten these up once, and nobody was impressed. The texture wasn't as creamy, and the flavor lacked richness. The full-fat version is worth every calorie – these are meant to be treats, after all!
Detailed Cooking Instructions
- Step 1: Prepare Your Perfect Base
- Line a standard 12-cup muffin tin with paper liners – this step is crucial for easy removal. Place one vanilla wafer cookie in the bottom of each liner, flat side down. No need to press or manipulate the cookie; it will settle naturally during baking to create the perfect crust-to-filling ratio.
- Step 2: Create Silky Smooth Filling
- In a large mixing bowl, beat 16 ounces of softened cream cheese until completely smooth with no lumps remaining. With the mixer on low speed, gradually add 1/2 cup granulated sugar. Beat until well incorporated and the mixture looks light and fluffy around the edges.
- Step 3: Add Structure And Flavor
- Add 2 large eggs one at a time, beating well after each addition until just incorporated. Stir in 1 teaspoon of vanilla extract and a pinch of salt. The batter should look glossy, smooth, and have a pourable consistency. Avoid overmixing, which can incorporate too much air.
- Step 4: Fill For Perfect Portions
- Using a cookie scoop or 1/4-cup measure, divide the cheesecake batter evenly among the prepared muffin cups, filling each about 3/4 full. The batter should come just below the top of each liner, allowing room for the cheesecakes to rise slightly during baking.
- Step 5: Bake With Precision
- Bake in a preheated 350°F oven for 20-22 minutes, until the centers are almost set but still slightly jiggly. The tops should not be browned. Cool completely in the pan, then refrigerate for at least 2 hours or overnight. Top with cherry pie filling just before serving for the most attractive presentation.
The first time I made these, I was rushing and didn't let my cream cheese soften properly. I ended up with tiny lumps throughout the batter that no amount of mixing would eliminate. Now I always set my ingredients out at least an hour before starting, which makes the process so much smoother – literally!
The Perfect Make-Ahead Dessert
One of the greatest advantages of these mini cheesecakes is their make-ahead potential, which has saved me countless times when entertaining. I often prepare them up to two days before a gathering, storing them untopped in the refrigerator. This advance preparation actually improves their flavor and texture as the vanilla notes develop and the filling sets to perfection. For my sister's 40th birthday celebration, I made a double batch the day before, then set up a topping bar with various fruit compotes, chocolate sauce, and caramel. Guests created their own custom desserts, which not only reduced my day-of stress but became the most talked-about element of the party. The key to success is adding the toppings just before serving to prevent the cheesecakes from becoming soggy.
Foolproof Variations That Impress
The simplicity of this base recipe makes it incredibly versatile. During winter holidays, I swap the vanilla wafers for gingersnap cookies and add 1/2 teaspoon of cinnamon to the filling for a seasonal twist. For chocolate lovers in my family, an Oreo cookie base with a tablespoon of cocoa powder added to the filling creates a cookies-and-cream version that disappears instantly. One of my most requested variations involves adding 2 teaspoons of fresh lemon zest to the batter and topping with blueberry preserves – the bright citrus notes perfectly complement the creamy richness. For adults-only gatherings, I sometimes add a tablespoon of coffee liqueur to the filling and top with a chocolate-covered espresso bean for sophisticated coffee-flavored treats.
Storage Solutions For Longevity
While these cheesecakes rarely last long in my household, proper storage can maintain their quality for several days. They keep beautifully in an airtight container in the refrigerator for up to four days without toppings. For longer preservation, I've discovered they freeze exceptionally well. Simply place the cooled, untopped cheesecakes on a baking sheet until frozen solid, then transfer to a freezer container with parchment between layers. They'll maintain quality for up to three months. When ready to serve, thaw overnight in the refrigerator and add toppings just before presenting. This freezer method saved me when I needed to prepare desserts weeks ahead for my daughter's graduation party – guests had no idea they weren't freshly made that morning.
Special Occasion Presentation
These mini desserts shine at celebrations when presentation is given a little extra attention. For my parents' anniversary dinner, I arranged them on a tiered cake stand, alternating classic cherry toppings with blueberry and strawberry for a beautiful color pattern. For a wedding shower, I placed each cheesecake in a clear plastic cocktail cup with the topping visible through the sides, then added custom flags with the couple's names. During Christmas gatherings, I sometimes dust the tops with edible gold or silver glitter over the fruit topping for a festive sparkle. Even the simplest touch – a mint leaf, a chocolate curl, or a single raspberry – can elevate these humble cheesecakes to restaurant-quality desserts with minimal effort.
These mini cheesecakes have become my signature dessert, requested at family gatherings and the first thing to disappear at potlucks. What began as a desperate last-minute solution has evolved into the recipe that friends and family associate with special moments at my table. There's something deeply satisfying about creating something so impressive with so little effort – it's my favorite kind of kitchen magic.
Recipe FAQs
- → Can I use different toppings instead of cherry pie filling?
- Absolutely! These mini cheesecakes are extremely versatile. Try strawberry, blueberry, or apple pie filling. You could also use fresh berries, chocolate ganache, caramel sauce, lemon curd, or even a dollop of whipped cream with a sprinkle of cinnamon. For a fancy presentation, drizzle with melted chocolate or add a mint leaf garnish.
- → What if I don't have vanilla wafers?
- You can substitute other cookies for the crust. Graham crackers, gingersnaps, Oreos (with filling removed), shortbread cookies, or even chocolate chip cookies work well. Simply place one cookie in the bottom of each liner. If using smaller cookies, you might need to crush them and mix with a little melted butter to form a proper crust base.
- → Why did my mini cheesecakes sink in the middle after baking?
- A slight depression in the center is normal and actually perfect for holding your toppings! If they sink dramatically, it could be due to overmixing (which incorporates too much air) or sudden temperature changes. Make sure to mix just until ingredients are combined after adding eggs, and allow cheesecakes to cool gradually at room temperature before refrigerating.
- → Can I make these mini cheesecakes ahead of time?
- Yes, these are perfect for making ahead! You can prepare them up to 3-4 days in advance and store them in the refrigerator. For longer storage, freeze them without toppings for up to 2 months. Add the toppings just before serving for the freshest presentation. If frozen, thaw overnight in the refrigerator before adding toppings and serving.
- → How can I tell when the mini cheesecakes are done baking?
- The mini cheesecakes are done when the edges are set but the centers still have a slight jiggle (like Jell-O, not like liquid). Overbaking can cause them to crack and become dry. The centers will continue to set as they cool. If you gently touch the center, it should spring back slightly but still feel soft.
- → Can I add other flavors to the cheesecake filling?
- Definitely! There are many delicious variations you can try. Add 1-2 tablespoons of lemon juice and 1 teaspoon of zest for lemon cheesecakes. Mix in 1/4 cup of cocoa powder for chocolate cheesecakes. Swirl in 2-3 tablespoons of caramel or fruit preserves before baking. You can also add 1/2 teaspoon of extracts like almond, coconut, or maple for different flavor profiles.