
 Pin
Pin
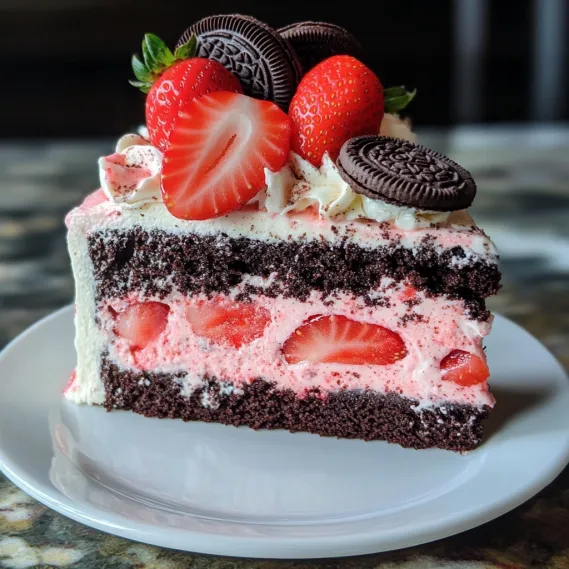
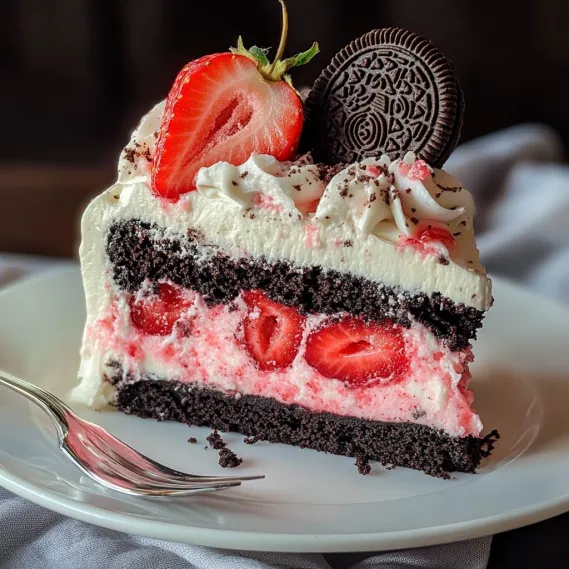
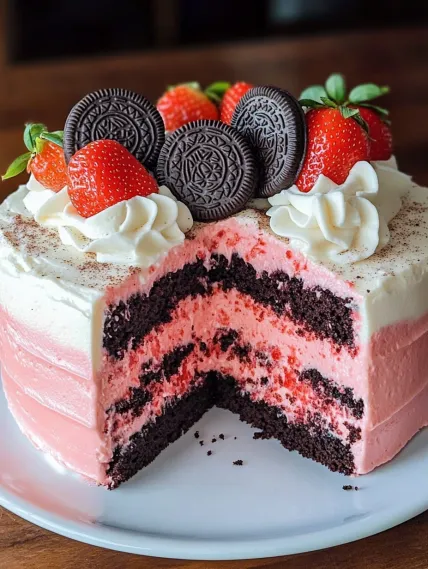
A slice of heaven awaits with this irresistible Strawberry Oreo Cake. The vibrant, fruity strawberry cake studded with chocolatey Oreo pieces creates an unexpected yet perfect harmony of flavors. Each bite delivers the bright freshness of strawberries alongside the rich, familiar crunch of chocolate cookies. This cake was born from a moment of indecision when my daughter couldn't choose between strawberry cake and cookies 'n cream ice cream for her birthday. Rather than picking one, I combined both into what has since become our family's most requested celebration dessert.
Last summer, I brought this cake to a neighborhood potluck and watched as people's eyes widened with each bite. Three different neighbors asked for the recipe before the night was over. My friend's teenage son, who typically picks apart desserts to eat just the "good parts," devoured his entire slice and immediately asked for seconds. That moment confirmed what I already suspected – this cake hits all the right notes.
Essential Ingredients and Selection Tips
- Fresh Strawberries: Choose ripe, fragrant berries for the most vibrant flavor. While frozen berries can work in a pinch, nothing beats the brightness of fresh strawberries pureed into the batter. They add natural moisture and genuine strawberry essence that artificial flavoring can't match
- Buttermilk: The secret to an exceptionally tender crumb. Its slight tanginess complements the sweet strawberries beautifully, while the acidity helps activate the baking powder for the perfect rise
- Oreo Cookies: The star mix-in that transforms this from a simple strawberry cake into something extraordinary. The cookies soften slightly during baking but maintain enough texture to provide delightful chocolatey bursts in every bite
- Heavy Cream: Creates the perfect base for the cookies 'n cream icing. Unlike a typical glaze made with milk, heavy cream adds richness and body that helps suspend the Oreo pieces rather than having them sink to the bottom
The magic of this cake lies in the contrast between components. When shopping for ingredients, don't skimp on quality - especially with the strawberries. Their flavor is the foundation that makes the chocolate cookies pop so beautifully against the fruity background.
Detailed Cooking Instructions
- Step 1: Perfect Strawberry Puree
- Select ripe, fragrant strawberries and hull them completely before pureeing to avoid any green bits in your cake. If your berries aren't very sweet, macerate them with a tablespoon of sugar for 30 minutes before pureeing to draw out more flavor. Strain the puree through a fine-mesh sieve if you prefer a smoother texture without seeds.
- Step 2: Batter Preparation
- Cream the butter and sugar together for a full 3-4 minutes until noticeably lighter in both color and texture - this incorporates air that helps create a light, fluffy cake. Alternate adding dry ingredients and wet ingredients, beginning and ending with the flour mixture to prevent curdling. Mix just until combined after each addition to avoid developing too much gluten.
- Step 3: Oreo Incorporation
- Break Oreo cookies into roughly 6-8 pieces each rather than pulverizing them - you want visible chunks throughout the cake. Fold these cookie pieces into the completed batter with just a few gentle strokes to prevent overmixing, which would cause the cookies to break down too much and streak the batter with black. Some visible cookie pieces are exactly what we're aiming for.
- Step 4: Baking Success
- Whether using a bundt pan or round cake pans, grease thoroughly, getting into all nooks and crannies. A cooking spray with flour works wonderfully, or manually butter and flour the pan. Pour the batter evenly and smooth the top before baking at 350°F until a toothpick inserted comes out with a few moist crumbs but no wet batter.
- Step 5: Icing Application
- Allow the cake to cool completely before preparing the cookies 'n cream icing. The icing should be thick enough to cling to the cake but pourable enough to drip attractively down the sides. Pour it slowly over the cooled cake, letting it cascade naturally, then immediately sprinkle additional crushed Oreos on top before the icing sets for both visual appeal and extra texture.

My first attempt at this cake taught me valuable lessons. I crushed the Oreos too finely, which made them disappear into the batter rather than creating those delightful chocolate chunks throughout. I've since found that a rough chop creates the perfect distribution and visual impact when you slice into the cake. This little detail makes all the difference in the eating experience.
Serving Inspiration
Transform this cake into an even more impressive dessert by serving slices with a scoop of strawberry or cookies 'n cream ice cream. For a beautiful presentation, arrange fresh strawberry halves around the base of the cake and sprinkle the top with both crushed Oreos and a few whole cookies positioned decoratively. My daughter's friends always fight over who gets the slices with whole cookies on top. For birthdays, I add colorful sprinkles that complement the pink cake for an extra festive touch.
Sweet Variations
Once you've mastered the basic recipe, there's room for creative exploration. I've tried replacing half the strawberry puree with a mix of raspberry and blackberry purees for a more complex berry flavor that my husband particularly loves. For chocolate enthusiasts, adding a quarter cup of cocoa powder to the cake batter creates a chocolate-covered-strawberry flavor profile that's absolutely decadent. My personal favorite variation uses Golden Oreos instead of regular ones for a different but equally delicious flavor contrast with the strawberry.
Storage Secrets
This cake stays remarkably moist and delicious for up to three days when stored in an airtight container at room temperature. The strawberry puree and buttermilk in the batter help maintain its tender texture. For longer storage, I refrigerate for up to a week – just bring slices to room temperature before serving for the best flavor experience. The cake also freezes beautifully for up to three months; I often make an extra to freeze for unexpected guests or cravings.
The beauty of this Strawberry Oreo Cake lies in its unexpected combination of flavors that somehow work perfectly together. What started as a compromise for my daughter's birthday has become a signature dessert that friends and family request by name. The contrast between fruity, tender cake and chocolatey cookie crunch creates something far more special than either component alone. When I see someone take their first bite and their eyes widen with surprise and delight, I'm reminded that sometimes the best recipes come from thinking outside the traditional flavor boundaries.
Recipe FAQs
- → Can I use frozen strawberries for the puree?
- Yes, you can use frozen strawberries. Just make sure to thaw them completely and drain off any excess liquid before pureeing. Otherwise, the extra moisture might make your cake too wet. For the best flavor, fresh strawberries are recommended, especially when they're in season.
- → Is strawberry extract necessary or can I skip it?
- While you can make the cake without strawberry extract, it does enhance the strawberry flavor significantly. If you omit it, consider adding an extra 1-2 tablespoons of strawberry puree and perhaps a bit more food coloring if you want a vibrant pink cake. The flavor won't be quite as pronounced, but it will still be delicious.
- → Can I make this cake in advance?
- Yes! This cake actually improves with a day of rest as the flavors develop and meld together. You can make it 1-2 days in advance and store it covered at room temperature. If you want to make it further ahead, you can bake the cake and freeze it uniced for up to 3 months. Thaw completely at room temperature before adding the icing.
- → What can I substitute for buttermilk?
- If you don't have buttermilk, you can make a quick substitute by adding 1½ teaspoons of white vinegar or lemon juice to ½ cup of regular milk. Let it sit for 5 minutes until slightly thickened before using. Alternatively, you can use ½ cup of plain yogurt or sour cream thinned with a tablespoon of milk.
- → Can I make cupcakes instead of a cake?
- Absolutely! This recipe will make approximately 24 cupcakes. Line your cupcake tins with paper liners and fill each about 2/3 full. Bake at the same temperature (350°F/175°C) but reduce the baking time to about 18-22 minutes. Drizzle or spread the icing on top of cooled cupcakes.
- → How should I store leftovers?
- Store any leftover cake in an airtight container at room temperature for up to 3 days. In hot or humid weather, refrigerate the cake to prevent the icing from melting. If refrigerated, allow slices to come to room temperature before serving for the best flavor and texture.