
 Pin
Pin
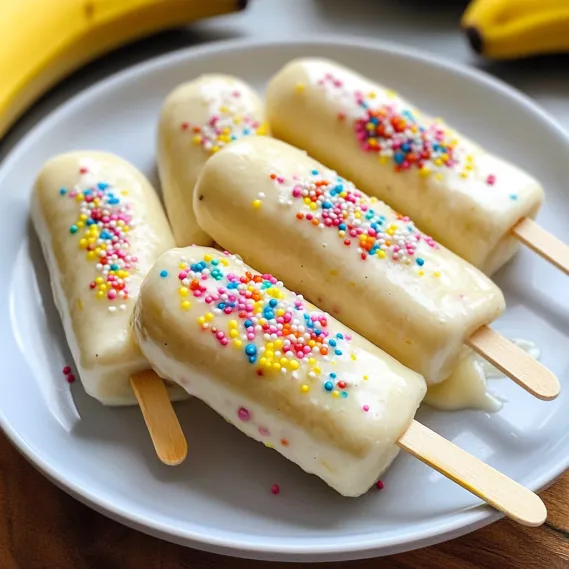
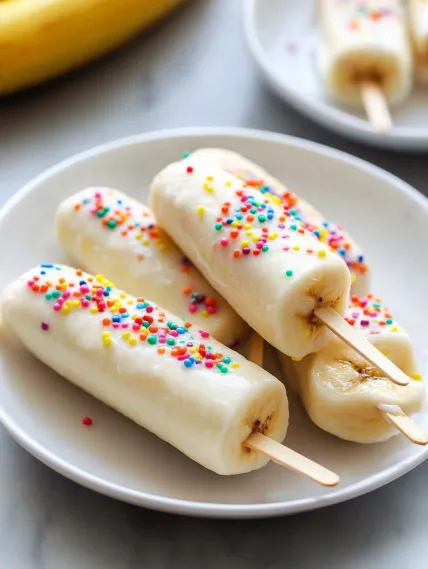
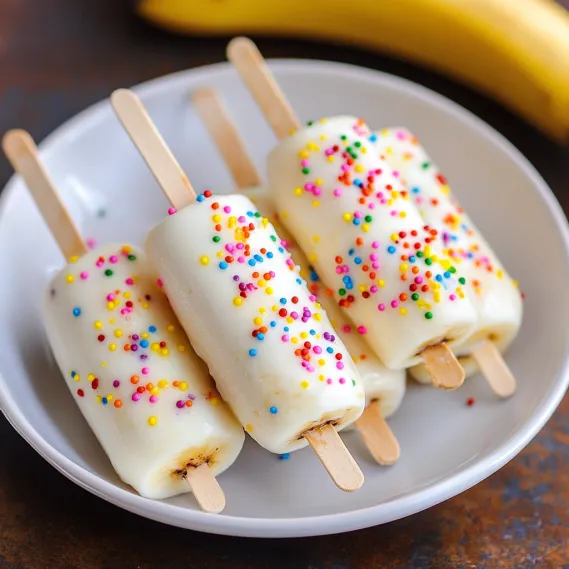
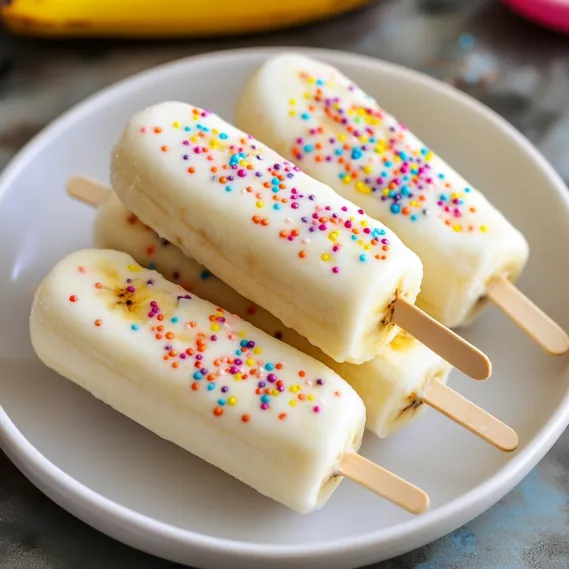
These Frozen Banana Yogurt Pops are summer perfection on a stick. Sweet, creamy bananas coated in tangy yogurt and adorned with colorful toppings create a treat that's as nutritious as it is delicious. I discovered this simple recipe during a particularly hot summer when my kids were constantly begging for ice cream. Looking for a compromise between their sweet cravings and my desire to offer something more nutritious, these frozen treats became our family's go-to summer snack. With minimal prep time and just three simple ingredients, they deliver all the fun of a frozen dessert with the benefit of real fruit and protein-packed yogurt.
Last summer, I set up a DIY banana pop station for my daughter's playdate with bowls of different yogurt flavors and an array of toppings. Not only did it keep six energetic 7-year-olds happily occupied for a good half hour, but one mom texted me later saying her notoriously picky eater asked if they could make "those banana ice creams" at home. That's the kind of snack win that makes you feel like you've somehow cracked the parenting code!
Essential Ingredients and Selection Tips
- Bananas: Choose bananas that are ripe (yellow with a few small brown spots) but not overripe. Too green and they'll lack sweetness; too brown and they'll be softer and more difficult to coat evenly. The natural sweetness and creamy texture when frozen makes bananas the perfect base for these treats
- Yogurt: Vanilla yogurt provides a classic flavor that pairs beautifully with banana, but don't be afraid to experiment with other flavors like strawberry or chocolate. Greek yogurt adds extra protein, while regular yogurt offers a smoother coating that's slightly easier to work with
- Toppings: While colorful sprinkles are always a hit with kids, consider other options like chopped nuts, mini chocolate chips, granola, crushed graham crackers, shredded coconut, or crushed freeze-dried fruit. These add texture, flavor, and visual appeal to your banana pops
The beauty of this recipe lies in its simplicity and flexibility. You can customize each pop to suit different tastes, making it perfect for families with varying preferences. I've found that setting up a "toppings bar" and letting everyone create their own combination turns a simple snack into a fun activity.
Detailed Cooking Instructions
- Step 1: Perfect Banana Preparation
- Cut your bananas in half crosswise rather than lengthwise for the ideal pop size that's easy for little hands to hold. Make sure to peel them before inserting the stick – it sounds obvious, but I've definitely had a distracted moment where I nearly forgot this crucial step! If you want the yogurt to adhere better, you can place the peeled banana halves in the freezer for about 15 minutes before coating.
- Step 2: Stick Insertion Strategy
- Insert the popsicle stick about halfway into the cut end of the banana, being careful not to push too hard or you might split the fruit. Hold the banana gently but firmly, and twist the stick slightly as you insert it to avoid creating cracks. If you're working with younger children, it's best to handle this step yourself while letting them focus on the fun decorating parts.
- Step 3: Yogurt Coating Technique
- Spooning the yogurt over the banana gives you more control than dipping, especially with younger helpers. Hold the banana over a bowl and rotate it slowly while spooning the yogurt to ensure even coverage. Let the excess drip off for a few seconds to prevent puddles on your parchment paper. Work quickly but carefully – finding the right balance takes a little practice.
- Step 4: Topping Application
- Add your sprinkles or other toppings immediately after coating each banana with yogurt, before it has a chance to set. The yogurt acts as the "glue" that holds your toppings in place, so timing matters here. Roll the banana gently in a shallow dish of toppings or sprinkle them directly onto the coated banana, turning to cover all sides. Press them lightly to ensure they stick.
- Step 5: Freezing For Perfect Results
- Arrange your coated bananas on parchment or wax paper with space between them to prevent sticking together. A flat baking sheet or plate that fits in your freezer works perfectly. For extra security, you can place the sticks between the rungs of a wire cooling rack to keep the bananas elevated during freezing. Freeze for at least 2 hours until the yogurt is firm, or 3-4 hours for fully frozen bananas.
My first attempt at these was a bit of a learning experience – I tried to dip the bananas directly into a narrow yogurt container, which resulted in yogurt everywhere except on the bananas! I've since refined the process to spooning the yogurt over the bananas, which gives much better control and coverage. This simple adjustment made all the difference in both the appearance and enjoyment of making these treats.
Serving Inspiration
Transform these simple pops into an even more special treat by serving them as part of a summer dessert board. Arrange the pops alongside fresh fruit, small cookies, and additional little bowls of toppings for an interactive, build-your-own-dessert experience. For birthday parties, stand the pops upright in a colorful container filled with crushed ice to keep them frozen longer. They also make perfect pool-side treats on hot days – just keep them in a cooler until serving time.
Tasty Variations
Once you've mastered the basic recipe, try some creative variations that add even more nutritional value or special touches. I love to press fresh blueberries or sliced strawberries into the yogurt coating before freezing for added color and flavor. For a tropical twist, use coconut yogurt and roll in toasted coconut flakes for a piña colada-inspired treat that adults love as much as kids. My personal favorite for busy mornings is coating them in protein-rich Greek yogurt and rolling in granola for a grab-and-go breakfast option that feels like a treat but provides lasting energy.
Storage Secrets
These Frozen Banana Yogurt Pops are best enjoyed within 1-2 days of making them, as bananas can darken and change texture with prolonged freezing. To store, place the fully frozen pops in a single layer in an airtight container, or wrap each pop individually in parchment paper and then place in a freezer bag. If you're making a large batch, separate layers with parchment paper to prevent sticking. For a grab-and-go snack option, wrap individually frozen pops in parchment paper secured with a piece of tape or string. This makes them easy to grab from the freezer for quick snacks or lunchbox treats.
These Frozen Banana Yogurt Pops have become more than just a recipe in our home – they're a summer tradition that marks the beginning of warm weather and outdoor adventures. What I love most about them is how they bridge the gap between treat and healthy snack, satisfying sweet cravings while providing genuine nutrition. The joy on my children's faces as they create their own custom pops is matched only by their delight in eating their frozen creations. Sometimes the simplest recipes become the most beloved family favorites.
Recipe FAQs
- → Can I use Greek yogurt instead of regular yogurt?
- Yes, you can definitely use Greek yogurt. It will create a thicker coating with more protein. Since Greek yogurt is thicker, you might need to thin it slightly with a tablespoon or two of milk to make it easier for dipping. The tangy flavor of Greek yogurt pairs nicely with the sweet bananas.
- → How ripe should the bananas be for this recipe?
- Use bananas that are ripe but still firm - yellow with a few small brown spots is perfect. Overly ripe bananas will be too soft and may fall apart during dipping and freezing. If your bananas are still slightly green, they'll be harder to eat when frozen and won't taste as sweet.
- → How long do these banana pops last in the freezer?
- When properly wrapped individually in plastic wrap or stored in an airtight container, these banana pops will last for about 2 weeks in the freezer. After that, they're still safe to eat but the quality and texture may start to deteriorate as the bananas can become icy or develop freezer burn.
- → What are some healthy topping options?
- For more nutritious toppings, try chopped nuts (like almonds, walnuts, or pistachios), granola, shredded coconut, chia seeds, crushed freeze-dried fruit, or cocoa nibs. You can also use a small amount of dark chocolate sprinkles which have less sugar than rainbow sprinkles.
- → Why are my banana pops turning brown?
- If your banana pops are turning brown before you've coated them with yogurt, that's normal oxidation that happens when bananas are exposed to air. Work quickly after cutting them and make sure to coat them completely with yogurt to prevent browning. If they're turning brown after being in the freezer for some time, they may be getting freezer burn - make sure they're well-wrapped for storage.
- → Can I make these dairy-free or vegan?
- Absolutely! Simply substitute the vanilla yogurt with any dairy-free alternative like coconut yogurt, almond milk yogurt, or soy yogurt. Most plant-based yogurts work well for coating, though some may be thinner than dairy yogurt. If needed, you can add a tablespoon of cornstarch to thicken plant-based yogurt before dipping.