
 Pin
Pin
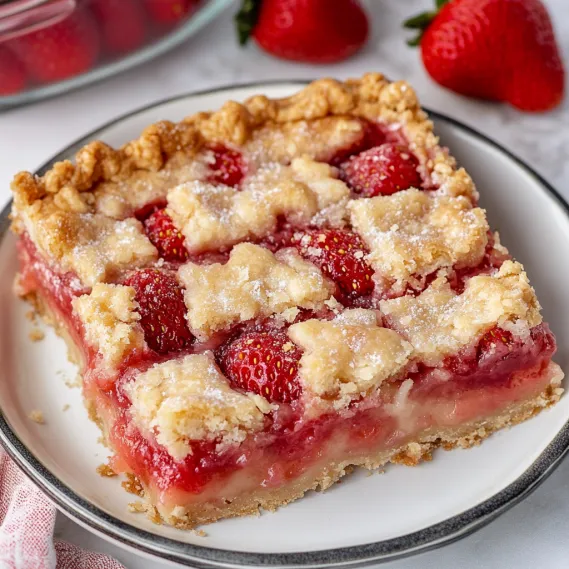
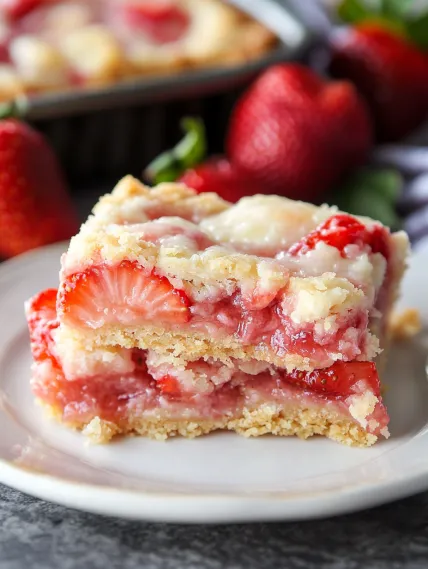
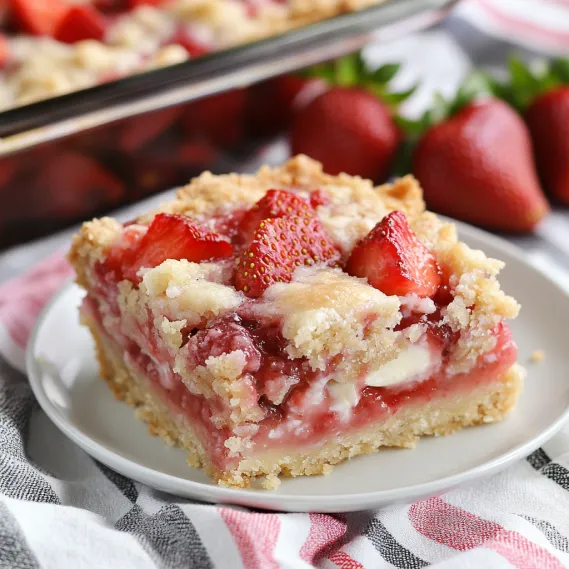
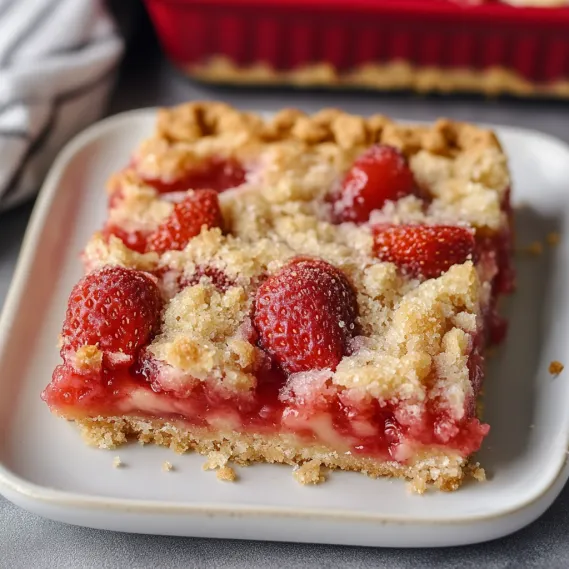
These Strawberry Pie Bars combine the best elements of shortbread cookies and fresh strawberry pie into one irresistible handheld treat. With a buttery, slightly crunchy shortbread crust, a creamy strawberry-studded filling, and a crumbly topping, each bite delivers the perfect balance of textures and flavors. Despite their impressive taste and appearance, these bars come together easily with simple pantry staples and fresh berries. They're perfect for everything from casual snacking with coffee to elegant dessert platters at your next gathering.
Even though it's snowing outside right now, I'm hopeful we'll see spring soon here in Minnesota! These Strawberry Pie Bars remind me of warmer weather and taste just like summer. This is the same base recipe as my popular Blueberry Pie Bars. The recipe is tried and true, uses basic fridge and pantry staples, and is just as good with strawberries as it is with blueberries.
Essential Ingredients and Selection Tips
- All-Purpose Flour: Provides structure for both the crust and filling. For the most tender results, measure by spooning into measuring cups rather than scooping directly from the bag.
- Butter: Use unsalted butter for best control over the final flavor. Make sure it's properly chilled for the crust to achieve that perfect shortbread texture.
- Fresh Strawberries: The star of this recipe! Look for bright red berries with no white shoulders for the sweetest flavor. Avoid berries with soft spots or mold.
- Sour Cream: Creates a custard-like filling with a subtle tanginess that balances the sweetness. Full-fat works best for richness.
- Eggs: Bind the filling together and contribute to its creamy texture. Bring to room temperature for best incorporation.
I've found that the quality of your strawberries makes all the difference in these bars. I once made them with off-season strawberries that lacked flavor, and while still good, they didn't have that vibrant summer taste. Now I only make these when strawberries are at their peak or I can find really fragrant ones at the farmer's market.
Detailed Cooking Instructions
- Step 1: Create The Perfect Crust Base
- Preheat your oven to 350°F and grease a 7x11-inch glass baking dish. In a large bowl, combine 1½ cups flour, ¾ cup sugar, and a pinch of salt. Add 1½ sticks (¾ cup) of cold, cubed butter and use a pastry blender to cut it in until the mixture resembles coarse crumbs. Reserve ¾ cup of this mixture for the topping, then firmly press the remaining mixture into the bottom of your prepared pan.
- Step 2: Pre-Bake For Structure
- Bake the crust for 15 minutes until it's just beginning to set but not brown. This pre-baking step is crucial for achieving that perfect shortbread texture and preventing a soggy bottom. While the crust bakes, prepare your filling so it's ready to go as soon as the crust comes out of the oven.
- Step 3: Prepare The Creamy Filling
- In a large bowl, whisk 2 eggs until well beaten. Add 1 cup sugar, ½ cup sour cream, ⅓ cup flour, and a pinch of salt, whisking until smooth and well combined. This mixture creates a custard-like base that will set up around the berries as it bakes, creating a creamy texture with bright fruit flavor.
- Step 4: Add The Fresh Fruit
- Gently fold 3 cups of diced fresh strawberries into the custard mixture. The folding motion helps prevent breaking the berries, which keeps the filling from becoming too wet or pink. Pour this mixture evenly over the hot pre-baked crust, making sure the strawberries are distributed evenly throughout.
- Step 5: Top And Bake To Golden Perfection
- Sprinkle the reserved crust mixture over the filling, creating a crumbly topping. Bake for 45-55 minutes until the topping is golden brown and the filling is set (it shouldn't jiggle when you gently shake the pan). Cool completely for at least one hour before cutting into bars for the cleanest slices.
My first attempt at these bars was a bit of a learning experience – I was impatient and cut them while still warm, resulting in a delicious but messy dessert! Now I always allow plenty of cooling time, which results in perfectly clean cuts and bars that hold their shape.
Perfect For Entertaining
These Strawberry Pie Bars have become my secret weapon for entertaining because they can be made a day ahead and actually improve with time. For summer gatherings, I often serve them alongside my blueberry version for a colorful, patriotic dessert platter that never fails to impress. At a recent baby shower I hosted, I cut these into smaller, bite-sized squares and arranged them on a tiered stand with other finger desserts. Not only did they look beautiful, but guests appreciated being able to enjoy a sweet treat without needing a fork. The bars travel well too – I've taken them to countless potlucks and picnics where they hold up beautifully even on warm days, making them much more practical than traditional pie.
Seasonal Berry Adaptations
While strawberries are perhaps my favorite version of these bars, the recipe's versatility is one of its greatest strengths. During blueberry season, I swap in fresh blueberries for an equally delicious variation. When cherries are abundant, pitted fresh cherries create a sophisticated flavor profile that's particularly wonderful with a scoop of vanilla ice cream. Late summer raspberries make a more delicate, slightly tart version that pairs beautifully with afternoon tea. I've even used frozen berries in winter (thawed and well-drained) when I'm craving a taste of summer. The basic formula remains the same – just swap out the fruit and adjust the sugar slightly depending on the natural sweetness of the berries you're using.
Make-Ahead Magic
As a busy home cook, I particularly appreciate recipes that can be prepared in advance without sacrificing quality, and these bars truly excel in that regard. I often bake them the evening before I plan to serve them, let them cool completely, and then refrigerate overnight. This not only saves time on the day of serving but actually improves both the flavor and texture. The filling sets up perfectly, the flavors meld together, and they become even easier to slice cleanly. For longer storage, I've found these bars freeze surprisingly well – I cut them into individual portions, wrap them separately, and freeze for up to a month. This way, I can pull out just a few at a time whenever the craving strikes or unexpected guests arrive.
Family-Friendly Baking Project
These Strawberry Pie Bars have become a favorite baking project to make with my children. The different components offer perfect tasks for little helpers – younger kids can help wash and dice strawberries (with a plastic knife) or sprinkle the crumb topping, while older ones can measure ingredients and mix the filling. My daughter loves customizing individual sections of the pan with different berries, creating a "mixed berry" version that showcases her creativity. The relatively short baking time means kids don't lose interest waiting for the results, and the straightforward technique builds confidence in the kitchen. Most importantly, the delicious outcome rewards their efforts and creates sweet memories of baking together.
These Strawberry Pie Bars have become one of my signature recipes, requested by friends and family throughout the summer months. There's something magical about the combination of buttery shortbread, creamy filling, and juicy strawberries that captures the essence of the season in a convenient, handheld format. Whether enjoyed as an afternoon treat with coffee, packed in a picnic basket, or served as the finale to a summer dinner party, these bars never fail to bring smiles and recipe requests.
Recipe FAQs
- → Can I use frozen strawberries instead of fresh?
- Yes, you can use frozen strawberries, but there are a few adjustments needed. Thaw the strawberries completely and drain the excess liquid to prevent the filling from becoming too wet. Pat them dry with paper towels after thawing. You might also need to add an extra tablespoon of flour to the filling to account for the additional moisture that frozen berries typically release during baking.
- → Can I substitute other fruits for the strawberries?
- Absolutely! This versatile recipe works well with many fruits. Blueberries, raspberries, blackberries, peaches, or a mixed berry combination all make excellent substitutions. For stone fruits like peaches, make sure to peel and dice them into small pieces. Keep the same amount (3 cups) regardless of which fruit you choose. Some juicier fruits might benefit from an extra tablespoon of flour in the filling.
- → How do I know when the bars are fully baked?
- The bars are done when the topping is light golden brown and the filling is set but might still have a slight jiggle in the center (similar to how you'd check a custard pie). If you insert a toothpick into the center, it should come out mostly clean with perhaps a few moist crumbs. The filling will continue to set as it cools, which is why the one-hour cooling period is important before cutting.
- → Can I make these bars ahead of time for an event?
- Yes, these bars are great for making ahead. You can prepare them up to two days in advance and store them in the refrigerator in an airtight container. For the best texture and flavor, let them come to room temperature for about 30 minutes before serving. They can also be frozen for up to 3 months - just wrap them well, thaw in the refrigerator overnight, and bring to room temperature before serving.
- → What's the best way to cut these into neat bars?
- For the cleanest cuts, make sure the bars are completely cooled - even refrigerated for an hour after the initial cooling period. Use a sharp knife, wiping the blade clean between cuts. For extra-neat squares, you can also chill the bars first, then lift the entire dessert out using parchment paper overhang (if you lined your pan), and cut on a cutting board rather than in the pan itself.
- → Can I reduce the sugar in this recipe?
- You can reduce the sugar somewhat, though it does affect both sweetness and texture. For the crust/topping, you can reduce the sugar to 1/2 cup without significant texture changes. In the filling, you can reduce to 3/4 cup sugar, especially if your strawberries are particularly sweet. Be aware that reducing sugar too much may affect how well the filling sets and could make the bars more tart, depending on the natural sweetness of your berries.