
 Pin
Pin
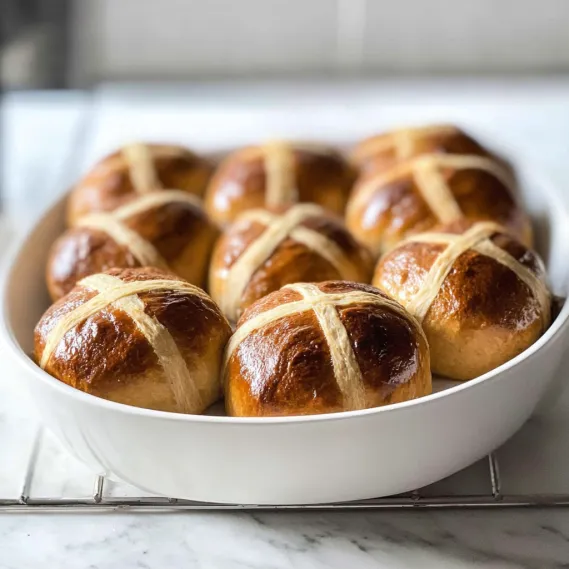
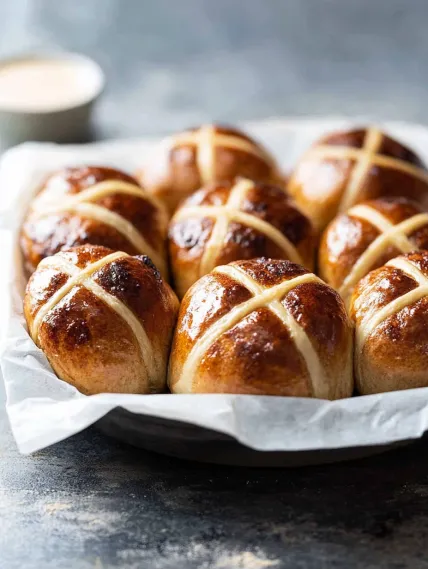
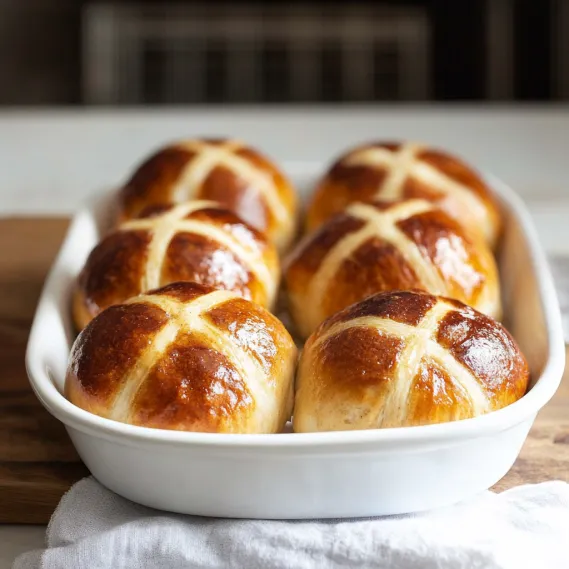
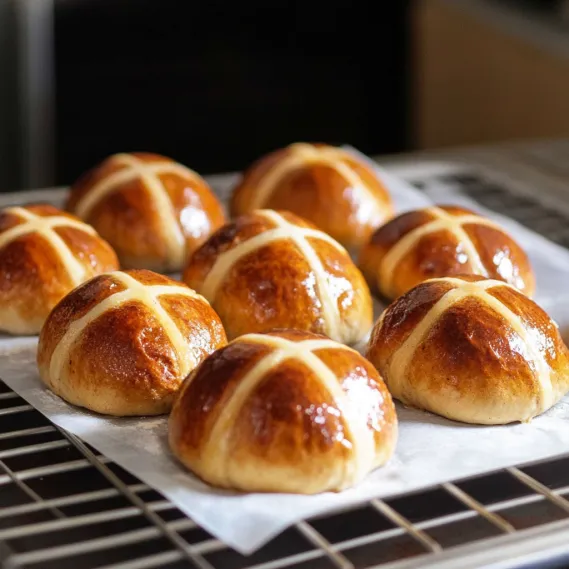
These homemade hot cross buns deliver everything you crave in this classic Easter treat – pillowy soft texture, perfect spice balance, plump fruit, and that signature glossy top with traditional crosses. The intoxicating aroma that fills your kitchen as they bake is reason enough to make them from scratch. While many people feel intimidated by recipes involving yeast, this foolproof method produces bakery-quality results that will convince you homemade is always worth the effort. Whether you choose the traditional kneaded method or the incredibly simple no-knead option, these buns will elevate your Easter celebration.
I first made these buns after years of disappointment with grocery store versions that never captured the magic of fresh bakery hot cross buns. The first time my family tasted these homemade ones, they were amazed by the difference – the softness, the aromatic spices, and the absence of that distinct artificial flavor found in mass-produced versions. Now making these has become our treasured Easter tradition.
Essential Ingredients and Selection Tips
- Yeast: Any type works (active dry, instant, or fresh). Check the expiry date as old yeast is the most common reason for failed bread recipes.
- Bread Flour: Creates stronger gluten development for fluffier buns, though all-purpose flour works too.
- Spices: Fresh, aromatic spices make all the difference. The blend of cinnamon, allspice, and nutmeg creates authentic flavor.
- Dried Fruit: Traditional recipes use currants, but raisins, cranberries, or mixed dried fruit work beautifully.
- Apricot Jam: Creates that signature glossy finish. Substitute with other jams or honey if needed.
I've discovered through much testing that the quality of your spices dramatically impacts the final flavor. I now refresh my ground spices just before Easter to ensure maximum aroma and taste in these special once-a-year treats.
Detailed Cooking Instructions
- Step 1: Prepare Your Perfect Dough
- Combine 4¼ cups flour, ¼ cup sugar, 2 tsp instant yeast, 1½ tsp cinnamon, ½ tsp each allspice and nutmeg, and ½ tsp salt in a large bowl. In a separate container, mix 1½ cups warm milk, 50g melted butter, 1 egg, and ¾ cup dried fruit. Pour wet ingredients into dry, then mix until combined.
- Step 2: Develop Essential Elasticity
- If using a stand mixer, knead on medium speed for 5 minutes until smooth and elastic. If kneading by hand, work the dough on a lightly floured surface for about 10 minutes. Add up to ¼ cup extra flour if needed – dough should pull away from the bowl sides but still feel soft and slightly tacky.
- Step 3: Allow First Rise
- Place dough in a lightly oiled bowl, cover with plastic wrap, and leave in a warm place for 1-1½ hours until doubled in size. A warm dryer (run empty for 3 minutes then turned off) makes the perfect rising environment. Once risen, punch down dough and turn onto a floured surface.
- Step 4: Form Perfect Buns
- Shape dough into a log and cut into 12 equal pieces. Take each piece, gather the edges toward the center like a money bag, then flip over. Roll between palms to form a smooth ball. Place in a 9×13" baking pan lined with parchment, arranging in a 3×4 pattern with slight gaps between each bun.
- Step 5: Add Traditional Crosses
- After the second 40-minute rise, mix ½ cup flour with about 5 tablespoons water to create a thick paste that holds its shape but is still pipeable. Transfer to a piping bag or zip-top bag with corner snipped. Pipe crosses on each bun, then bake at 350°F/180°C for 22 minutes until deeply golden. Brush with warmed, strained apricot jam while hot for a beautiful glossy finish.
When I first attempted hot cross buns, I used too much flour and ended up with dense, hard buns. I've since learned that a slightly sticky dough produces the softest, fluffiest results. Don't panic if your dough feels a bit tacky – that's exactly what you want for bakery-quality buns.
The Secret To Perfect Wok Technique
High heat is essential for authentic fried rice. My grandmother taught me to heat the wok until smoking before adding oil. Keep ingredients moving constantly to achieve that elusive "wok hei" flavor. Never overcrowd the pan—cook in batches instead. This technique transformed my fried rice into restaurant-quality perfection.
Making The Most Of Leftovers
This dish excels at transforming leftovers into something exciting. I've used roast chicken, holiday ham, and even Thanksgiving turkey with great success. Cut meat into uniform pieces that distribute evenly throughout. Leftover grilled steak adds incredible depth with its smoky edges. Even roasted vegetables bring delightful caramelized sweetness.
Balancing Flavors And Textures
Special fried rice succeeds through balanced components. Char siu provides richness, prawns add sweetness, eggs contribute silkiness, while vegetables offer freshness. The sequence matters—aromatics first build flavor, eggs midway remain distinct, vegetables maintain crispness. Adding spring onions last preserves their brightness for that authentic restaurant finish.
Customization For Dietary Needs
This dish adapts easily to dietary restrictions. For vegetarians, I omit meat, double eggs and add extra vegetables. Low-carb diners enjoy my cauliflower rice version that carries flavors beautifully. For gluten-sensitive guests, tamari replaces soy sauce while ensuring chicken powder is certified gluten-free. Everyone enjoys this beloved dish regardless of restrictions.
No-Knead Option For Beginners
For those intimidated by kneading or without a stand mixer, my no-knead version has been a game-changer. Simply combine 4 cups flour, ¼ cup sugar, 1 tbsp instant yeast, spices, and salt in a large bowl. Add warm milk, melted butter, eggs, and dried fruit, then stir with a wooden spoon until you have a thick, sticky batter. Cover and let rise for 1.5-2 hours (it rises slower than kneaded dough), then proceed with shaping. The dough will be stickier to work with, so use plenty of flour on your hands and surface. While these buns don't rise quite as high and tend to dry out slightly faster the next day, they're still far superior to store-bought versions and require almost no effort.
Make-Ahead Options
I often prepare the dough the night before and let it have its first rise in the refrigerator overnight. This slow, cold fermentation actually improves flavor development. The next morning, I let the dough come to room temperature for about 30 minutes, then shape the buns and proceed with the second rise. For busy holiday mornings, this method is a lifesaver – most of the work is done the day before, but you still get freshly baked buns. Alternatively, you can fully bake the buns a day ahead, then rewarm them covered with foil in a low oven for about 10 minutes before serving.
Flavor Variations Worth Trying
While traditional hot cross buns are divine, I've created several variations that have become family favorites. For chocolate lovers, replace half the dried fruit with dark chocolate chunks. For a tropical twist, use dried pineapple and coconut in place of traditional fruits and add a teaspoon of cardamom to the spice mix. My orange-cranberry version uses orange zest in the dough and dried cranberries instead of currants, glazed with orange marmalade instead of apricot jam. These variations maintain the essence of hot cross buns while offering exciting new flavor profiles for those who enjoy experimenting.
These homemade Hot Cross Buns have transformed our Easter celebrations. There's something deeply satisfying about continuing this centuries-old tradition in my own kitchen, especially knowing I'm creating something far superior to commercially produced versions. The process of making them – the kneading, the rising, the wonderful spiced aroma filling the house – has become as meaningful as enjoying them together around our Easter table.
Recipe FAQs
- → Bread flour needed?
- It’s best, but all-purpose works too.
- → How to tell it’s risen?
- First doubles, second grows 75%—watch it!
- → Can I skip fruit?
- Sure, or swap in choc chips instead.
- → Make-ahead tip?
- Fridge after shaping, rise later.
- → How to keep fresh?
- Reheat 15 seconds in the microwave.