
 Pin
Pin
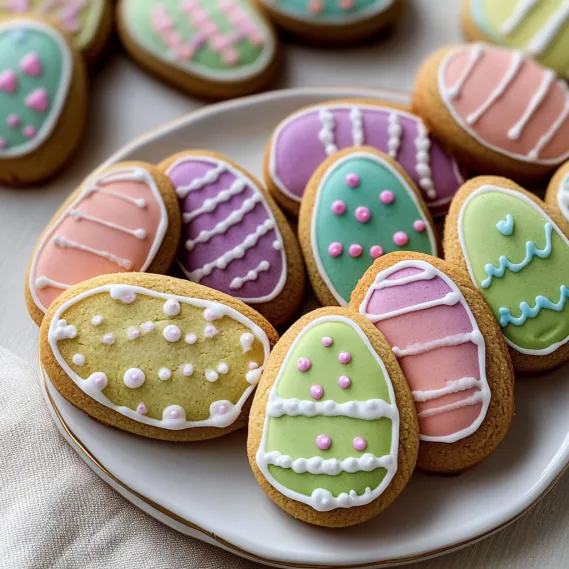
These festive Easter cookies transform a classic butter cookie recipe into showstopping spring treats that look as amazing as they taste. With their soft centers, crisp edges, and subtly sweet vanilla-almond flavor, these cookies provide the perfect canvas for creative decoration. Whether adorned with intricate royal icing designs, topped with marshmallow tails for PEEPS-inspired bunnies, or sprinkled with colorful sanding sugar, these cookies make a gorgeous centerpiece for your Easter celebrations and are guaranteed to delight adults and children alike.
I first made these cookies for my daughter's spring birthday party, and they've become our Easter tradition ever since. What I love most is how versatile the recipe is – the same dough can be transformed into elegant Easter egg designs for adults or cute bunny shapes that children adore. The look on my nephew's face when he saw the bunny cookies with marshmallow tails was absolutely priceless!
Essential Ingredients and Selection Tips
- Butter: Use unsalted butter at cool room temperature. It should be soft enough to press with your finger but not melty or greasy.
- Sugar: Regular granulated sugar creates the perfect sweetness without overwhelming the delicate flavor.
- Extracts: Vanilla extract forms the base flavor, while a touch of almond extract adds that bakery-quality depth. Use pure extracts for the best taste.
- Flour: All-purpose flour provides the structure. For most accurate results, measure by weight or spoon and level your flour.
- Meringue Powder: For royal icing. Find this in craft stores with baking sections or online. It's what gives the icing its ability to dry firm but not hard.
- Food Coloring: Gel colors provide vibrant shades without thinning your icing. For Easter pastels, you'll need just a tiny amount.
I've discovered that the temperature of the butter makes all the difference in this dough. If it's too soft, the cookies will spread; too cold, and the dough will be difficult to work with. The perfect butter should hold a slight indent when pressed with your finger.
Detailed Cooking Instructions
- Step 1: Prepare Your Perfect Dough
- Cream together 1 cup butter and 2/3 cup sugar until light and fluffy, about 3 minutes. Add 1 egg, 1 teaspoon vanilla extract, and 1/4 teaspoon almond extract, mixing until combined. Gradually add 2 1/2 cups flour mixed with 1/2 teaspoon baking powder and 1/4 teaspoon salt, mixing just until incorporated.
- Step 2: Master The Rolling Technique
- Divide dough in half and roll each portion directly on parchment paper to 1/4-inch thickness. This is the secret to perfect cookies – roll the dough BEFORE chilling, not after. Place the rolled dough (still on parchment) on baking sheets and refrigerate for at least 2 hours until firm.
- Step 3: Cut And Bake With Precision
- Preheat oven to 350°F. Remove one portion of chilled dough and cut into desired Easter shapes – eggs, bunnies, and carrots work beautifully. Transfer shapes to lined baking sheets, spacing 2 inches apart. Bake for 11-12 minutes until edges are just barely golden but tops remain pale.
- Step 4: Create Royal Icing Masterpieces
- Beat 4 cups powdered sugar, 3 tablespoons meringue powder, and 9-10 tablespoons water for about 2 minutes until glossy with soft peaks. Divide into bowls and tint with gel food coloring in pastel shades. Use piping tip #4 to outline and flood cookies, then refrigerate to set faster (about 30 minutes).
- Step 5: Add Finishing Details
- Once base layer is set, use piping tip #1 or #2 to add decorative details like lines, dots, or patterns to Easter eggs. For bunny cookies, add white icing with sanding sugar and press half a mini marshmallow for the tail. For carrots, use orange icing with green-sugar coated stems. Let dry completely before stacking or storing.

The first time I made these cookies, I rushed the chilling process and ended up with misshapen blobs instead of clear designs. Now I always make sure to give the dough plenty of time in the refrigerator, which results in perfectly defined edges that hold their shape beautifully during baking.
The Secret To Perfect Wok Technique
High heat is essential for authentic fried rice. My grandmother taught me to heat the wok until smoking before adding oil. Keep ingredients moving constantly to achieve that elusive "wok hei" flavor. Never overcrowd the pan—cook in batches instead. This technique transformed my fried rice into restaurant-quality perfection.
Making The Most Of Leftovers
This dish excels at transforming leftovers into something exciting. I've used roast chicken, holiday ham, and even Thanksgiving turkey with great success. Cut meat into uniform pieces that distribute evenly throughout. Leftover grilled steak adds incredible depth with its smoky edges. Even roasted vegetables bring delightful caramelized sweetness.
Balancing Flavors And Textures
Special fried rice succeeds through balanced components. Char siu provides richness, prawns add sweetness, eggs contribute silkiness, while vegetables offer freshness. The sequence matters—aromatics first build flavor, eggs midway remain distinct, vegetables maintain crispness. Adding spring onions last preserves their brightness for that authentic restaurant finish.
Customization For Dietary Needs
This dish adapts easily to dietary restrictions. For vegetarians, I omit meat, double eggs and add extra vegetables. Low-carb diners enjoy my cauliflower rice version that carries flavors beautifully. For gluten-sensitive guests, tamari replaces soy sauce while ensuring chicken powder is certified gluten-free. Everyone enjoys this beloved dish regardless of restrictions.
Decorating With Children
These Easter cookies have become a cherished activity with my children every spring. For kid-friendly decorating, I set up stations with different colored icings in squeeze bottles, various sprinkles, and mini marshmallows for bunny tails. The bunny and carrot shapes are perfect for little hands since they don't require intricate piping skills. My six-year-old daughter takes great pride in her creativity, while my three-year-old son mostly enjoys applying excessive amounts of sprinkles. The smiles on their faces are worth every bit of the inevitable kitchen mess!
Gifting And Presentation Ideas
These cookies make thoughtful homemade Easter gifts that friends and family adore. For special presentation, I arrange them in clear cellophane bags tied with pastel ribbons or stack them in decorative Easter tins lined with colorful tissue paper. For Easter brunch hosting, I create a stunning centerpiece by arranging the cookies on a tiered stand, interspersed with fresh spring flowers and small chocolate eggs. The visual impact is tremendous, and guests always reach for a cookie before anything else on the dessert table.
Troubleshooting Common Issues
Over the years, I've encountered and solved various cookie decorating challenges. If your royal icing is too thick, add water literally a drop at a time until it reaches the right consistency – it should flow smoothly but not be runny. For flooding, the icing should settle back into itself within 10-15 seconds when you run a knife through it. If the icing develops a skin while you're working, cover the bowl with a damp paper towel. For those struggling with steady hands for detailed work, rest your wrist on the table while piping and exhale slowly as you squeeze – this significantly improves precision and has transformed my decorating skills.

These Easter cookies have become more than just a seasonal treat in our home – they're a creative tradition that marks the arrival of spring and brings our family together. The joy of creating something both beautiful and delicious, then sharing it with loved ones, makes these cookies truly special. Whether you're an experienced baker or trying decorated cookies for the first time, this recipe offers a perfect balance of approachable technique and impressive results.
Recipe FAQs
- → Can I skip pecans?
- Yep, or swap with walnuts.
- → Fresh carrots only?
- Best bet—pre-shredded are too dry.
- → How long to bake?
- 20-24 minutes for three, 30-35 for two.
- → Freezing okay?
- Yes, up to 3 months—thaw and frost.
- → Good for parties?
- A total crowd-pleaser!