
 Pin
Pin
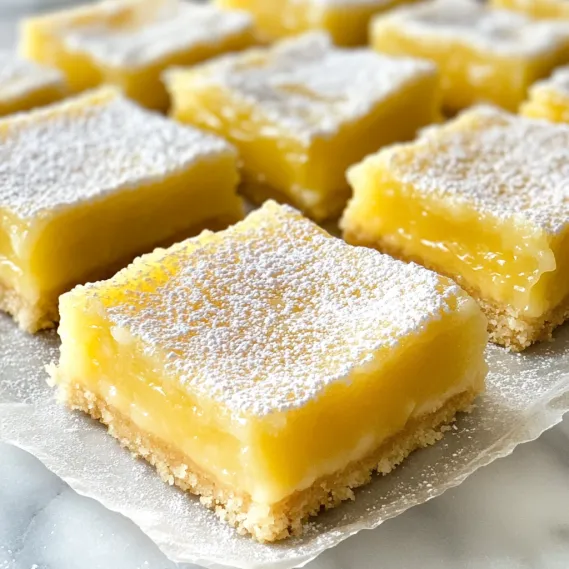
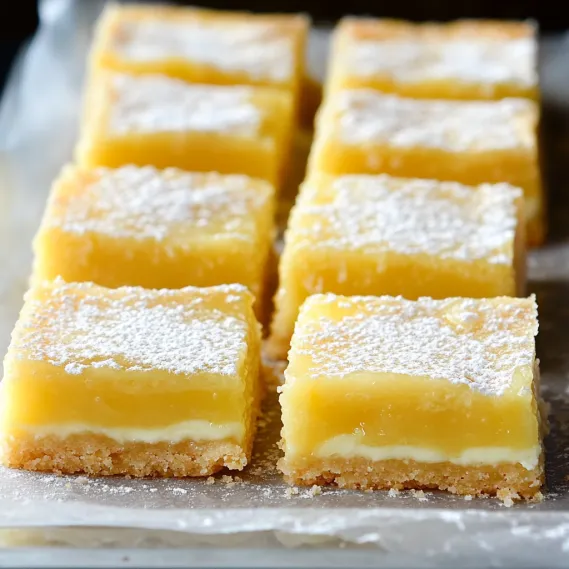
These lemon bars deliver the perfect balance of buttery shortbread and bright, tangy lemon filling in every bite. The substantial crust provides a sturdy foundation for the luscious, thick lemon layer that's simultaneously sweet and tart. With their vibrant yellow hue and dusting of powdered sugar, these bars look as sunny as they taste. Whether you're making them for a bake sale, brunch, shower, or just because it's Tuesday, these foolproof lemon bars are guaranteed to brighten anyone's day with their fresh citrus flavor and perfect texture.
I've been making these lemon bars for years and they've earned their reputation as a crowd favorite. The first time I brought them to a neighborhood potluck, they disappeared within minutes and three people asked for the recipe. What makes them special is the ratio of crust to filling - the lemon layer is thicker and creamier than most recipes, giving you a substantial citrus flavor in every bite without being overwhelmingly tart or sweet.
Essential Ingredients and Selection Tips
- Lemons: Fresh is absolutely essential. The bright, aromatic oils in fresh lemon zest and juice create that vibrant flavor that bottled juice can't match.
- Butter: Use unsalted butter so you can control the salt content. Make sure it's completely melted for the crust.
- Eggs: These provide structure to the lemon filling. Room temperature eggs incorporate more evenly.
- Vanilla Extract: My secret ingredient in the shortbread crust. Most recipes don't include this, but it adds wonderful depth.
- Flour: Used in both layers, it provides structure to the crust and helps set the lemon filling to the perfect consistency.
The quality of your lemons makes a huge difference in these bars. I always look for heavy, fragrant lemons with thin skins - they tend to be juicier and have more flavorful zest. One of my favorite tricks is to rub the lemon zest into the sugar before mixing it into the filling, which releases the essential oils for even more lemon flavor.
Detailed Cooking Instructions
- Step 1: Prepare The Perfect Crust
- Preheat your oven to 325°F. Line a 9×13 inch glass baking pan with parchment paper. In a medium bowl, mix 2 cups plus 2 tablespoons all-purpose flour, 1/2 cup granulated sugar, 2 teaspoons vanilla extract, and 1/4 teaspoon salt with 1 cup melted butter until combined. Press firmly into the prepared pan, creating an even layer all the way to the edges.
- Step 2: Pre-Bake The Foundation
- Bake the crust for 18-20 minutes until the edges are very lightly browned. This crucial step ensures the crust will hold up under the lemon filling without becoming soggy. The crust should be warm when you add the filling, so time the next step accordingly.
- Step 3: Create The Luscious Filling
- While the crust bakes, whisk together 2 and 1/2 cups granulated sugar and 6 tablespoons all-purpose flour in a large bowl. Add 6 large eggs and whisk until completely combined. Finally, pour in 1 cup freshly squeezed lemon juice (from about 4-5 lemons) and whisk until everything is fully incorporated. The mixture will be pale yellow and fairly thin.
- Step 4: Bake To Perfection
- Pour the lemon filling onto the warm pre-baked crust. Return the pan to the oven and bake for 20-22 minutes, or until the center is just set and no longer jiggles when you gently shake the pan. Be careful not to overbake, as this can cause the filling to crack and become rubbery rather than creamy.
- Step 5: Cool And Finish
- Allow the lemon bars to cool at room temperature for about 1 hour, then refrigerate for at least 1-2 hours until completely chilled. Once chilled, lift the bars out using the parchment paper overhang, dust generously with powdered sugar, and cut into squares with a clean, sharp knife.
I learned the hard way not to rush the cooling process. The first time I made these, I was impatient and tried to cut them while still warm. The filling hadn't set properly, creating a delicious but very messy situation! Now I make them a day ahead whenever possible, which also allows the flavors to develop even more deeply.
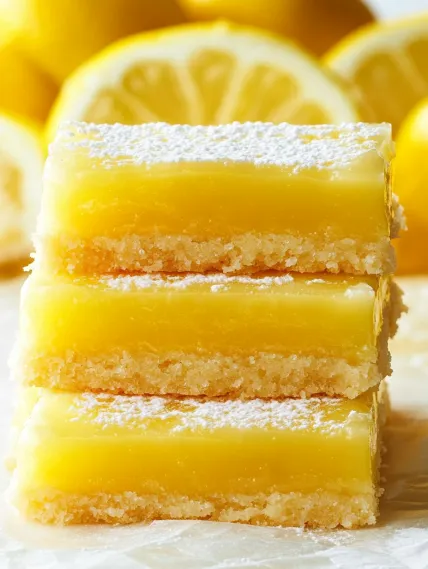
Perfect Citrus Selection Secrets
The key to exceptional lemon bars starts at the grocery store or farmers market. After years of making this recipe, I've become quite picky about my lemons. I look for fruits that feel heavy for their size, which indicates juiciness. The skin should be bright yellow without any green tinges (which indicates under-ripeness) and have a strong, fresh scent when you gently scratch the surface. Meyer lemons, when in season, create an extraordinary version of these bars with their slightly sweeter, more floral flavor profile. During winter when citrus is at its peak, I often make a double batch of these bars, freezing half for later enjoyment when good lemons are harder to find.
Creative Serving Suggestions
While these lemon bars are perfect on their own, I've discovered several ways to elevate them for special occasions. For summer gatherings, I serve them with a small dollop of fresh blueberry compote, which creates a beautiful color contrast and complementary flavor. At holiday events, I sometimes add a thin layer of shortbread crumbs mixed with finely chopped pistachios on top for a festive green and white touch against the yellow bars. For brunch settings, they pair beautifully with a dollop of lightly sweetened whipped cream and a fresh raspberry. My neighbor serves them alongside Earl Grey tea, claiming the bergamot in the tea enhances the citrus notes in the bars – and after trying the combination, I have to agree!
Troubleshooting Common Issues
Over the years, I've encountered and solved most issues that can arise with lemon bars. If your crust seems too crumbly, make sure you're pressing it firmly into the pan – I use the bottom of a measuring cup for even compression. For a filling that's too runny, the most common culprit is underbaking. Remember that the center should be just set with a slight jiggle, similar to a cheesecake. If your bars develop cracks on top, you've likely overbaked them or the oven temperature was too high. Baking at 325°F rather than higher temperatures allows for more even cooking without cracks. Lastly, if the powdered sugar seems to disappear into the bars after sitting, simply add a fresh dusting right before serving.
Perfect Make-Ahead Dessert
These lemon bars have saved me countless times when I need a dessert but don't have time on the day of an event. They actually improve with an overnight rest in the refrigerator, making them perfect for advance preparation. They keep beautifully in the refrigerator for up to 5 days, tightly covered. I often make them for Sunday gatherings on Friday night, letting them chill thoroughly before cutting and storing in a single layer in an airtight container. For longer storage, you can freeze the cut bars (without powdered sugar) for up to 3 months. Simply thaw overnight in the refrigerator, bring to room temperature for about 30 minutes, then dust with fresh powdered sugar before serving.

These lemon bars have become my signature dessert, the one friends specifically request when I ask what I can bring to gatherings. There's something about the combination of buttery shortbread and bright, tangy lemon that appeals to almost everyone. The fact that they're straightforward to make yet look and taste impressive is just a bonus. Whether you're an experienced baker or just starting out, these lemon bars are sure to become a favorite in your recipe collection.
Recipe FAQs
- → Low temp reason?
- Prevents over-baking the curd.
- → Lemon juice type?
- Fresh is tops—use what you have.
- → Chill time?
- 2 hours out, 1-2 in fridge.
- → Good to freeze?
- Sure, 3-4 months max.
- → Party fit?
- Perfect for sharing!