
 Pin
Pin
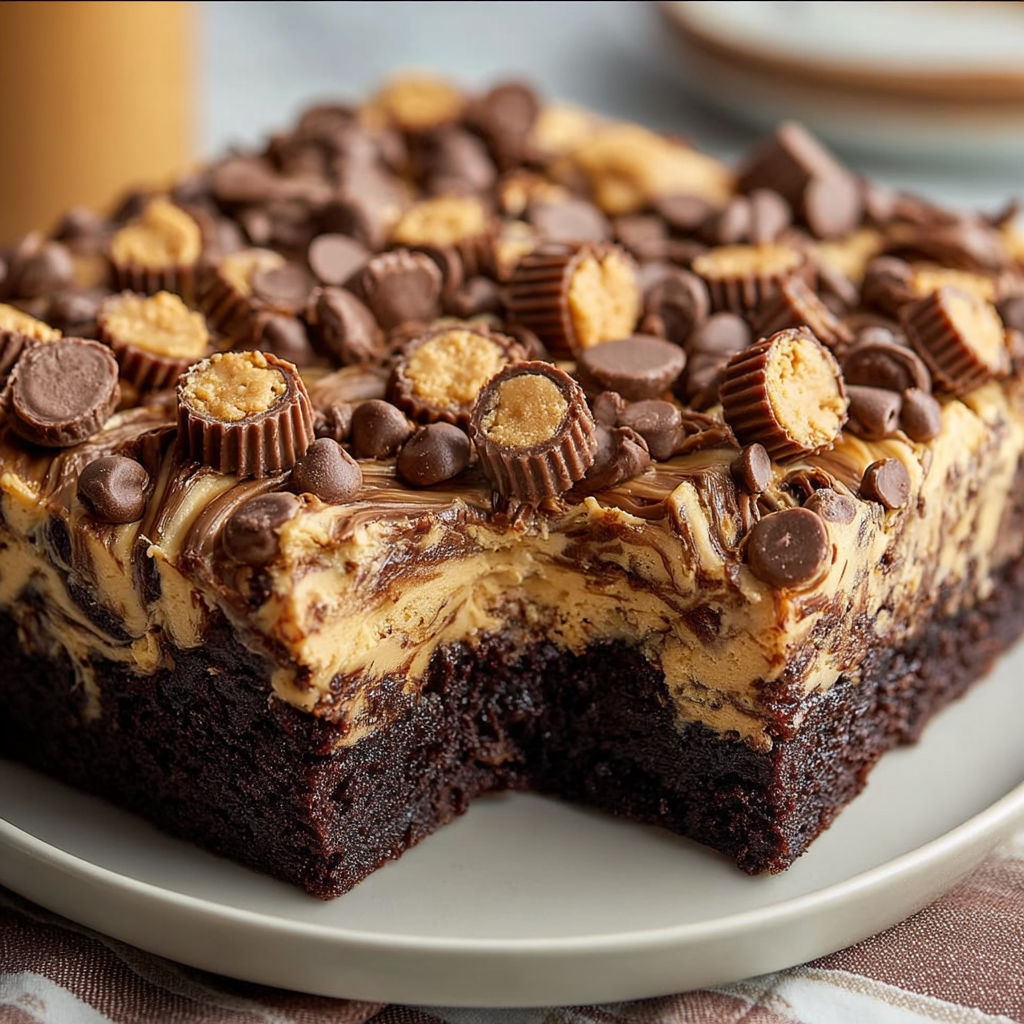
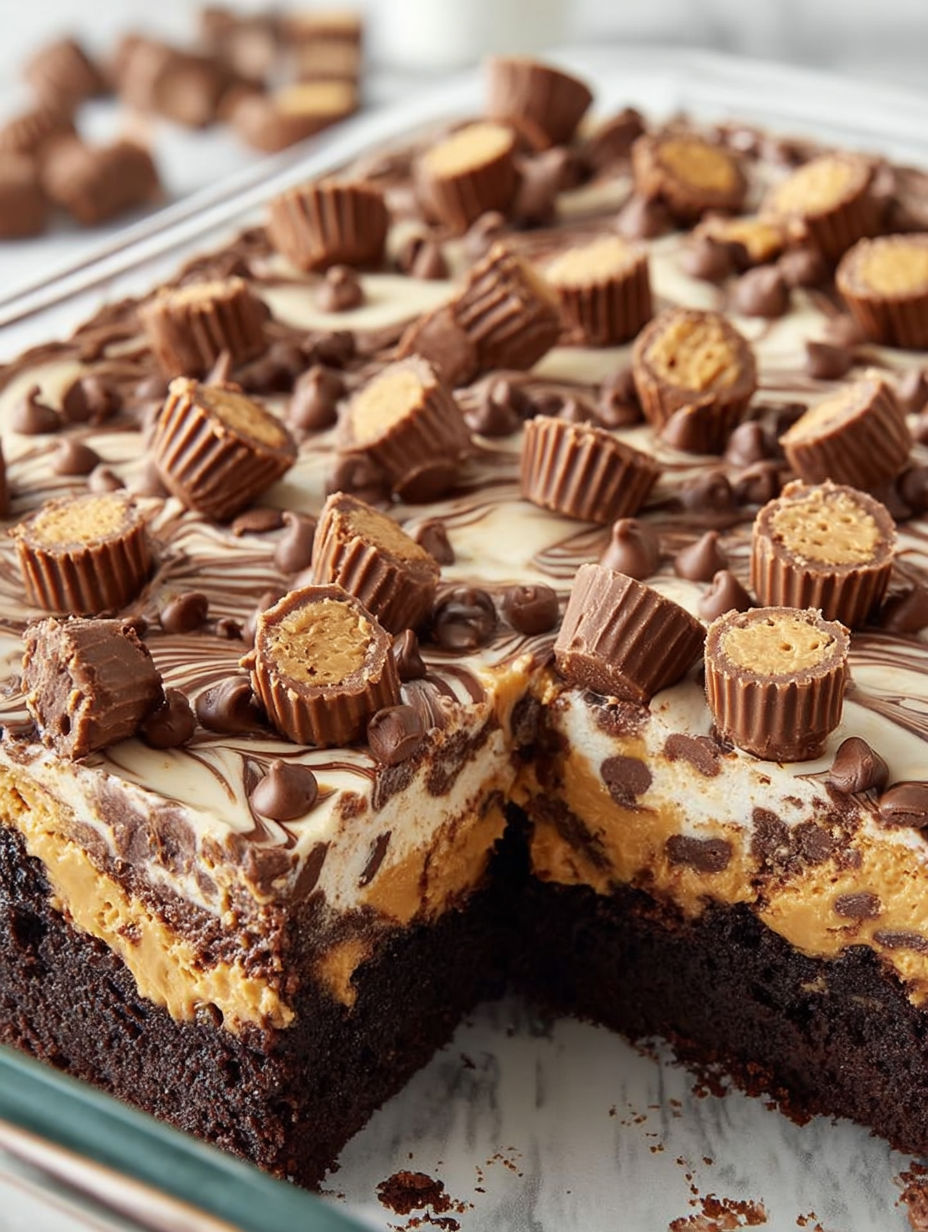
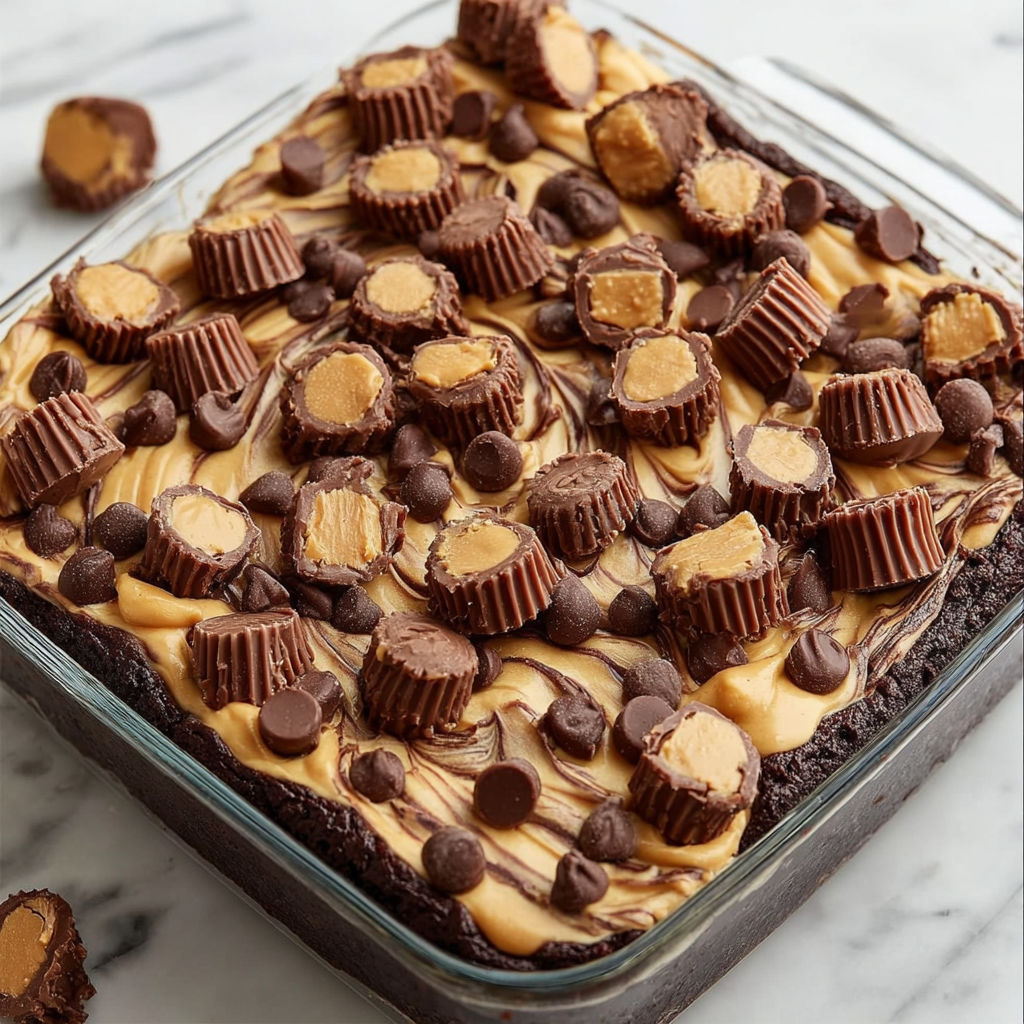
This decadent Reese's Peanut Butter Earthquake cake combines two irresistible flavors in one spectacular dessert. The deep chocolate base erupts with ribbons of peanut butter cream while the surface cracks dramatically during baking, creating the perfect landscape for chocolate chips and peanut butter cup pieces to settle into the warm, gooey texture.
I first made this for my nephew's birthday party when I needed something impressive without spending hours in the kitchen. The moment I pulled it from the oven, everyone gathered around to watch the surface continue to crack and settle as it cooled. Now it's requested at every family gathering.
Ingredients
- Chocolate cake mix provides the perfect foundation and saves preparation time
- Eggs bind the cake and create structure while adding richness
- Oil keeps the cake moist and tender even after cooling
- Water thins the batter to the right consistency for proper rising
- Butter adds richness to both cake and peanut butter layers
- Cream cheese creates a tangy counterpoint to the sweet elements
- Creamy peanut butter offers that distinctive nutty flavor that pairs perfectly with chocolate
- Vanilla extract enhances both chocolate and peanut butter notes
- Powdered sugar sweetens while maintaining the creamy texture
- Semi sweet chocolate chips add pockets of intense chocolate flavor throughout
- Mini peanut butter cups create delightful candy surprises in every bite
How To Make Reese's Peanut Butter Earthquake
- Prepare the baking dish
- Preheat your oven to 175°C and thoroughly grease a 23 x 33 cm glass baking dish. Using glass helps conduct heat evenly through this thick dessert, preventing undercooked centers. Make sure to get butter or cooking spray into all corners for easy serving later.
- Mix the chocolate base
- Combine the chocolate cake mix with eggs, oil, and water according to package directions in a large bowl. Whisk for about 2 minutes until completely smooth with no dry pockets. The batter should be pourable but not too thin. Add the melted butter and stir until fully incorporated for extra richness and moisture.
- Create the peanut butter cream
- In a separate bowl, beat the softened cream cheese until completely smooth, about 2 minutes. Room temperature cream cheese is crucial here to avoid lumps. Add the peanut butter and beat for another minute until well blended and fluffy. Mix in vanilla extract, then gradually add powdered sugar, beating between additions until you achieve a thick, spreadable consistency.
- Layer and swirl
- Pour the chocolate cake batter into your prepared dish, spreading evenly to the corners. Drop spoonfuls of the peanut butter cream mixture randomly across the surface of the batter. The key is distribution without mixing completely. Leave visible swirls and mounds on top as they will create the dramatic earthquake effect during baking.
- Add the toppings
- Scatter the chocolate chips evenly across the surface, then distribute the halved mini peanut butter cups. Press some candy pieces gently into the batter while leaving others sitting on top. This creates different textures throughout the finished cake with some pieces melting completely and others maintaining their shape.
- Bake to perfection
- Place in the preheated oven and bake for 45 to 55 minutes. Watch for the edges to set firm while the center should just barely wobble when the pan is gently shaken. The surface will develop dramatic cracks and fissures as it bakes, revealing the peanut butter layer beneath. The toothpick test works differently here look for moist crumbs rather than completely clean.
My grandmother always said the secret to a perfect peanut butter dessert is using the name brand peanut butter rather than natural varieties. The stabilizers in commercial peanut butter help maintain the proper texture during baking. When I first attempted this with natural peanut butter, the oils separated during baking and created an uneven texture.
Storage Solutions
This dessert keeps beautifully at room temperature for 2 days when covered with foil. For longer storage, refrigerate for up to 5 days in an airtight container. The texture becomes more fudgy when chilled, which some family members actually prefer to the fresh baked version. If you want to freeze portions, wrap individual slices in plastic wrap then foil and freeze for up to 3 months. Thaw in the refrigerator overnight before bringing to room temperature or gently warming.
Perfect Pairings
The richness of this cake demands a contrasting companion. A scoop of vanilla bean ice cream provides temperature contrast that highlights the warm, gooey texture. For something unexpected, try serving with a sprinkle of flaky sea salt on top to cut through the sweetness. Coffee enthusiasts will appreciate how a shot of espresso or strong black coffee amplifies the chocolate notes. For special occasions, drizzle warm caramel sauce over individual servings just before presenting.
Making It Your Own
This recipe welcomes creative adaptations. For a more intensely chocolate experience, add a tablespoon of espresso powder to the cake batter to deepen the flavor without adding coffee taste. Almond butter can substitute for peanut butter for guests with peanut allergies. White chocolate chips offer a striking visual contrast against the dark cake. During holiday seasons, themed candy pieces can replace the peanut butter cups think mint chocolates for Christmas or candy corn for Halloween. The basic technique remains the same while the flavor profile evolves.
Recipe FAQs
- → Can I use a homemade chocolate cake instead of a box mix?
Absolutely! You can substitute your favorite homemade chocolate cake recipe for the box mix. Just prepare the batter as you normally would and proceed with the remaining steps. The homemade version may have a slightly different texture, but will work beautifully with the peanut butter swirl.
- → How do I know when the Peanut Butter Earthquake is done baking?
The dessert is ready when the edges are set, the top surface has visible cracks (hence the 'earthquake' name), and the center is just firm with a slight jiggle. A toothpick inserted near the edge should come out mostly clean, but the center will remain slightly gooey, which is characteristic of this dessert.
- → Can I substitute crunchy peanut butter for creamy?
While creamy peanut butter creates the smoothest swirl, you can use crunchy peanut butter for added texture. The peanut pieces will add interesting crunch throughout the dessert. Just ensure you mix it thoroughly with the cream cheese to maintain a spreadable consistency.
- → How should I store leftovers?
Store any leftovers in an airtight container at room temperature for up to 2 days or refrigerate for up to 5 days. You can reheat individual slices in the microwave for 15-20 seconds if you prefer the gooey warm texture. The dessert also freezes well for up to 3 months if tightly wrapped.
- → Can I make this dessert without Reese's cups?
Yes, you can substitute the mini Reese's cups with other candy pieces like peanut butter chips, chocolate chunks, or even chopped peanut butter cookies. The key is maintaining the balance between the chocolate cake base and peanut butter elements.
- → Why did my peanut butter cream sink into the cake?
If your peanut butter cream sinks completely into the cake instead of creating a swirl effect, it might be too thin. Make sure your cream cheese is softened but not melted, and that you've added enough powdered sugar to achieve a thick, spreadable consistency that can sit on top of the cake batter.